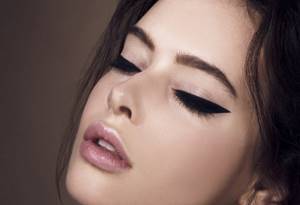
Among the various make-up techniques, beautiful arrows are in the lead. They correct the shape of the eyes, focus attention on their beauty, and give the look a charming freshness. Every girl has a special skill, how to draw arrows. Women who do not suit these alluring lines do not exist in nature. The main thing is to find the right option: restrained modesty in the spirit of Audrey Hepburn, alluring sexuality like Marilyn Monroe or charming languor in the style of Marlene Dietrich.
Types of arrows
Before you draw arrows on your eyes, you should figure out what they are, with what means they are made and to whom they go.
Basic arrows
Fits perfectly into everyday life. Visually they look like short arrows, thanks to which the eyelashes appear more expressive. Such arrows are made with a pencil. A thin line is drawn along the interlash line, which ends with a tail at the outer corner and is shaded.
Double arrows
An original way to decorate for the evening. Gives eyelashes visual thickness and a flirty playfulness to the image. They are performed similarly to basic arrows, but the outer corner is decorated with two tails instead of one. The effect of a sly cat's gaze is created.

Classic arrows
The prevalence of the beauty trend is explained by its universal application. Makeup is appropriate for any occasion. They are wider than the basic arrows and give the eyes accentuated expressiveness. In the process of execution, the upper eyelid stands out beautifully with a gradual thickening of the lines, which end with a thin tail.
Arrows from the middle of the century
Visually correct the shape of the eyes, giving it an almond shape. The line starts from the middle of the eyelid and leads to the outer corner.
Wide arrows
They add mystery to the eyes, visually the eyelashes appear thicker. Similar to classic arrows, but with a wider outline of the eyelids.
Arab arrows
A popular beauty trend with full contouring. More often than not, this method is complemented by a catchy lip design. Both eyelids are highlighted, the field between the eyelashes is drawn, and the corners are outlined.

Basic scheme for drawing arrows on the eyes
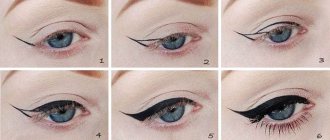
The basic scheme for drawing arrows on the eyes is quite simple.
It will help beginners create smooth lines and “not reinvent the wheel.” Let's look at it step by step:
- First we draw the bottom line: it starts from the outer corner of the eye and continues the line of eyelash growth. At first, it is better not to make the notch too long - 0.8 mm - 1 cm is enough;
- From the center of the upper eyelid (guide by the pupil), draw a line to the created “tail”;
- Draw a connecting line from the inner corner of the eye to the top of line 2;
- We paint over the resulting voids in the resulting outline. The arrow is ready!
You can vary the length of the tail, the thickness of the arrow and its ending depending on your preferences and goals.
Ideal arrows must be smooth, without jagged edges or gaps in the “body”!
At first, you will often have to redraw the arrows again, erasing the previous version, but over time you will get better at it and learn how to create the desired outline the first time!
Who and which arrows are suitable
To draw arrows for yourself, you need to decide which type suits your eye shape and face type.
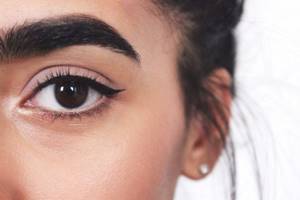
Almond shaped eyes
For girls with almond-shaped eyes, not far from the bridge of the nose, any eyeliner option is suitable. Such lucky women will be decorated with both thin and thick eyeliner.

Round shaped eyes
Girls with round eyes can use arrows to visually lengthen their shape. Your eyes will open, they will look bigger, your gaze will become more expressive.

Narrow eye shape
The main goal of owners of narrow eyes is to open them as wide as possible with the help of skillful make-up. Thin lines go at the very edge of eyelash growth, smoothly rising to the outer corners.

Wide-set eyes
Owners of wide-set eyes will appreciate arrows with a wide outline of the inner corners, gradually tapering towards the outer corners. If the eyes are located close to the bridge of the nose, they will be decorated with thin arrows at the outer corner, which gradually become thicker towards the outer corners.

Drawing perfect arrows: 5 life hacks
Arrows on the eyes will probably never go out of style. They were, are and will be. Without this makeup detail, a sensual look is simply unthinkable. However, not everyone is able to draw arrows evenly and correctly; you must admit, this process does not tolerate fuss. But we will tell you everything about the correct arrows and the technique of applying them.
WHAT TO DRAW ARROWS
First, decide on the texture that is closest to you and to your liking, because arrows can be drawn using different means:
It is possible to choose the right remedy for yourself only after trying everything. You also need to be patient with this process.
5 LIFE HACKS TO DRAW ARROWS EASILY
1. If your eyeliner turns out to be hard...
heat it with a lighter or hair dryer. The pencil will soften and it will be much easier to draw the line. There is no need to heat the pencil for a long time: 2-3 seconds are enough to soften it.
2. If you run out of eyeliner...
Use mascara. Just swipe your mascara very close to your lash line. You will get a soft line. If you have a brush in your makeup bag, use it when applying mascara instead of eyeliner. One caveat: you can only apply mascara to the outer eyelid.
3. If you can’t draw straight arrows...
Use a business card. Yes, yes, exactly a business card, or any other, the main thing is that it is solid. Place it on the corner of your eye and draw an arrow along the edge of the business card. The line will be perfectly straight in just a couple of seconds! The cat eye effect is guaranteed.
4. If you can’t draw straight arrows (option 2)
Take regular tape. A proven option for the “lazy”: cut a piece of tape, press it once against the back of your hand to loosen its grip, and stick it to the outer corner of your eye.
5. Draw arrows in the opposite direction
Start your art before your eyes not from the inner corner, but from the outer one. This way it will be easy for you to imagine what the arrow should be like - flying and thin or bright and bold. You will be able to stop, evaluate your efforts and continue with your makeup again.
CHOOSE ROOMS FOR YOUR EYE TYPE
Arrows for small eyes
In order to visually enlarge small eyes, use eyeliner of lighter shades rather than jet black. Brown or dark gray will work well. You only need to draw arrows on the upper eyelid.
An arrow is drawn from the middle of the eye and pointed evenly to the outer corner. If the line is not drawn beyond the outer corner of the eye, it will visually make the eye smaller.
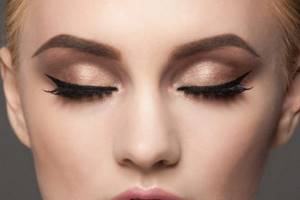
Arrows for large and rounded eyes
If you have large and round eyes, draw arrows on both the upper and lower eyelids. Black eyeliner will do just fine here. It is better to lengthen the corners of the eyes; to do this, the line should be made slightly higher than the corner, visually rounding it. After the arrows are drawn, they need to be shaded.
Eyeliners for close-set eyes
If your eyes are close-set, then the arrow does not need to start from the inner corner, draw it from the middle of the eye. The arrow needs to be made wider towards the outer corner of the eye. To visually widen your eyes, draw the same arrows on the lower eyelid.
Wide-set eyeliners
Draw a tight, even line across the entire upper eyelid. The inner corner of the eyelid needs to be drawn a little so that the eyes visually appear closer to each other.
Eyeliners for narrow eyes
Narrow eyes need to be visually opened slightly. To do this, draw a clear line along the entire length of the eyelid. The middle of the arrow needs to be made a little thicker, and the corners of the eyes should be painted with shadows from a light palette.
Ideally shaped eyeliners
Those with ideal eye shapes can safely experiment and draw different arrows every day. Don't be afraid to use colored eyeliners and shadows, they are now in trend. The main thing, as they say, is imagination.
How can you draw arrows?
Having decided on the type and configuration, it is advisable to choose what you can use to draw the arrows. There are several means suitable for this.
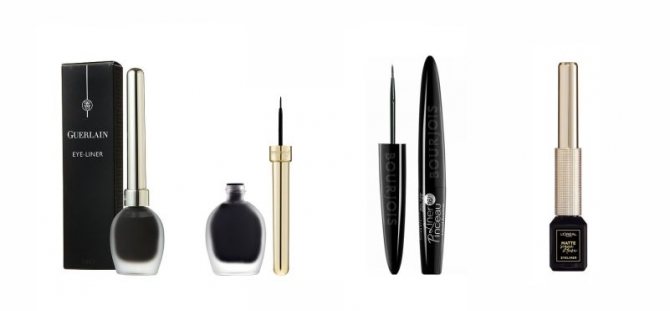
Eyeliner
Liquid eyeliner allows you to beautifully draw contour lines, creating flawless makeup. How to draw arrows with eyeliner, we will go through step by step below. The stable texture and ultra-thin applicator make it possible to draw arrows with eyeliner perfectly. The main advantages of eyeliner include brightness and durability. Thanks to silicone ingredients, the cosmetic product stretches along with the skin after drying.
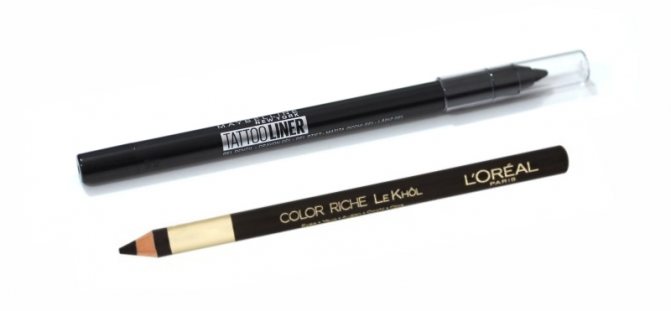
Drawing arrows with a pencil
When asked how to draw arrows for beginners, any experienced master will answer - with a pencil. By painting the area between the eyelashes, the pencil provides expressiveness to the look and gives the makeup a natural look. Even a novice amateur makeup artist can handle applying thin and even lines. Before you draw the arrows with a pencil, you should choose a color. An excellent alternative to the black classics are discreet shades of gray, blue, green and brown.
Shadows
For a smooth transition of halftones, shadow arrows are quickly and beautifully executed. A short-haired brush with an angled tip will easily cope with the task. Shadows of neutral shades will fit into daytime makeup. For evening make-up, it is better to stick to rich shimmering colors. Thanks to a rich palette from discreet nude tones to malachite and bronze, you can create beautiful looks for any occasion.
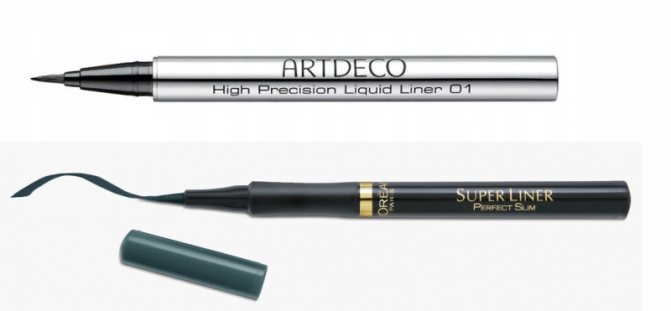
Drawing arrows with a liner
A special liner perfectly draws thick arrows. Thanks to the applicator, which resembles a thin tip of a felt-tip pen, the delicate skin of the eyelids is not damaged. Using a liner it is convenient to apply eyeliner for evening make-up.
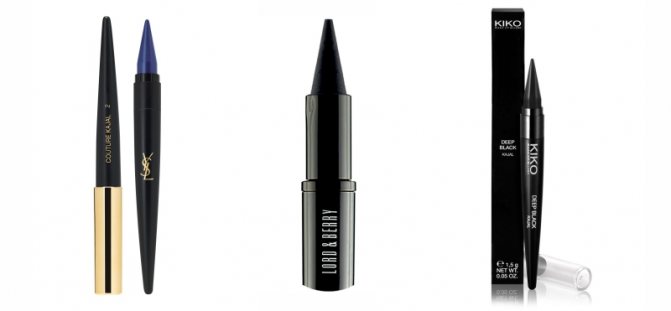
Kayal
Externally, kajal is compared to an ordinary makeup pencil. But beautyholics know the unlimited possibilities of a special product. It is distinguished by a very soft, fatty rod that glides smoothly over the surface of the eyelid, leaving the same thin lines on it. Most often, kajal is used for the eyelash contour on the mucosal side.
How to draw arrows on the eyes
It is very difficult to answer the question “what is the best way to draw arrows” - everything here is purely individual. The modern cosmetics industry offers numerous products, each of which has its own advantages and disadvantages, and you need to choose from them according to personal preferences only through a series of trial and errors! We will outline the main types of funds:
EYELINER
For those who are looking for a way to learn how to draw arrows on their eyes, eyeliner will be an excellent help - an ageless classic, with the help of which fashionistas have created their arrows for decades in a row! Today at least 2 types of eyeliners are known:
Liquid eyeliner is the easiest to work with. In addition, this is the most popular tool for drawing arrows. As a rule, it comes with a hard felt or soft bristle brush included. Long-lasting liquid eyeliner Precision Eyeliner
from
Kiko Milano
is equipped with a felt applicator that will help you quickly and easily learn how to draw arrows!
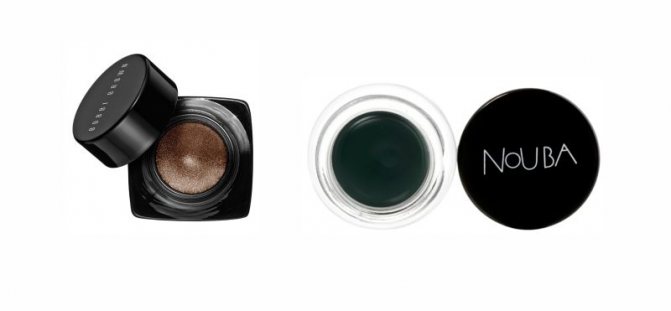
This type of eyeliner will help you create both thin arrows and complex graphic images. The gel texture can even be used as a base for eye makeup. It is worth noting that it will be difficult for beginners to immediately make friends with this material. To work with gel eyeliner, you will need to purchase a special angled brush, if it is not included in the kit, like the EyeStudio Lasting Drama Gel Liner
from
Maybelline
.
LINER / MARKER / FELT MASTER
PENCIL
Before drawing arrows with a pencil, you need to consider some features of using this tool:
- It is necessary to lightly powder the eyelid to avoid possible spreading of the lead or its imprints on the upper eyelid. For the same purposes, try to choose pencils that are wax-based, moisture-resistant, or water-resistant. Double Wear
eyeliner from
Estee Lauder
; - You need to draw arrows with a soft, but well-sharpened pencil. Otherwise, the outline will turn out blurry and ugly. If your pencil is too hard, you can slightly melt its lead by holding it over a lighter or candle;
- Don't forget to carefully work out the space between eyelashes to avoid gaps in the contour.
We draw arrows with a pencil along with a step-by-step video lesson from Elena Krygina:
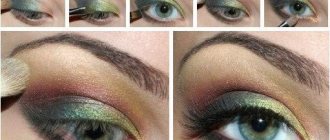
Before drawing arrows with shadows, it is important to create a base for the shadows using a primer and prepare a thin angled brush. Let's look at the application step by step:
- Guided by the diagram above, we line up the body of the arrow, starting from the inner corner of the eye and ending with the tip. To do this, you can use a small amount of pigment so that in case of an error you can easily make a correction;
- Carefully connect the resulting points, trying to create an accurate, even line;
- Paint over the spaces;
- It is better to paint eyelashes only after the arrow is ready.
To make the color more saturated and bright, you can apply shadows to the finished arrow, made with a pencil or eyeliner.
COMBINATIONS OF MEANS
To create perfect arrows, all means are good. You can easily combine several cosmetic products, for example:
- Gel eyeliner + shimmer shadows or metallic shadows. By working the arrow on top with shadows, you will add shine and brightness;
- Pencil + eyeliner. It is much easier to erase a pencil in case of a mistake. Therefore, a beginner can create an arrow first with a pencil, and then work on the finished version with eyeliner. In addition, the pencil ideally masks the gaps between the eyelashes, so it will be an excellent addition to the eyeliner in filling the space between the eyelashes;
- Pencil + matte shadows. An arrow drawn with a sharp pencil will look beautiful if you shade it a little with black shadows. Be careful to blend only the outer edge of the outline!
How to properly paint the interlash space. Why paint over the interlash space?
Women know that eyes are a weapon of temptation. Therefore, makeup often focuses on them. But, according to makeup artists, most representatives of the fair sex make the same mistake - they leave the space between the eyelashes unpainted. And this spoils even the most beautiful smokey eye or eyeliner. It is a properly designed interlash that is the key to a languid look, visually thick eyelashes and a beautiful eye shape.
Editorial “So Simple!” will share with you the advice of a makeup artist on how to properly paint over the interlashes so as not to damage your eyes and not suffer from pencil imprinted on the lower eyelid.
Interciliary space
First, you need to find out what the interciliary space is, because many people confuse it with the upper mucous membrane of the eyelid. Another mistake is to paint a thin line just above the eyelashes. This is also a mistake, because you are not creating the desired effect, and it’s hard to call it an arrow. More like remnants of yesterday's makeup. So, the intercilium is the eyelash growth line. Not above the eyelashes and not mucous.
You need to paint over the voids between the eyelashes with a pencil or eyeliner. The thinner the eyelashes, the more necessary this step is to create visual thickness. Try to paint the space between the eyelashes, and you will be surprised how expressive your eyes can be with a minimum of makeup.
Now you know which place to paint. After all, pencil eyeliner of the upper mucosa immediately imprints on the lower eyelid and disappears after 20 minutes. It is imperative to choose soft gel pencils or long-lasting eyeliners. The shade depends on the color type, eyelash color and overall makeup look. Most women of Slavic appearance are suitable for chocolate colors, and for Eastern women - black.
To make your eye color brighter, you can use pencils in emerald, purple and blue shades.
Now let's start the process. It all depends on the structure of the eyelid; some people need to lift the moving eyelid quite a bit with their finger, while for others it is enough to place a mirror below in order to clearly see the intercilium. You need to paint over the voids with short strokes. There is no need to shade anything, and if you go beyond the eyelashes, then carefully clean up the excess pencil. Now you can paint your eyelashes with mascara, apply shadows, draw arrows. In any case, your look will be seductive and your makeup will be complete.
Try to paint the space between eyelashes, and you will immediately be transformed. For an everyday, well-rested look, just take this step, add blush to your cheeks and eyelids, and tint your brows. All! You'll look great. We just advise you not to use waterproof eyeliners for the space between eyelashes, because it will be difficult to use them later.
We also previously talked about...
Tell us in the comments if you paint the space between your eyelashes, and also share the article with your friends on social networks!
Preview photo
Author of the article
Oksana Dudnik
She loves painting and is ready to admire paintings all the time! Oksana knows a lot about perfumes, is well versed in fashion trends and will give a head start to many famous beauty bloggers. Her love for sports is reinforced by her swimming qualifications! The charming girl’s favorite book is “The Prince” by Niccolo Machiavelli.
Pencil for the interlash line. Step-by-step instructions for drawing “Dior’s” arrows.
1. Use a simple black eyeliner to create a classic eyelash line.
And don’t be lazy - the space between the eyelashes must be completely painted over, otherwise future “Dior” arrows will look flat and not expressive. 2. Gradually we begin to expand the arrow - starting from the inner border of the iris and moving towards the outer corner of the eye. And we don’t just pull out the “tail” of the arrow yet, we are only working on making the interlash arrow a little wider and “fat.” 3. The next step is to make the arrow even wider, but only in a small area from the outer border of the iris, moving towards the outer corner of the eye. It is very important to draw the line of the arrow as evenly as possible, almost parallel to the ground, and in no case lower it down, following the natural shape of the eye. Otherwise, no “cat” cut will work. Finally, we extend the “tail” of the arrow by placing the pencil lead on the skin and pulling slightly. In addition to a pencil, this can be done with an eyeliner brush. 4. Don't forget to slightly lower the bottom border of the arrow - in fact, it should be a logical continuation of the line of your lower eyelid. 5. Now we paint over the pencil arrow with liquid eyeliner. We hold our hand confidently and make sure that the hand is practically lying on the skin. 6. There is another simple way to quickly draw an even “Dior” arrow, and this time without using a pencil. To do this, take any plastic card as a stencil and apply it to the outer corner of the eye so that its side is an even continuation of the lower eyelid. Pressing the card tightly to the skin, we draw the “tail” of the future arrow with eyeliner. Next, carefully draw the arrow gradually and smoothly connecting the outer and inner corners of the eye with a single line. 7. Don’t forget to put a little shadow in the crease of the upper eyelid to give the eye additional volume and relief. We also make sure to darken the lower eyelid, which will prevent the eye from visually narrowing. Be sure to follow the rule: the longer the “Dior” arrow, the longer the eyelashes should be and the longer the eyebrows should be. 8. And if eyebrows can be extended by carefully drawing them with a pencil, then you will have to increase the volume and length of eyelashes with the help of false analogues. Moreover, we don’t even need a whole eyelash arch; half of it is enough for one eye. So, cut one eyelash arch in half, carefully grease the edge with glue and glue it as closely as possible to the roots of your own eyelashes. Using a cotton swab, we press the false eyelashes closer to the roots, straighten them, etc. In addition, you can paint the base of the false eyelashes with the same liquid eyeliner that was used for the wings. 9. Silver cream shadows and cyclamen lip color are ideally combined with the graphic “Dior” arrows. Apply cream shadows to the entire upper eyelid (up to the eyebrows), a little to the inner corner of the eyes and to the tick above the upper lip. We outline the contour of the lips with a pencil and gently shade it. Then apply liptar to the lips. And voila, the makeup is ready - expressive bright eyes, luscious lips, etc. boundless feminine charm! Beauty tips from Lena Krygina Until you get good at creating the perfect graphic arrow, it is best to draw it first completely with a pencil and only then (on top of the pencil) paint over it with liquid eyeliner. The fact is that it is extremely difficult to correct “blunders” made with eyeliner, but retouching a pencil line is much easier. When choosing liquid eyeliner, give preference to a product that is waterproof, or at least moisture-resistant. An arrow made with such eyeliner will last longer and will not “creep” from rain, heat or tears. When painting the arrow with liquid eyeliner, tilt your head slightly down and lower your gaze too, so that the eyelid is half-closed. This way the skin on the eyelid will not stretch and the eyeliner will be as smooth as possible.
The best pencil for the interlash line. What should a pencil be like for an interlash liner?
You can visually make your eyes more expressive and your eyelashes thicker with just one pencil! Let's figure out what and how

©fotoimedia/imaxtree
Not every eyeliner can fill the space between eyelashes without negative consequences. Some turn out to be too hard for this sensitive area, others are too soft and not very durable, and still others are even imprinted on the skin under the eyes after half an hour. The beauty blogger told us what a pencil should be like for an interlash liner.
It is better to choose a soft but durable pencil for this purpose. Test it on your hand: it should glide over the skin, blend easily, but at the same time harden quickly and last for at least several hours. When you have chosen a pencil, follow the instructions:
1
Sharpen the pencil well - otherwise it will not fill the space between the eyelashes, but will draw an arrow.
2
Apply the base over the entire eyelid and gently distribute it at the roots of the eyelashes.
3
Lift the upper eyelid slightly with your finger so that the base of the eyelashes is visible.
4
If this procedure is not yet familiar to the eyes, in order to avoid unpleasant sensations, you can fill the inter-lash space pointwise, as if adding additional eyelashes where they are missing. Very soon, skills will appear that will allow you to draw a quick, single line. By the way, for the dot method you can use not only a pencil, but also a long-lasting eyeliner!
5
Try not to actively blink before the pencil dries, otherwise you may get a “panda” effect. To make sure the pencil doesn't mark, place your index finger firmly on your lower eyelid and close your eyes. If your finger remains clean, you can safely continue makeup. If you see prints on it, wait some more time until it dries completely.
6
Powder your eyelashes with your eyes closed. This way the powder will not get into your eyes, but will additionally secure the pencil.
How to draw graphic arrows
These arrows are more expressive and are more suitable for the evening. Depending on the occasion, the line can be lengthened and thickened, but let's start with the basics.
You will need
Paper tape or plastic card.
Step 1: Prepare the eyelid
For such a complex arrow, makeup artists recommend preparing the eyelid and applying a little eyeshadow base. Then it will be easier to work with the eyeliner and it will not float by the middle of the day.
You can lightly decorate your eyes with shadows. Darken the outer corner and lighten the inner one.
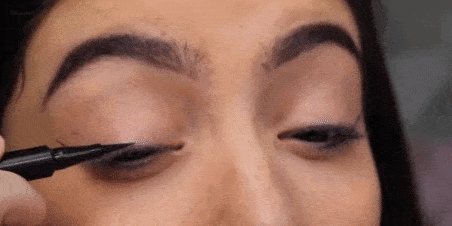
Step 2. Paint the space between the eyelashes
As in the first method, thinly draw the eyelash line.
Step 3. Draw the tail of the arrow
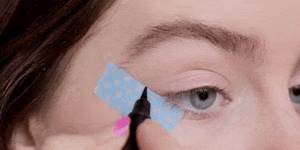
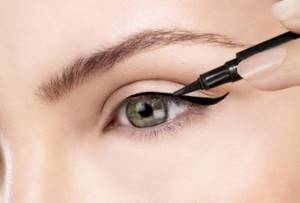
The tail in this technique is the main part. Only a professional can draw an ideal line, but for beginners and amateurs it is better to use a stencil.
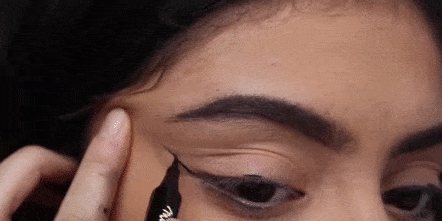
To do this, take paper tape. Apply a small piece from the outer corner of your eye to your temple. And now, using eyeliner, draw a line of the desired length. The tape will serve as your ruler. You can use a plastic card in the same way.
The base of the ponytail is ready. Now on both eyes, determine the middle of the eyelid and put small marks there using eyeliner.
Connect the tip to the middle of the eyelid. The line should be exactly horizontal and the movement should be easy.
For ease of application, pull the skin slightly towards your temple.
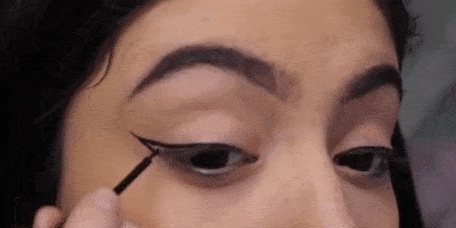
Now use eyeliner to fill in the space between the two lines.
Step 4. Draw the arrow
All that remains is to use eyeliner to lower the line from the middle of the eyelid to the inner corner of the eye. Move clearly along the lash line. Add some dark eyeshadow to the crease of your eyelid. For an evening or a holiday, false eyelashes or mascara with a volume effect are suitable for such arrows.