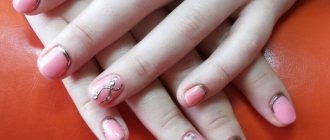
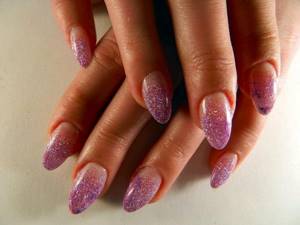
Extended nails are now quite common among girls, because before applying a decorative coating in the form of gel polish, many prefer to change the length and shape of the natural nail plate so that the resulting manicure looks impressive and unusual.
However, many women now do the nail extension technique at home on their own, despite the fact that it includes many steps, non-compliance with which affects the quality of the work. Before you extend your nails at home, pay attention to the specifics of the technique to ensure you create a beautiful manicure that will last up to a month.
How to make a bump on your nails with gel
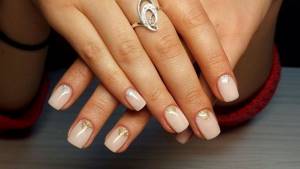
Creating the perfect manicure is a complex process with many subtleties. Many girls like the way plain shades of gel polish with even highlights look on their nails, but not everyone can achieve perfection in this technique.
The main problem lies in the unevenness of the nail - the presence of tubercles and dents leads to the fact that the gel polish is distributed unevenly. In this case, it is necessary to straighten the nail before application.
What is it for
The nail plate of different people has its own characteristics - some are lucky to have naturally smooth and strong nails, while others know first-hand what tubercles, peeling and other problems are. In addition, even on healthy and smooth nails, unevenness may appear over time, since frequent treatment with aggressive agents, physical impact and drying in a device negatively affect its condition.
Nails without waves and dents
Leveling your nails with gel polish allows you to remove waves, bumps and dents, which otherwise would become more noticeable after applying a colored coating. But this is not the only advantage of the procedure.
Alignment has a number of advantages:
- The nail plate becomes stronger;
- The quality of the manicure improves - it will delight its owner not for several days, but for more than two weeks;
- The procedure is quick and takes about 10 minutes;
- Protection of the nail from mechanical influences;
- Aesthetic beauty – gel polish applies to smooth nails without streaking, forming an ideal surface.
Aesthetic beauty of nails
In other words, leveling is a procedure that will help create a beautiful manicure for a long time and strengthen the nail plate, making it less sensitive to various external influences.
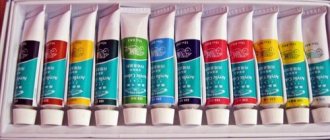
The creation of nail architecture is carried out using specialized means. On the shelves of cosmetic stores you can find three types of suitable products:
- Biogel;
- Base for gel polish;
- Gel for extensions.
The use of each substance has its own characteristics, but they are all united by one important rule: the product must be thick, otherwise it will not fill the recesses on the nails and it will be impossible to construct the desired shape.
Care for extended nails
In order for a beautiful manicure to last 3-4 weeks in its original form, it requires appropriate care:
- Do not wet your hands during the first 24 hours after the procedure. You can wash and shower, but visiting the pool and sauna is not advisable. Liquid and temperature changes make the gel brittle.
- Protect your hands from mechanical damage and excess moisture. Housework should be done with rubber gloves.
- Take care of the skin of your hands and cuticles by rubbing in a nourishing cream daily.
- Overgrown nails can be “revitalized” by covering them with regular colored varnish. This will give them shine.
- Corrections should only be made with a nail file; cutting the gel plates with scissors is strictly forbidden, as this will permanently damage their shape.
- To perform a hygienic manicure on artificial nails, you should not steam. Softening the cuticle can be done using oil.
- If the extensions were carried out using acrylic, then under no circumstances should you use nail polish remover. This substance contains acetone, which causes yellowing and brittleness of the plate.
No matter how beautiful your extended nails look, you still need to take a break from this procedure from time to time. After extensions, they look lifeless and dry. After all, in the process the protective layer of the plate is removed, and the access to oxygen is blocked for a long time. The health of natural nails must be monitored, otherwise the patients will have to take a very long time to restore.
Using a shellac base
The most popular way to treat the nail plate when performing a combined manicure is to level it with a gel polish base. Experienced professionals have proven their success with such products as Kodi, NeoNail, Komilfo, Adore Professional, etc. These rubber-based products have a thick structure and effectively form a smooth surface, removing all unevenness.
Leveling the nail plate with a gel polish base is carried out in several stages:
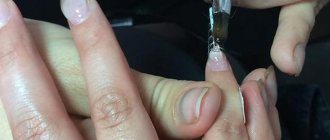
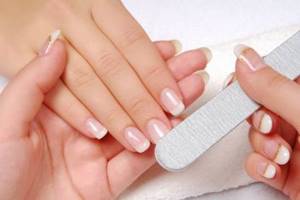
Stage 1: Preparation
The nails are given the correct neat shape, then they are degreased with any suitable means.
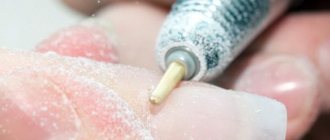
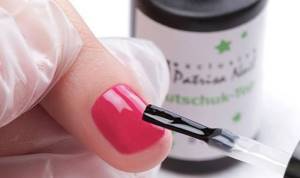
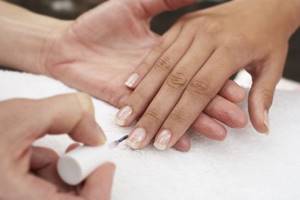
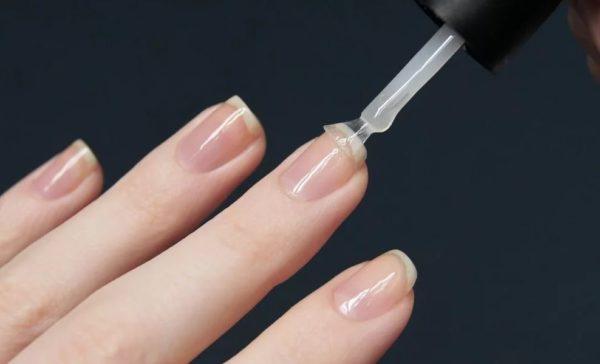
Stage 2: Applying base
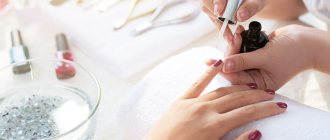
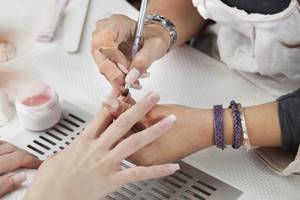
Having picked up a drop of the base composition with a brush, you need to apply it as close to the cuticle as possible and distribute it evenly - first in the center, and then on the right and left as shown in the photo.
Stage 3: Sealing
Having turned the nail, seal the end with a brush, and then allow the base to dry thoroughly.
When shaping the architecture of the nail plate, you don’t need to worry about the product laying down in a thin layer – the brush included with the base is very soft, so uniform application is guaranteed.
After application and drying, gel polish is applied.
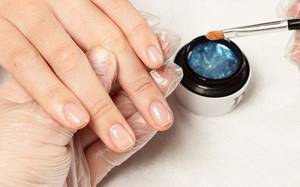
Using biogel
Biogel is a special type of manicure product designed for thin nails. The advantages of using it are that leveling the nail plate with gel polish is accompanied by the application of a protective layer that prevents peeling and other problems.
The disadvantages of biogel include the difficulty of application - the brush should hardly touch the working surface. The coating of the plate occurs due to the tension of the thick composition. When choosing a product in a store, you need to pay attention to the brush - you should choose one that is very soft, round and with long bristles. The second disadvantage of using biogel lies in the need to purchase an additional manicure product, because it does not replace the base, but is applied on top of it.
Leveling with gel under gel polish is carried out as follows:
- First you need to prepare the nail - shape it and degrease it;
- The second stage is to apply the base over the entire surface and seal the end;
- After the coating has dried, a layer of biogel is applied.
- Dry it like a simple gel polish - 30 seconds in an LED lamp and 2 minutes in a simple ultraviolet lamp.
- Before applying the color coating, be sure to remove the sticky layer.
Since applying biogel requires some experience, it is not recommended for beginners, but if you want to learn, you need to prepare for the fact that this may take a lot of time. The correct application technique is presented in the video.
Using extension gel
This option is suitable for those whose nails become deformed as they grow, because such a gel reliably retains its shape. But its use is accompanied by one big drawback - such a gel does not dissolve, but is only cut off, which can negatively affect the structure of the nail.
The gel strengthening technique for extensions is performed as follows:
- First, you need to disinfect your hands and treat the nail plate, including degreasing;
- Then the base is applied and dried;
- The base layer is immediately covered with gel;
- The finished manicure is dried in a lamp and trimmed with a nail file.
In pursuit of the perfect manicure, do not forget that nails need special care. To straighten the nail plate, it is not enough to resort to the above materials; you need to provide the body with the necessary amount of vitamins, use nail strengtheners, make special masks, etc.
What it is?
Everyone's nails have their own individual texture. Those girls whose hair is naturally smooth and without flaws do not experience problems. But some people have nails with an uneven surface, extremely brittle and sensitive. And during the manicure procedure, nails are subjected to additional tests in the form of filings, grinding, and hardware, which creates additional stress on the nails. You need to straighten your nails so that their correct architecture is formed. In addition, this will prevent such troubles as varnish running, uneven coating, and coloring of the cuticle area.
Alignment takes place in the following two stages:
- the first layer is a primer, designed to mask nail defects;
- the second is the finishing one, thanks to the even spreading of the base, the nail takes on a natural, even shape, fading away in the area of cuticle growth; the result is a perfectly smooth nail surface ready for decoration.
Leveling the surface of the nail is an important stage of manicure. It has advantages such as:
- the ability to further strengthen nails and extend the life of the decorative coating;
- creating a geometrically correct surface of the nail, which will give the correct direction of its growth;
- simplicity of the procedure - it takes no more than 15 minutes, and no additional funds are required to carry it out; it is important to carry out the leveling procedure if the previous manicure is removed with a device, since it is necessary to leave the base layer intact in order to further protect the nail from external influences;
- aesthetics - a smooth nail plate will make the glossy highlights of the nails ideal after applying the decorative coating.
How to choose?
The easiest way to straighten the nail plate is to use gel polish. This method can be done even by a beginner. First of all, you should pay attention to the bottle with the base - it should have the label “with rubber” written on it. Rubber makes the composition more viscous, thick and flexible. It is thanks to this rubber consistency that the depressions are filled and the tubercles on the nail are leveled, and an arch of the correct shape is formed. The advantages of this method are as follows:
- base with a rubber base is usually self-leveling;
- eliminates natural nail defects;
- application speed.
There is an option for straightening the nail using biogel. Its advantage is that it not only smoothes the nail, but also heals it thanks to the vitamin and mineral complexes in its composition, proteins and resins. Biogel has the following advantages:
- natural composition;
- healing effect;
- acceleration of nail growth;
- ease of removal of the coating.
However, it is worth noting that working with biogel is difficult. The brush should not touch the working surface of the nail - alignment should occur from the tension of the composition. When choosing biogel in a store, carefully consider the brush - it should be soft and have long bristles.
The third option is leveling the nail plate with gel. Here it is worth remembering that the gel cannot be removed with a solvent - it can only be cut off with a manicure machine or an abrasive file. The composition of the gel is relatively non-toxic and safe. It covers and strengthens the nail well, providing an even decorative coating and its resistance to external factors.
Finally, you can use acrylic powder for leveling. Everyone knows that acrylic is used for nail extensions. However, this material is very versatile. It is more difficult to work with than the above-mentioned levelers, but in the end you will definitely be satisfied with the result. Acrylic powder perfectly strengthens nails, serves as a strong base for broken nail corners, and allows the coating to be durable for a long time. The choice of method and material for leveling the nail plate is yours, but remember that you should not be too complex because of small natural defects of the nails.
Nail extension materials and methods
An artificial nail is a plastic plate of a certain shape. To obtain this plate, two materials are used: gel and acrylic. Both materials are quite durable. The difference between them is the method of hardening.
What you need for nail extensions
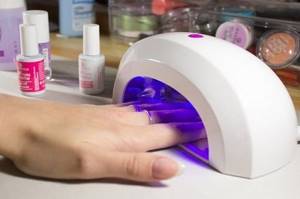
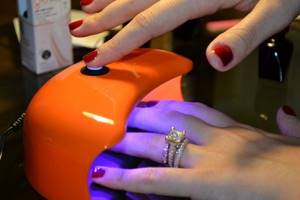
First you need to decide on the nail design, as well as the technique. Regardless of the choice of material (acrylic or gel), a lamp for nail extension is required. The UV device crystallizes the gel: without a lamp, the gel simply will not harden. In the case of acrylic extensions, the lamp is used at the final stage of drying.
For a simple design for home use, you can purchase a lamp of no more than 9 W. It will do its job perfectly, provided that the material is transparent.
If you plan to carry out any complex nail design using a large number of colored varnishes, then you need a powerful UV lamp - up to 36 W.
So, when the main element of the procedure - the lamp - has been purchased, you need to buy the remaining tools and materials for home extensions.
What you need for nail extensions:
- gel or acrylic;
- forms or types;
- primer – a means that helps ensure reliable adhesion of the artificial material and the natural plate;
- glue;
- dehydrator - nail plate degreaser;
- the basis;
- monomer and acrylic powder in the case of acrylic extensions;
- construction gel in case of gel extensions;
- top – finishing product.
- cuticle spatula;
- brushes for applying forming material;
- file with a hardness of 80 grit for acrylic or 100 grit for gel;
- tweezers.
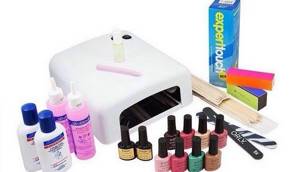
In order not to buy all the materials and tools separately, you can purchase a ready-made kit for nail extensions. There is everything you need to carry out a full procedure.
In addition, it is necessary to purchase hand and tool disinfectant. For example: bacillol, cutasept. This is necessary to prevent infection from entering the skin. And the natural plate also contains many bacteria. If they are not eliminated before coating, then natural nails will deteriorate under the gel cover, where air does not enter.
Acrylic nail extensions
Acrylic crystallizes in a slightly different way: after mixing the monomer and powder. Acrylic hardens faster. Its main advantage: clear lines and graceful shapes. This material is plastic, so it easily lends itself to any shape.
Advantages of acrylic:
- good strength;
- smoothes out all irregularities and defects;
- prevents nails from growing into the skin;
- easy to correct after mechanical damage;
- can be easily removed not only with a special solution, but also with a liquid containing acetone.
Disadvantages of acrylic coating:
- sharp unpleasant odor containing harmful impurities;
- the occurrence of allergic reactions;
- wear only on your hands, as acrylic pedicures can injure the skin with hard, sharp edges.
Another disadvantage of acrylic is that it has a cloudy structure. Therefore, acrylic nail extensions are not suitable for all types of nail designs.
This material is quite toxic, so craftsmen do not recommend using this material at home. Another thing is the salon, where there is a powerful exhaust hood to remove all harmful odors.
Gel nail extensions
The gel contains extracts from coniferous tree resins. This eliminates possible allergic reactions, as is the case with acrylic. In addition, gel nail extensions are an excellent prevention of fungal infections. After all, the crystallization process occurs through UV radiation, which kills all possible microbes. It is this factor that is decisive in its application by masters.
Benefits of the gel:
- elastic coating, but inferior in strength to acrylic;
- allows air to pass through to the natural nail;
- natural look;
- long-term result.
Disadvantages of gel coating:
- once chipped it cannot be repaired;
- more expensive procedure;
- Removing the gel is accompanied by painful sensations.
The gel in a liquid state is applied to a special form, and then hands are placed under a UV lamp so that the material hardens. Which gel for nail extensions is better? It is better to use a three-phase gel, which provides three functions:
- strength;
- clutch;
- modeling.
The gel must have the following basic characteristics:
- Viscosity. The product should not be too liquid so as not to spread, and not too thick so that it can be easily modeled.
- Freezing. The product should crystallize quickly enough under the influence of a lamp without the use of additional means.
- Lack of odor is an important characteristic. Toxic fumes may cause an allergic reaction.
- Certificate of quality. To get a quality manicure at home, you need to choose products from well-known, trusted brands.
Why is it necessary?
We all have different nail structures. Lucky are those who have smooth and even nails. But some have a hypersensitive plate (there are also irregularities, detachments, and tubercles). In addition, during manicure the nail plate is subjected to processing: polishing; removing old gel polish with a device, which has a bad effect on the condition of the nails.
plum
To give the correct shape, a procedure is performed to level and strengthen the nail plate, thereby getting rid of various tubercles and depressions, waves and excess gel polish. The first layer of varnish is usually a primer; it hides all the main natural irregularities. The second layer is evenly distributed over the nail, gradually disappearing in the cuticle area, forming an ideal surface.
Pros:
- Leveling will strengthen the nails, and the coating will last for several weeks.
- The ability to give the correct shape to the nail. With regular alignment, the nail will grow in the desired direction.
- Affordable and simple! There is no need to purchase additional products to strengthen the nail plate; the procedure will take about 10 minutes.
- Leveling, when removing gel polish with hardware (hardware manicure or hardware pedicure), we do it so that a base layer remains. A thin layer of base coat will cover and protect the nail.
- The perfectly smooth surface gives beautiful reflections from different light sources.
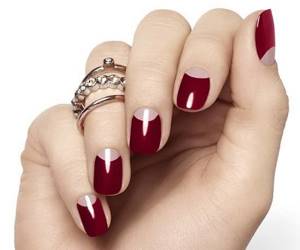
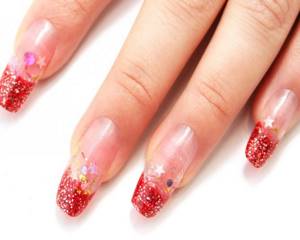
Red Patrice nail design 305 on nails
Why do irregularities appear?
Wavy, ridged and nails are a problem! With such nails, any manicure will not look perfect. Often we do not think about the reason for the deplorable condition of our nails, but this issue deserves special attention.
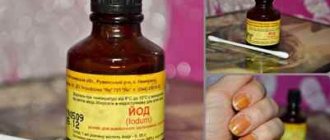
One of the indicators of our health is our nails. For example, if your nails become covered with a groove near the cuticle, then you should take a course of vitamins and microelements. Ribbed nails can appear as a result of minor injuries, and can also be the cause of fungus, psoriasis and other problems in the body.
How to level?
The procedure for straightening the nail plate is very simple. It is necessary to take into account the specifics of the material.
Suitable for strengthening nails:
- base for applying gel polish;
- biogel;
- various extension gels.
Any product that forms the basis of a manicure should be thick. Liquid bases or gels are not suitable. They will simply flow off the surface of the nail.
Base alignment
The base should be thick, preferably using rubber. The thicker it is, the easier it is to strengthen it. More liquid products will quickly flow down to the side rollers.
The following bases are suitable:
- Kodi;
- Komilfo;
- Lovely Base;
- NeoNail;
- Adore Professional.
Base alignment
Strengthening technique:
- Prepare your nails.
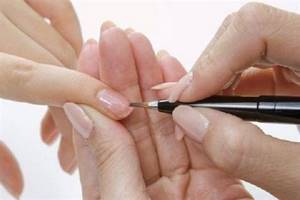
- Apply a drop of base of the desired size with a brush in a thin layer.
- Place a drop in the apex area (almost near the cuticle). Pull it towards the cuticle and stretch it in 3 movements. The first is in the center, the second is on the right edge, the third is on the left edge. Don't be afraid to ruin everything. The base brush is very soft, it will not push through the drop, so go ahead with confidence.
- Use the corner of the brush to form the shape of the nail.
- Turn the nail (hand) over, seal the end and dry thoroughly.
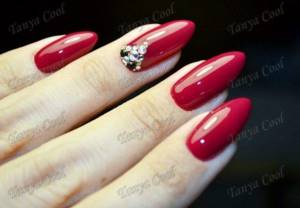
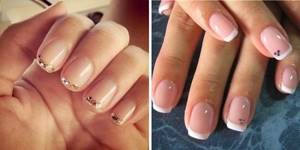
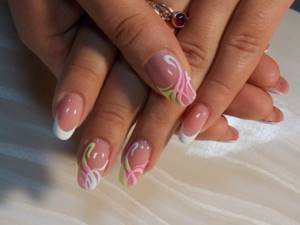
Rhinestone design on nails
Leveling with biogel
The choice of most girls will be biogel. It has a thick consistency and is highly soluble. Manufacturers produce special biogels for thin nails. This will be a real salvation for problematic nails with detachments. Choose a soft brush with a round shape and long bristles. It should practically not touch the nail at all. The biogel should stretch due to surface tension.
The following biogels are suitable:
- Bio Stretch Gel (BSG);
- Atica TM;
- Creator;
- Yoko;
- El Corazon
Leveling with biogel
Before leveling with biogel, be sure to apply a base layer.
Leveling the nail plate with biogel
The choice of most girls is biogel. It has a thick consistency and dissolves well. Many manufacturers produce special biogels for thin nails. This is a real salvation for problematic nails that suffer from detachments. You need to choose a soft brush with a rounded shape and long bristles. It should practically not touch the nail. The product should stretch only due to surface tension.
Which biogels are suitable:
- Bio Stretch Gel (BSG);
- Atica TM;
- Creator;
- Yoko;
- El Corazon.
Remember that to level with biogel, you also need to apply a base.
Strengthening technique:
- Apply a thin primer layer of basic biogel using a brush to prepared, fat-free and slightly buffed nails.
- Rub the base well, especially in the area of the side rollers, under the cuticle and seal the end.
- Dry the layer. In terms of time, the biogel dries like a regular gel polish: 30 seconds in an LED lamp and 2 minutes in a regular UV lamp.
- The second leveling layer must be applied to a well-dried primer layer. Saturate the brush with material gel and scoop a drop of a suitable size onto the tip.
- Place in the center of the nail about a millimeter from the cuticle.
- Push the brush forward a little towards the cuticle.
- When the drop lies along the cuticle, pull the material down to the tip. Without pressing, distribute the biogel over the nail, not reaching the end of the free edge, so as not to touch the dispersion layer and not violate its integrity. This will distribute the material more evenly.
- It is necessary to work on the side zones. You need to stretch the material from the droplet to the tip closer to the rollers.
- Turning the nail sideways, form a longitudinal line. Using the corner of the brush, lightly grab the layer of biogel and pull it down along the nail in long, even lines.
- Near the side rollers, the thickness of the gel should be minimal.
- The result will be a small volume along the center line of the nail from the cuticle to the tip with the highest point somewhere between the center and the cuticle at about 1/3.
- Turn the finger over and seal the end.
- Dry the layer in a lamp.
Before applying a colored layer, regardless of whether you need to cover your nails with colored gel polish or gel, you need to remove the sticky layer. This is necessary so that the color layer lays down well and evenly.
C-curve nail
It is necessary to ensure that the transverse bend has a beautiful rounded shape without excess materials on the sides. This is especially true when working with liquid materials. To avoid such an error and eliminate all irregularities, you need to turn your finger nail down.
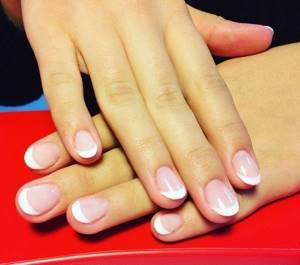
Life hack - How to make perfect highlights?
You won't get a perfect highlight without a round lamp. Its appearance directly depends on the light source. Under a regular lamp it will appear square, angular or oblong. A beautiful round glare can only be obtained from a round lamp. In its absence, it will be very difficult to form it.
To get the perfect glare, a regular round table lamp will do. After applying the strengthening, the nails can be held under a regular lamp for 20-30 seconds, and then sent to an LED or UV lamp.
PS: Subscribe to my blog and Yandex Zen channel so you don’t miss anything.
Use of channel materials is allowed only with an active link to the blog
BestNails54.ru !
Gel coating
The gel is a synthetic substance that hardens during the polymerization process. It helps to model nails, lengthen or change their shape.
The polymer coating strengthens and smoothes the nail plates. The gel is applied to the natural nail, and it does not lengthen as with extensions. The polymer layer is much thinner, the nails look natural.
If desired, you can apply varnish to the coating, but even without additional design, the nails look aesthetically pleasing and stylish.
This manicure is suitable for those who want to create a natural look. You can coat your nails with polymer not only on your hands, but also on your toes.
general information
If you want to do extensions at home, then the first thing to start with is determining the type and material. The choice of materials for the procedure will depend on this. The easiest way for beginners to work is with gel.
Extension can be done with gel, biogel or acrylic. Any material will last on nails for up to three weeks if the technology is followed. Gel and acrylic allow you to grow nails to any length, but biogel - only up to 3 mm. Gel nails are thicker but easy to repair. Acrylic ones, with the same strength, can be much thinner and more natural, but they cannot be repaired, but only removed and built up again. In addition, acrylic is harder to work with.
According to the technology, extensions can be carried out using forms or tips. Extension on forms allows you to create more natural and neat nails, but requires your own free edge of at least 1.5 - 2 mm. Tip extensions can be done to any length and complex shape, even on very short nails.
https://youtu.be/UTwqJcNckMU
Advantages and disadvantages
Nails coated with a gel substance not only look natural, but also become stronger and more durable. The polymer does not spoil the nail plate, but thickens and evens it out.
Helium coating has a number of other advantages that speak in favor of this technology:
- The polymer base contains natural resins that strengthen fragile plates.
- Nails do not break on impact and do not peel off.
- The manicure lasts a long time (about 20-25 days).
- There is no need to remove the old material, just make a correction.
- The nail plates have the correct shape, look attractive, and shine.
- At the same time, the cuticle is processed; as a result, it grows back more slowly than with a regular manicure.
- It is possible to form any shape of the plate.
- Large selection of different shades of material.
- The base contains no allergens.
The main disadvantage of this method is the need for periodic correction. All other disadvantages depend on the correctness of the procedure and use of the nails.
Advantages and disadvantages
Many girls prefer to use gel polish instead of a special gel composition for extensions or acrylic powder; this technique is especially common among novice artists who work at home or perform manicures only for themselves.
This is due to the positive aspects of the technique:
- Safety. Often, gel polish is made hypoallergenic; it does not contain aggressive components that could adversely affect the health of the nails. This is the main difference from acrylic, which often damages the matrix during extensions;
- Availability. Everyone who does decorative manicures and pedicures has gel polishes, so you don’t have to buy other products to perform extensions;
- Strength. The coating turns out to be quite stable and wear-resistant, so it does not break even with mechanical impact on the free edge;
- Easy to do. It is quite easy to distribute the base evenly over the nail bed, as it does not have an overly thick consistency. You can make the transitions invisible, which makes the extension result natural.
If you follow the technology of artificially lengthening the nail bed, the result is neat and does not differ from a manicure performed in a salon.
However, first consider the disadvantages of the technique:
- Discomfort while drying the coating. Gel polish has a side effect during polymerization - it causes a burning sensation associated with a sudden surge of heat to the nail due to the dense base layer;
- Risk of leaks. Due to the fact that the consistency of the composition is not as thick as that of acrylic or a special gel, it is easier to distribute, but prolonged leveling can lead to it leaking under the cuticle or side roller.
This type of build-up must be removed using hardware or chemical means. Most often at home, the second option is used, which involves the use of a remover - a liquid for removing gel polish by securing it with a compress under foil or a fingertip.
What do you need
Everything you need to carry out the procedure for strengthening the nail surface can be purchased in specialized stores. Thanks to this, work can be carried out at home. To begin with, you will have to spend a large amount, but in the future it will pay off. You should buy quality products, even though they cost more. Poor quality material will only damage your nails.
Tools and materials
The first thing to prepare is the gel itself. To perform a helium manicure you need to purchase:
- sticks (metal or orange) for moving the cuticle;
- nail file, buff, polishing the nail surface, giving them the desired configuration;
- cuticle remover for unedged manicure;
- nippers intended for trimming manicure;
- primers that remove excess moisture - acid-free or acidic for normal or wet nails, respectively;
- synthetic brush for applying polymer;
- ultraviolet lamp for drying the material;
- cleaners that degrease the nail surface and remove the sticky layer;
- products for nail decoration (varnishes, rhinestones, sparkles);
- cotton pads, lint-free wipes.
Before purchasing materials and tools, you need to make sure the quality of the product. It is recommended to purchase products from trusted brands, based on user reviews.
Gel selection
When applying the polymer, three layers are formed: base, modeling, finishing. Each of them has its own functions. The base is the base on which subsequent layers are applied. Modeling – forms the nail plate, is responsible for the strength of the material. Finish – designed to protect against negative external factors. Therefore, special attention must be paid to the choice of material.
Getting beautiful, healthy nails largely depends on the quality of the material. There are several types of gels:
The “phase” of the base indicates the number of polymer layers formed.
Technology of gel nail extension on tips
Modeling on tips differs at the stage of applying blanks.
- Attach the tips and decide on a size close to the width of the plate.
- Cleanse the skin, remove the coating and do a trim manicure.
- Shorten the free edge to half a millimeter.
- Degrease the inside of the workpiece and the surface of the nail with a disinfectant.
- Cover the templates and nail plate with glue. Press the tips firmly. If one of them doesn’t sit well, soak a cotton pad in nail polish remover – this will soften the glue.
- Reduce tip length if necessary. Use a nail file to give the desired shape.
- File away the excess along the edges and at the base of the nail, eliminating as much of the height difference between the plate and the workpiece as possible. Also cut off part of the tip to make it thinner.
- Remove the shine with a buff, shake off the sawdust.
- Repeat steps 5-11 from the instructions for nail extensions on forms (except 8th).
Step-by-step instruction
The procedure for covering nails with gel is simple. You can do it yourself at home, without turning to professional craftsmen. The main thing is to follow the technology, performing all operations consistently.
How to prepare your nails
Before applying the polymer, the nails must be properly treated. It is recommended to take a therapeutic hand bath 2-3 hours before the procedure.
Preparation of the nail plate is as follows:
- Excess length is trimmed, the nail is filed, giving the desired shape.
- Degrease the surface of the plate using a cleaner.
- The cuticle is treated: with an unedged manicure, it is softened with a remover and pushed back with an orange stick; when trimmed, the cuticle is moved and trimmed with nippers.
- Sand the plate with a buff, carefully removing the top layer.
- Remove remaining fat with a cleaner.
- A thin layer of primer is applied to ensure adhesion of the polymer to the plate.
After treatment, you should not touch the surface of the nail, otherwise the material will lose its adhesive properties.
Stages of the procedure
The process of strengthening nails with gel consists of several stages. You can't miss any of them. Be sure to read the product instructions. Depending on the materials used, the process may vary slightly, but the basic steps remain the same.
No extension
Gel strengthening without extensions involves applying polymer to natural nails. You can coat both short and long nails with polymer.
After preparing and drying the nail plates, the main procedure begins. It is carried out in several stages:
- Apply a thin base layer, being careful not to get on the cuticles and skin. The sides and ends are carefully processed.
- Hands are placed in a lamp to dry for 1-2 minutes.
- A modeling layer is applied with a brush, with which you can adjust the shape.
- By placing your hands in the lamp, the gel is polymerized for 3-4 minutes.
- Clean the surface from the sticky layer. To give the desired length and level the sides, cut off the excess polymer by removing the sawdust with a brush.
- Apply the finishing layer.
- Dry the nails in a lamp by placing your hands there for 1 minute.
- Use a cleaner to get rid of the sticky layer.
The whole process takes no more than 1.5 hours. After the procedure is completed, the cuticles are soaked in emollient oil. Then you can coat the surface of the nails with varnish or decorate with additional elements.
With extension
To cover with extensions, you will need additional elements to model your nails. Tips are most often used as templates. In order for the nails to have a natural look, the shape of the tips must completely match the outline of the plate.
Further work is performed in the following order:
- Glue is applied to the contact area of the tips, applied to the nail, pressing tightly and holding for some time.
- The tips are cut with pliers, giving them the desired shape.
- File the joint at the top of the tip so that there is no step.
- Apply the base starting from the middle of the nail, gradually spreading to the edges. If a single-phase system is used, then the first layer can be colored. If it is three-phase, then it is transparent.
- Polymerize in a lamp for no more than 1 minute.
- Apply a modeling base and dry it again in a lamp.
- Remove the sticky layer, sand the artificial surface, and remove excess polymer with a brush.
- Cover the nails with the finishing compound, sealing the ends. The last layer is also dried in a lamp.
The extension process lasts 2-3 hours. For an hour after finishing work, you must avoid getting your hands wet to prevent the polymer from peeling off.
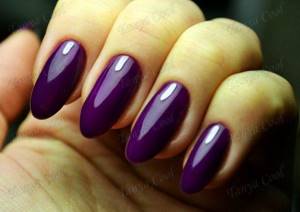
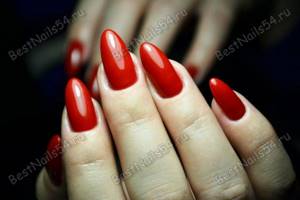
Extension of sharp and pointed nails
Nail shapes
Nail extension involves giving shape. Recently, the Stiletto nail shape has become very common. But since the ideal manicure is an individual matter, those who for some reason are not suitable for a sharp or pointed shape prefer a manicure called ballerina, zero or almond.
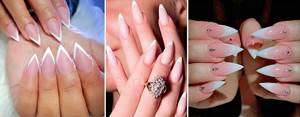
Recently, the Stiletto nail shape has become very common.
Experienced manicurists do not recommend using pointed nail extensions for those who have natural trapezoidal nails. Firstly, this is a very complex process, and there is a high probability that the look will not be perfect; secondly, there is a risk of severe damage to the natural nail plate.
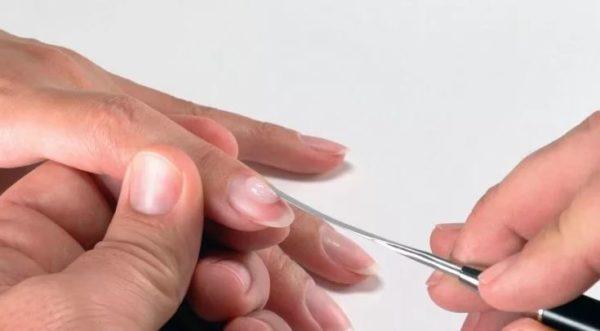
In order to reduce the likelihood of cracks, chips and breakages of the extended nail, you should properly prepare the free edge of the natural nail. If it is not completely cut down, or the shape of the free edge has been incorrectly modeled, a sharp or pointed nail extension can create discomfort when worn.
Important! When preparing a natural nail plate for sharp nail extensions, deep cutting is prohibited. It will be enough to process the edge with a milling cutter and do a hygienic manicure.
Also, one of the important details of sharp or pointed nail extensions is the correct application of the template. It should be understood that each finger has an individual size. The template must be adjusted to natural parameters, otherwise the extended nail will not last long without damage.