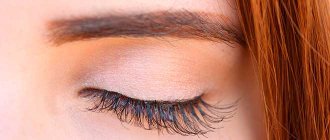
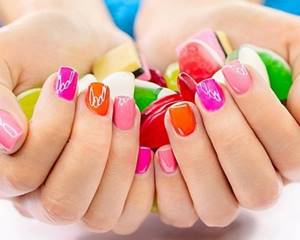
Most women prefer to do their own manicure. Firstly, this allows you to save a lot of money, and secondly, this is a great opportunity to show your individuality and create a new, unique image.
The beauty industry has made sure that modern products for home manicure are not inferior to salon products.
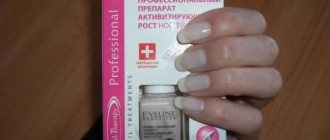
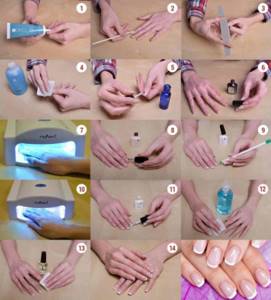
How to apply shellac?
You will need:
- everything you need for a regular manicure - from nail files to oils
- alcohol wipes for shellac
- special means for removing the sticky layer
- nail polisher and soft file
- the basis
- colored shellacs
- top coating
- Ultraviolet lamp
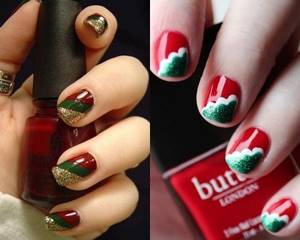
Shellac nail design, photo
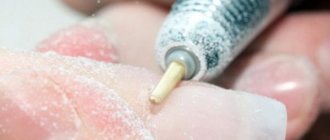
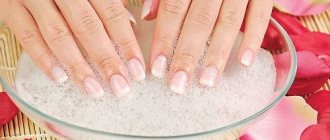
First, we need to prepare our nails:
- we start with a hand bath, remove the cuticle or push it back with an orange stick
- give your nails the desired shape
- We polish the nails under shellac with a gentle, soft sanding
- remove dust with a brush and degrease nails with alcohol wipes
Then start applying shellac:
- So that our hand does not tremble from excitement, we imagine that we are applying ordinary varnish
- First, cover one side of the nail plate with a thin layer, then the opposite, and finally cover the center of the nail.
- Dry in a lamp for about two minutes
- The first layer of shellac is transparent and to give the color richness, we cover the nails with a second layer. Attention: the second layer should be slightly thicker
- Dry in a UV lamp for two minutes. Next we apply the top coat and dry it again in the lamp for the same amount of time.
- The final stage is to remove the sticky layer with a special solution.
Shellac French
French shellac has its own little secrets. We do French manicure in the same way as a regular manicure, but we use a brush, since it will not be possible to remove the stencil after drying, and it is also impossible to remove it before drying without blurring the border of the design.
Shellac French
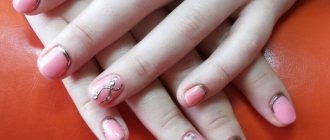
Shellac drawings
Drawing on shellac is done with acrylic paints, since acrylic has many advantages:
- acrylic paint is diluted with water. And the more water, the more transparent the color
- Using acrylic paints is very economical
- acrylic performed well on all types of coatings
- Acrylic paint can be used to create any design
- Mixing colors creates interesting shades
You can paint with ordinary acrylic paints, which are sold in art stores. Now you need to come up with an idea for a design and a color scheme. You can get ideas from this article.
To make designs, they use special thin nail design brushes, toothpicks, needles and even sponges - it all depends on the creative idea.
Acrylic painting technique:
- prepare the nail plate and cover it with shellac
- put the paints on the palette and start drawing
- We study the consistency of the paint and dilute it with water if necessary.
- if the drawing is multi-layered, let the previous layer dry
- fix the drawing with a top coat
Step-by-step instructions: how to properly paint your nails with gel polish
Experts give the following recommendations on how to properly paint your nails with gel polish:
- Preparing nails for painting with gel polish (cuticle trimming, nail design, polishing with buff, applying nourishing oil);
- Degreasing nails using lint-free wipes;
- Primer application;
- Applying base coat;
- Painting with gel polish (1-2 layers);
- Drying the manicure in a UV lamp (from 3 to 10 minutes);
- Finish coating;
- Remove the sticky coating with a sponge using a special product.
A brief description of all the necessary tools and products for manicure using gel polish:
- The base coat is spread in a thin layer before applying the varnish. Protects the nail plate from the effects of varnish;
- The final coating is applied after the gel polish has dried (the final stage). Gives a glossy shine to nails;
- Drying lamp on the freshly painted surface for 10 minutes. Conducts polymerization of gel polish;
- A degreaser is needed to treat nails after preparatory procedures. Removes particles of dust and grease;
- A dehydrator is used during nail treatment after preparatory procedures. Dries the nail plate;
- Acid-free primer is used before applying varnish. Hides imperfections of the nail surface, protects the varnish from chipping;
- Lint-free wipes are needed for removing nail polish, removing the sticky layer, applying degreaser, and dehydrator. Does not leave hairs or particles, promotes even distribution of varnish;
- A nail file is used to file away excess volume of the nail. Helps create a neat shape;
- A sanding file is needed during polishing. Creates an even, smooth nail;
- The buff is needed for shaping and polishing. Creates a smooth, beautifully shaped nail;
- A pusher is used to remove cuticles. The surface of the nail is free of excess skin;
- An orange stick is also needed to remove cuticles. The surface of the nail is free of excess skin;
- Nourishing cuticle oil is distributed over the cuticle before degreasing and applying varnish for 5 minutes. Needed to strengthen nails;
- Decorative elements pPlaced with tweezers on a varnished surface before drying in a lamp. Give the manicure originality.
The process of acquiring well-groomed hands takes no more than 1 hour.
Experts believe that in order to maintain healthy nails, it is correct to take breaks between procedures for painting nails with gel polish for at least 3-4 days.
Gel polish completely blocks oxygen access to the nails. It is necessary to give your nails “rest” and additional nutrition. Continuous use of gel polish causes brittleness and deformation of nails.
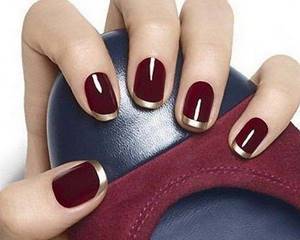
Shellac for short nails
There are a lot of successful design ideas for applying shellac to short nails. It all depends on your taste and age. For young girls, bright colors, rhinestone decoration or discreet ombre are suitable. For business women, a mirrored jacket with a matte base is suitable.
The design of short nails also depends on the season. Looks good in summer:
- openwork pattern
- bright shades
- thematic drawings
In winter, the thematic pattern changes, the tone becomes heavier, and the time comes for rich, natural shades. And if you find it difficult to make a choice, make a white French shellac. This is a win-win option for a woman of any age; it is appropriate for any outfit and season.
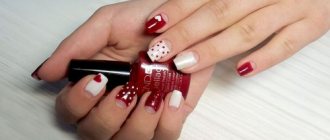
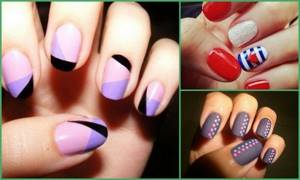
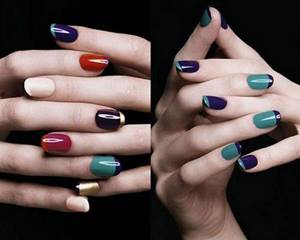
Shellac: new designs
The leader in shellac nail design this year is naturalness, and the length of the nail should be minimal. Interestingly, this also applies to extended nails. French manicure is done in pastel colors. A French jacket with a broken, v-shaped or triangular edge and a mixture of contrasting colors is fashionable.
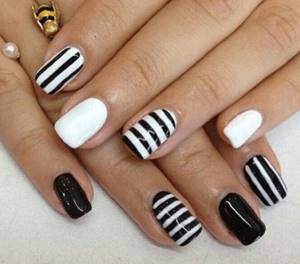
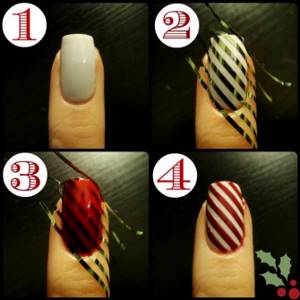
Striped manicure is very popular, in which colorists advise choosing the following combinations:
Nail designs with adhesive tape are trendy. Here you can “play” with various geometric shapes, and craftsmen create entire patterns from them. Very easy to apply manicure with stickers.
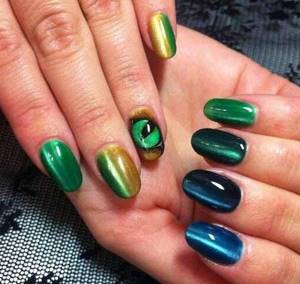
Shellac cat eye
The favorite of the season is the “Cat Eye” manicure. Shellac "Cat's Eye" differs from an ordinary colored coating in that it contains microscopic metal particles and when a magnet is brought to the nail, these particles form a bizarre pattern reminiscent of the shine of a cat's eyes.
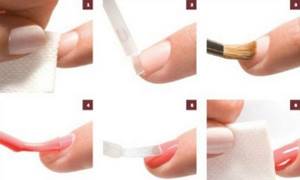
How to remove shellac?
To remove shellac you need to have:
- sponges for removing shellac, but you can get by with cotton pads and foil
- shellac remover
- orange stick
Instructions for removing shellac:
- Soak sponges with shellac remover
- We wrap it around the nail plate and secure it. If you work with cotton pads, then wrap them in foil. We try to make it very tight
- Hold for 10-15 minutes
- If the polish has dissolved, carefully remove the remaining residue with an orange stick in the direction from the cuticle to the edge of the nail.
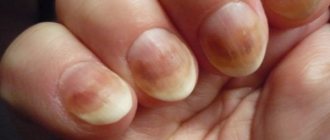
What is the difference between shellac and gel polish?
They started talking about gel polishes back in the nineties of the last century, and Shellac is a relatively new invention, it was patented in 2010.
There are small but significant differences between gel polish and shellac:
- Gel polish is a durable coating that lasts on nails for up to three weeks, is odorless and does not lose color.
- Gel polish is applied to a base that holds the nail and gel together, so it’s difficult to call this procedure gentle
- Before applying gel polish, the nail plate is filed down, which somewhat destroys the upper part of the nail
- Shellac basically has more varnish than gel, so it is easier to apply - in a familiar way, and thanks to the gel it lasts up to four weeks
- Before applying shellac, there is no need to file the nail plate, so shellac is considered a more gentle coating
- No primer is applied under shellac, so the nail is not further injured
- Shellac is more expensive
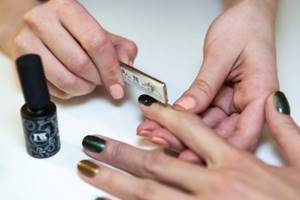
How to do shellac manicure at home - step by step
- We shape the nails and trim the cuticles.
- Apply a thin layer of base coat to the nail and let it dry.
- Apply the first colored layer of shellac. You can choose any color you like, and let it dry for 5 minutes, or maybe more, depending on the instructions.
- Before applying the stencils, you need to make sure that the nail is completely dry. You can cut out the stickers yourself or buy special ones in the store. We glue our blanks onto the nail in the cuticle area. They can be either round or triangular, depending on your imagination.
- On the rest of the nail we apply shellac several shades darker, or any other to your taste. Let it dry for about 5 minutes.
- If desired, you can also stick on stickers and paint the remaining nail with shellac of a different shade (slightly darker). And again give them time to dry for 5 minutes. After this, we remove our stickers.
- Finally, apply a fixing layer and let the nails dry for 5 minutes. If they are still a little sticky, you can use a degreaser or a cloth moistened with acetone and lightly wipe the nail.
How to make gel polish correctly?
In order to properly do a manicure with gel polish, we will need the same devices as listed in the article above about shellac. We follow the following sequence of actions:
- We polish the surface of the nail plate with a nail file (you can purchase a grinding machine). You need to remember that we sand with a thin layer, do not remove much, remove the gloss - and that’s enough
- Use lint-free wipes to degrease the nail with nail polish remover.
- Apply a base coat and dry in a lamp. Cover the entire nail without leaving any gaps
- We cover with color in several stages, depending on what saturation you need. After each layer, dry in a lamp for up to two minutes.
- Apply the top fixative in a thicker layer and dry in a lamp for up to three minutes.
- Remove the dispersion layer and a fashionable manicure with gel polish is ready
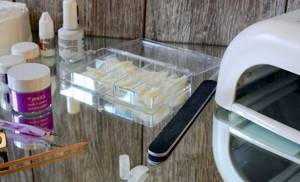
What you will need
The main point that stops girls from wanting to create a gel manicure for themselves is the extensive list of necessary tools. Indeed, the master’s arsenal turns out to be familiar. But such preparation is justified if you are going to frequently pamper your nails with a new manicure or provide these services at home.
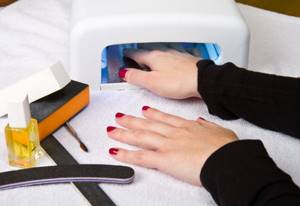
- A UV lamp or LED is the master’s main assistant in creating designs with gel polish. The cost of this device varies from 1500 and above. Chinese sites offer options that are even cheaper.
Note! Cost can directly affect the quality of the purchase. Be sure to check the lamp power - the minimum value should be 36 Watts (if you chose a UV lamp). The LED lamp is more expensive, but also durable.
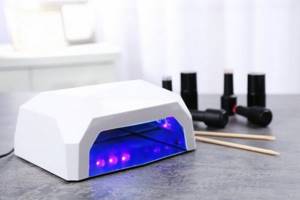
UV lamp for gel manicure
However, you won’t be able to do gel extensions with it. Weigh the pros and cons and make your choice, because it is impossible to apply gel polish at home without a lamp.
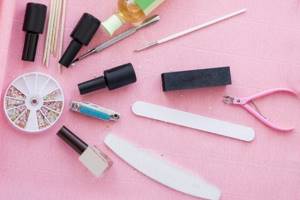
- You can’t do without pushers, nail files, buffs, polishers, an orange stick and lint-free wipes. Don't let such a large list scare you. All these materials are low cost. For example, a large set of nail files for beginners can be found for 100-200 rubles, and a set of 50 napkins costs only 70 rubles on a Chinese website.
Minimum set of accessories for gel polish manicure
- What we do not recommend saving on is nail clippers and scissors. You don’t want to injure your skin and frequently change dull instruments. So visit a professional store for quality options.
- A must-have item in the arsenal of a manicurist at home is a degreaser, also known as a dehydrator. Without it, the whole process makes no sense, because the gel polish simply will not stick to the nails. This product is designed to degrease natural keratin and also remove the sticky layer. Some girls use acetone or alcohol as an alternative to a dehydrator, but it is not good enough for these tasks.
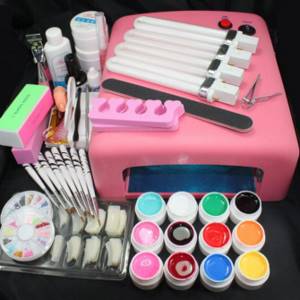
Professional gel manicure kit
- It is recommended to apply gel polish with a primer. It is necessary for bonding nail keratin and varnish. The secret to the longevity of a beautiful gel manicure lies in the use of a primer. It also helps strengthen nails.
- Of course, you can’t do without the gel coating and top coat itself. Choose quality manufacturers, and then the result will really please you. The most famous and reliable brands are “CND. Shellac", "Kodi", "Naomi", "Creator", "My nail" and "Fox".
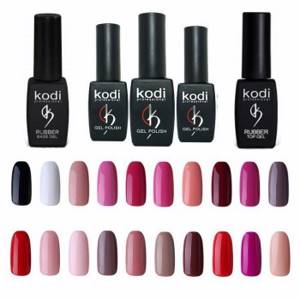
Palette of quality Cody varnishes
We have listed the minimum list of nail master tools. Of course, you can supplement it with various care products and decorative elements. The quality of work, as well as the variety of manicure designs, depends on how rich your working arsenal is.
https://youtu.be/https://www.youtube.com/watch?v=AvK4vAKXjDc
_
Interesting : Which is better: shellac or gel polish?
Manicure with gel polish on short nails
Finally, fashion trends have coincided with our idea of natural beauty. Short, well-groomed nails are in fashion. The advantage of a manicure on short nails done with gel polish is that it is more durable, since short nails are less susceptible to injury.
A manicure with gel polish is performed on short nails using the usual technology, you just need to take into account that the trend is very short nails, cut, as they say, at the root. Lunar manicure with gel polish or a manicure from Dior is performed on any nails, for women of any age. There are no restrictions here.
Lunar manicure with gel polish, photo
If you are a business woman, your moon manicure should look in pastel colors, and the hole can be designed with any geometric line - concave or convex. If you are young, an acidic color with a triangular or zigzag hole will look organic.
Fashionable beautiful manicure with gel polish, photo
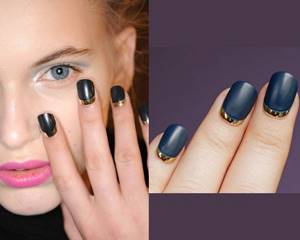
Wedding moon manicure looks delicate, in white and pink tones with a light pattern on one nail. Even fans of square-shaped nails will find a niche for moon manicure with gel polish - you can decorate the hole with a square shape. The French inversion manicure is very popular. When the nail is shaped as if the edge of the nail has moved to the hole. It looks original, especially if you use traditional French colors.
Manicure gel polish glass
The most original manicure today performed with gel polish is “Broken Glass”. For this we need holographic foil (you can find it in any manicure store). Cut the pieces into the desired shape and get to work:
- preparing nails for coating
- We fold the cut foil into a mound - this makes it easier to grab it with a brush
- Next, we cover the nails with gel polish using the method described in this article.
- We no longer dry the top layer of the nail plate in a lamp; we will lay our “glass” on it
- We wet the brush in the top coat, grab one piece of foil with it and attach it to the nail. It is important that the edges of the foil lie flat. Thus we lay out the entire pattern
- cover the nail with topcoat and dry it in a lamp. Your creative manicure is ready
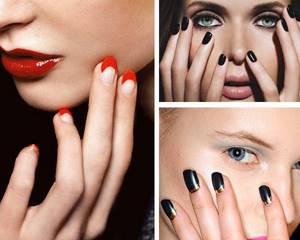
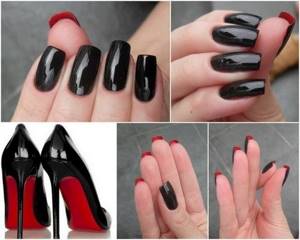
Black manicure with gel polish
A black manicure with gel polish is suitable for any woman. After all, there are a lot of options for its design. Black color does not require pretentiousness and overloading with patterns. In this color you can create a mirror manicure with gel polish, glass manicure, moon manicure, matte manicure, French manicure, and with rhinestones. The only event in which a black manicure will look ridiculous is a wedding ceremony. And only if the wedding is not in the Gothic style.
Tips for beginners
- Never file nails that already have gel polish applied. This way you open up moisture and air and destroy the integrity of the coating.
- After you complete your manicure, it is advisable to keep your hands away from water for 2 hours. This is exactly how long it takes for the layers to finally bond together.
- Protect your beautifully manicured hands from contact with aggressive detergents.
- Don't forget about timely correction. The duration of an aesthetic manicure with gel polish is 2-5 weeks.
Interesting : Gel polish on short nails: design and new ideas
Now you know how to apply gel polish at home step by step, which means you can implement a variety of beautiful manicure ideas on your nails.
Manicure lessons with gel polish for beginners
For a manicure with gel polish you need:
- 36 watt UV lamp
- base coat
- color gel polish
- top coating
- dispersion layer remover
- gel polish remover
Sequence of creating nail art:
- We treat our hands with antiseptic
- We do a hardware or edged manicure, correct the shape of the nails
- We process the surface of the nail with a grinder
- Remove dust with a brush and wipe with a lint-free cloth soaked in a special degreaser.
- Cover with an acid-free primer for reliable adhesion of the gel polish to the nail.
- Apply the base coat to the thumbnail first. Apply a thin layer in the center from the cuticle towards the edge of the nail, then the left side, then the right
- Dry for 10 seconds
- While one nail is drying, apply the base to the nail of the other hand using the same movements and dry it
- This way we will reduce the time of this procedure to a minimum.
- Apply a thin layer of colored gel polish, covering the entire nail plate as much as possible and dry it in the lamp for about 10 seconds, repeat the procedure as with the base - alternately on each hand, not forgetting to dry it in the lamp
- We also apply a second layer of colored gel polish and dry for two minutes.
- After covering with the second layer, apply the top glossy coating to the nail plates and dry each finger in a lamp for up to a minute.
- Upon completion, remove the dispersion layer with a special means
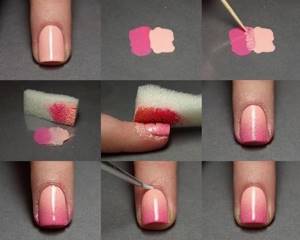
French manicure gel polish photo using ombre technique
You can create a beautiful and long-lasting manicure with gel polish and shellac at home. To do this, you need to prepare all the necessary devices and materials and do not forget to add a little imagination, which will tell you an original design.
Application technology
It's time to tell you how to apply gel polish at home with a lamp. You have already seen that if you stock up on all the necessary tools, you can create beauty on your nails right at home. However, doing your own manicure is not so easy. It’s ideal if you involve a friend in this exciting activity. This way you can set up a home beauty salon and give each other a beautiful manicure. Act step by step according to our plan and you will succeed.
Doing a manicure with gel polish at home
- The whole process begins with a standard hygienic manicure procedure. Surely, you have already performed all these manipulations with your nails many times, but just in case, we will remind you of the necessary actions. It's great if you have some time left. This means you can afford to make a steaming bath for your hands with caring ingredients (or just sea salt).
- Then you need to properly prepare the nail plates. The quality and durability of the finished manicure depends on how responsibly you approach this. Cut the cuticle and remove the pterygium. Use a nail file to give your nails the desired shape. If they are not strong, it is better to choose a short or medium length.
- Armed with a soft buff, remove the gloss from your nails. Next, you need to brush off all the resulting dust with a brush.
- Then a degreaser and primer are used. Do not skip these steps, and then the gel polish will lie correctly and will delight you with its beauty for a long time.
Note! The time between applying primer and topcoat should not exceed 15 minutes.
- As you may have guessed, the next step is to apply a base coat of topcoat. They need to cover the nail plates, carefully ensuring that the product does not get on the cuticle.
- Then it’s time to apply colored varnish in 2 layers. The first one should be quite subtle. After applying it, place your nails under the lamp. The second layer is also baked in a lamp. If necessary, a third layer can be applied. It's better to spend time gradually adding layers and baking them one at a time than to end up with an uneven, thick coating with bubbles.
Important point! It is recommended to work on the thumbs separately so that the varnish on them does not flow beyond the borders.
- If you've been planning on decorating your nails, now is the best time to do it. Don’t limit yourself in your imagination and feel free to add rhinestones, stickers, sparkles and other decor to this process.
Simple design ideas at home
- To secure the manicure, apply a layer of top coat to the entire surface of the nails. The density of this coating should be such as to protect the design from chips and damage.
- When finished, remove the sticky layer from your nails. To do this, wipe them with a cloth containing degreaser. It would also be useful to moisturize the cuticle with a special product or cream.
Step-by-step instructions for working with gel coating
You can also understand in detail how to apply gel polish from the video.
https://youtu.be/https://www.youtube.com/watch?v=tJpwtLxlXwE
_