Manicure
from Valeria Gai
03.09.2017
1846
0
Do you agree that creativity should not be limited by any boundaries? And since nail art also refers to art, then we will try to deviate from the rules (if it is at all appropriate to talk about any rules here) and try to make, say, a gradient on the nails with ordinary varnish, but in unusual ways. So, get your brushes and paints ready and let's begin...
What does gradient mean on nails with gel polish?
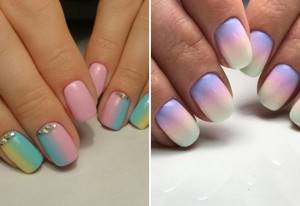
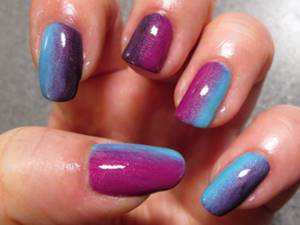
A gradient on gel polish nails, also called ombre or stretch, is a smooth flow of one tone into another - from light to dark or vice versa. This technique has something in common with French manicure, but the most significant difference is the absence of a clear boundary between shades.
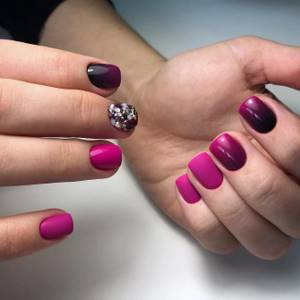
Transitions should be blurry, that's the beauty of design. And the shades of varnish are very different. But they look better when they belong to the same color scheme, for example, burgundy, red, pink.
We recommend reading the article on how to do a French manicure with gel polish. From it you will learn what you need to do a French manicure with gel polish, which gel polish is better and the types of French manicure with gel polish. And here is more information about how gel polish differs from shellac.
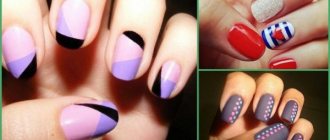
Gradient on nails: ideas
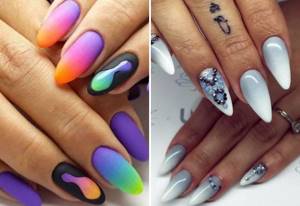
The main idea of manicure using the gradient technique is the simultaneous use of several varnishes with a smooth transition from one shade to another.
Depending on the colors used, the following types of gradient are distinguished:
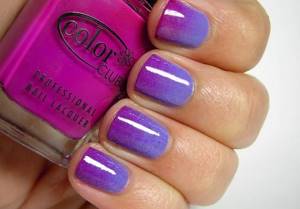
- ombre manicure - movement from dark to light shade of one tone, for example from rich blue to delicate blue;
- Dip Dye manicure - the use of several bright contrasting colors.
According to the technique of performing manicure in the gradient style, they are also classified into:
- horizontal - the color transition occurs in the direction from the cuticle area to the tips of the nails;
- vertical - shades alternate in the form of vertical stripes between the side ridges of the nail plate;
- with a transition - each nail is painted in an individual shade, the transition is carried out between the fingers as a whole.
Ombre on nails is a simple technique that can be mastered easily and quickly. But it requires painstaking and perseverance, especially if every nail is painted.
Photo: pixabay.com: UGC
There are such popular options:
- manicure with a transition from the little finger to the thumb and then add a vertical gradient to one of the nails;
- The geometric gradient is interesting. To carry it out, special stencils are used, which greatly simplifies the task and at the same time helps to create a clear and beautiful drawing.
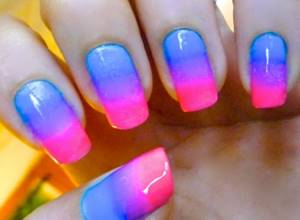
Thermal varnishes, which change color depending on the temperature, also look good in this technique. They make the color palette even richer and add an element of unpredictability and mystery to it.
How to make a gradient on nails with gel polish, what is needed for this
To make a gradient on your nails with gel polish, you need to:
- perform a hygienic manicure
- use a base, preferably transparent, and if camouflage, then choose the most neutral shade;
- have 2 or more tones of varnish, topcoat, cleanser, lint-free napkins, orange sticks;
- prepare a comb brush or foam sponge, air puffing, sponge, airbrush, paint for the latter;
- the presence of a UV or LED lamp for drying the coating.
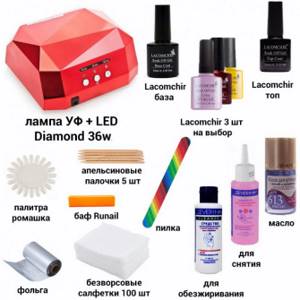
Depending on the type of ombre, you may need glitter, stencils, foil, film, and velvet sand.
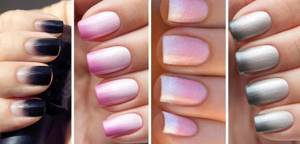
There are several types of this manicure, but the main ones are:
| Type of manicure | Description | Photo example |
| Vertical | With it, the shades change from the area near the cuticle to the free edge and vice versa. |
|
| Horizontal | The shades transform into each other from the right to the left sinus. |
|
| Original | The flow of tones is carried out from one nail to another, that is, each of them is painted in its own color. |
|
| French | Here, the free edge of the nail must be lighter or darker than the rest of the nail, usually it is white. |
|
What helps to achieve a smooth transition
A smooth transition of shades is achieved by shading one varnish over another. Both products should not be allowed to dry.
The flow of colors is ensured by using:
- Sponge or sponge made of foam rubber . You can take a dishwasher one, but only a new, unused one, be sure to cut it to reduce its size.
- Special brush - comb . It is quite wide, almost flat, and the hairs at the end are spread out, like the teeth of a comb.
- Aeropuffing . This is something like a brush, but its working part is not lint, but a foam ball.
- Airbrush . This is a compressor manicure device that sprays gel polish using air pressure.
Foam sponge to create a gradient Special brush - comb Aeropuffing Airbrush
After completing the gradient, before drying, you need to let the gel polish “sit” a little on the nail, the bubbles disappear. That is, you should wait a few seconds before sending it to the lamp.
What kind of brush should it be?
The brush called “comb” should be:
- with a fairly long pile;
- soft;
- with equally diverging hairs at the tip.
Similar ones are produced by TNL, Pole, RuNail, Rubloff, Patrisa Nail and others.
In addition to the “comb”, you will need a brush to apply the base shade; you can use the one in the bottle with the product itself. A “hair” is also needed for painting areas near the cuticle and sinuses. Skilled craftsmen use a fan brush instead of a comb. But not everyone will be able to work with it; the fleecy part of this tool is too wide.
Watch the video on how to prepare a gradient brush:
How to choose a sponge
The width and length of the sponge should be larger than the nail plate, quite thick so that it can be comfortably fixed with your fingers. The one designed for washing dishes is suitable. But you should use its soft side, and the hard side can be cut off, at the same time reducing the overall size. The sponge must be porous to hold the gel polish inside. Therefore, sponges that are too smooth are not suitable for applying cosmetics. They will make an even impression, as if with a brush, but shading is needed.
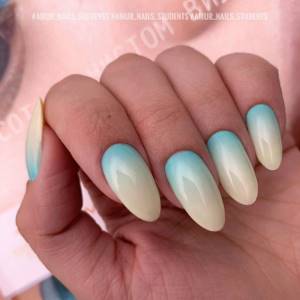
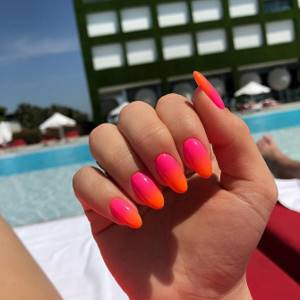
Gradient nails: 40 amazing ideas for the hot season
Well-groomed hands are the key to success for every fashionista. Designers in the manicure industry are coming up with new manicure techniques every day. And of all the different techniques, you will find exactly the one that you cannot refuse. And such a technique is a gradient.
https://www.instagram.com/mindal_studio/
The gradient technique is gaining popularity especially in the summer, because the brightness of such a manicure is impossible not to notice. And also the beauty of the gradient technique captivates all fashionistas, because beauties do not need to decide on one color for a manicure, but can choose several harmoniously combining shades and make an irreplaceable stunning manicure using the gradient technique.
https://www.instagram.com/ksusha_perwushina/
The most difficult thing about the gradient technique is that the transition between two shades must be smooth and imperceptible. Of course, this result can be achieved at home, but it is best to trust the professionals in their field, they will definitely make your hands excellent, and your manicure simply unforgettable. The editors of the Krasotka site have selected stunning bright manicure ideas using the gradient technique for our fashionistas!
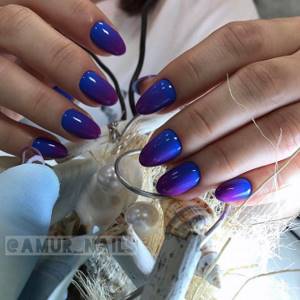
https://www.instagram.com/amur_nails/
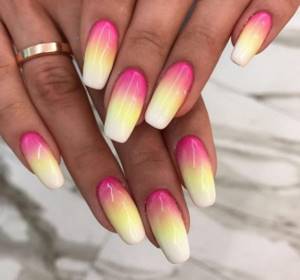
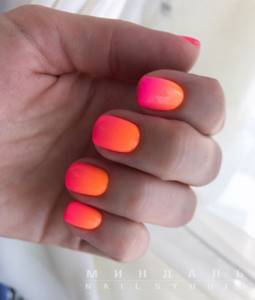
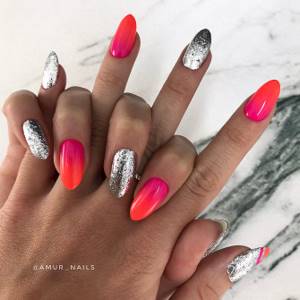
Bright manicure images
The fashionista look is ready when a bright manicure shines on her hands!
instagram.com/__albina_nails__
https://www.instagram.com/alenakapriz/
https://www.instagram.com/alenakapriz/
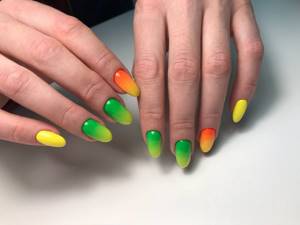
Ombre manicure in nail design helps to create bright and unforgettable images. Stripes, zigzags, checkered patterns and polka dots, combined with smooth transitions of tones, look expressive and stylish. And how wonderful and fresh this manicure looks with neon shades. He will attract everyone's attention.
instagram.com/__albina_nails__
instagram.com/amur_nails
instagram.com/__albina_nails__
instagram.com/__albina_nails__
instagram.com/__albina_nails__
instagram.com/__albina_nails__
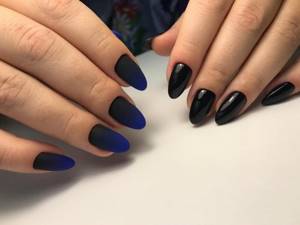
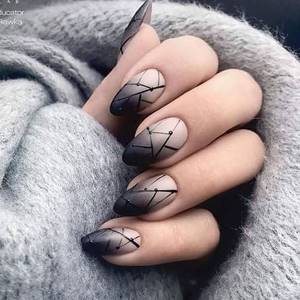
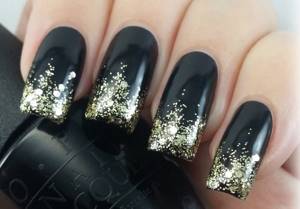
Black gradient on nails
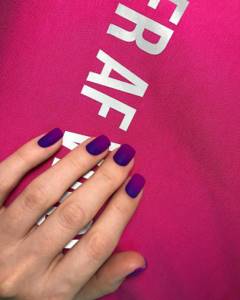
Any shade of the palette looks harmonious with black. The classic black and white combination will create a strict office look.
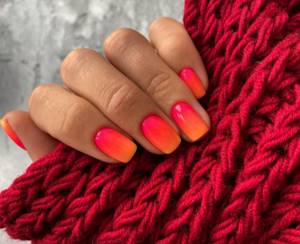
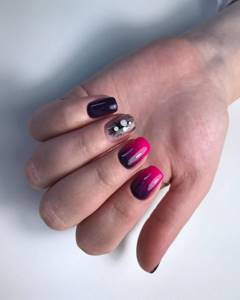
The black-red gradient will add activity and passion to the look. Shades of red depending on the saturation and black color, this is a combination that is appropriate in everyday life and an evening out.
instagram.com/__albina_nails__
instagram.com/__albina_nails__
instagram.com/__albina_nails__
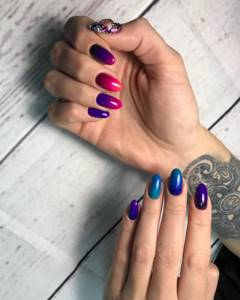
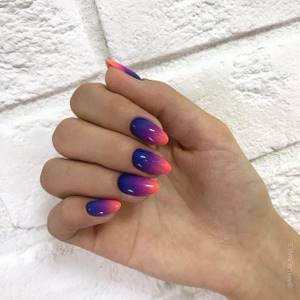
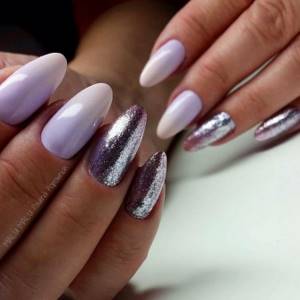
Gradient on short nails
It is at this length of the nail plates that the most complete gradient is obtained, no matter what color combination you choose. The laconicism of pastel colors allows you to use a manicure for an office style.
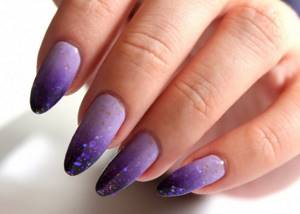
A black and purple gradient with the addition of rhinestones is a great idea for an evening look.
instagram.com/__albina_nails__

instagram.com/__albina_nails__
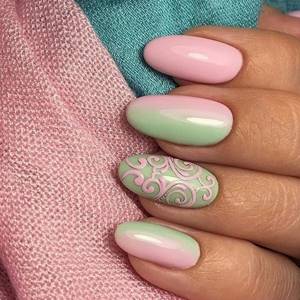
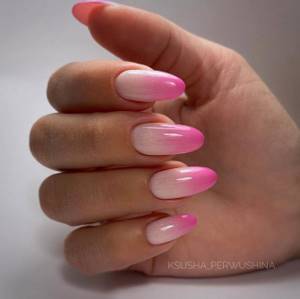
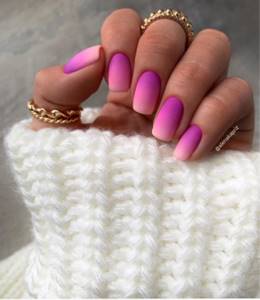
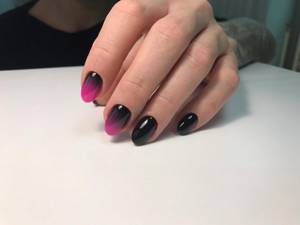
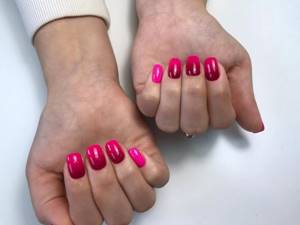
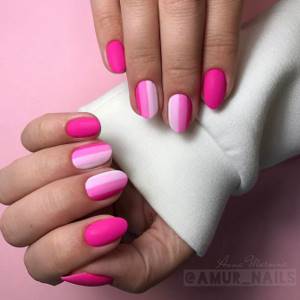
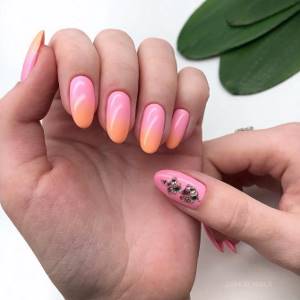
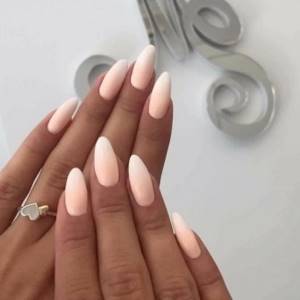
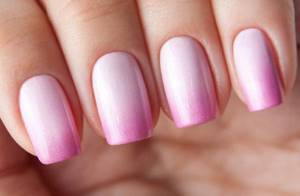
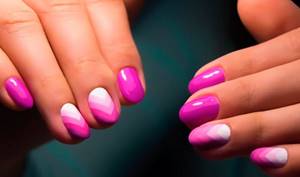
Pink gradient on nails
Delicate pink color will forever remain one of the most popular colors among women of all ages. It is appropriate in any life situation. Women of any social status can afford it. It is truly versatile.
instagram.com/__albina_nails__
instagram.com/__albina_nails__
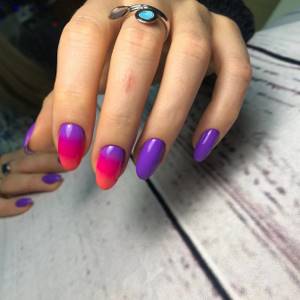
instagram.com/amur_nails
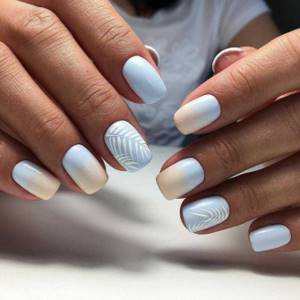
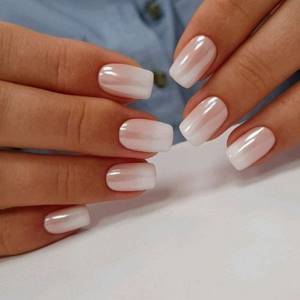
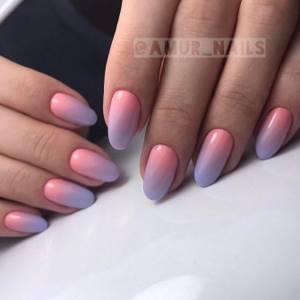
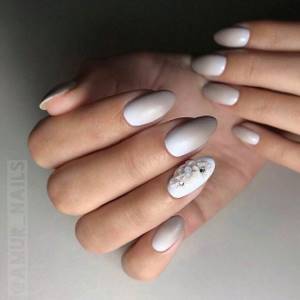
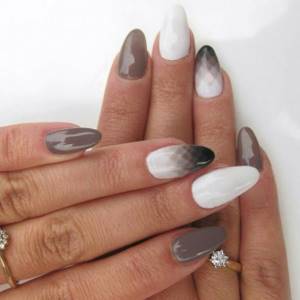
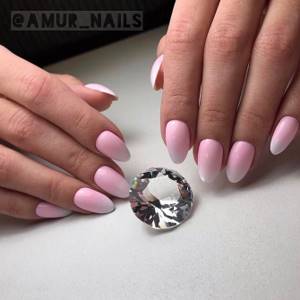
White gradient on nails
A white-pink or white-beige gradient looks like a completely independent design. Although, it perfectly serves as a background for applying different designs to it.
Delicate transitions from pink to white give the handles a special grace and femininity. A manicure complemented with rhinestones and sparkles creates a magnificent evening look.
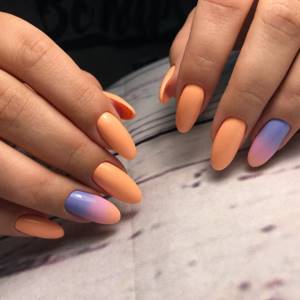
instagram.com/amur_nails
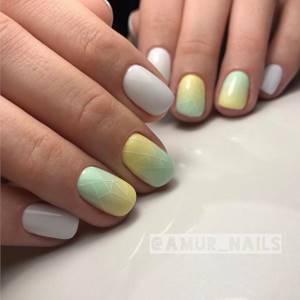
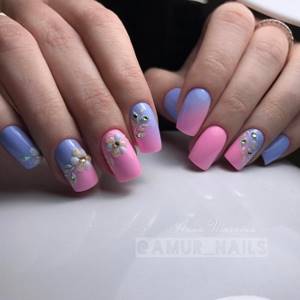
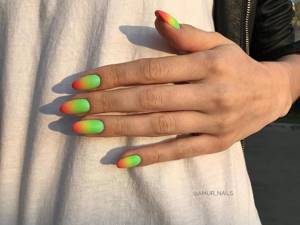
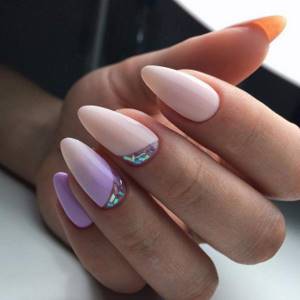
Gradient design on nails
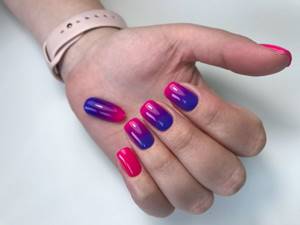
This manicure is gaining popularity every year. Its trick is that smooth transitions of shades are possible not only between tones of the same color. Colors can be combined in completely unpredictable ways. The result is an unusual nail design.
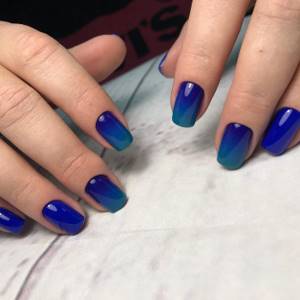
instagram.com/amur_nails
instagram.com/amur_nails
instagram.com/amur_nails
instagram.com/amur_nails
instagram.com/amur_nails
instagram.com/amur_nails
instagram.com/amur_nails
instagram.com/amur_nails

instagram.com/amur_nails

instagram.com/amur_nails
instagram.com/karo_mani
instagram.com/karo_mani
instagram.com/karo_mani

instagram.com/karo_mani

instagram.com/karo_mani
instagram.com/karo_mani
instagram.com/karo_mani
How to make a gradient on your nails
The most accessible element for creating a gradient manicure at home is a sponge. Prepared strips of varnish are blotted with a damp sponge and applied to the nail. A colorless fixative varnish is applied on top.
instagram.com/amur_nails
Gradient is a very stylish manicure option. The combination of any colors and patterns will allow you to create an individual image.
Which option did you like best? Write in the comments which of the presented ones you chose for yourself.
Which image did you like the most? We look forward to your comments!
Gradient on nails with gel polish step by step with a comb brush
A gradient on nails with gel polish using a “comb” is done step by step as follows:
- After degreasing the nail plate, a rubber base is applied and must be dried.
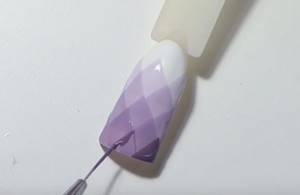
- At the base, the nail should be painted with a dark color, in the center with a neon shade, and the free edge should be made completely light.
- Using a comb brush, pull the dark shade through the middle to the tip of the plate.
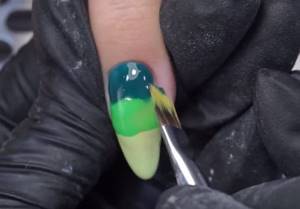
- The “hair” is painted at the cuticle and dried.
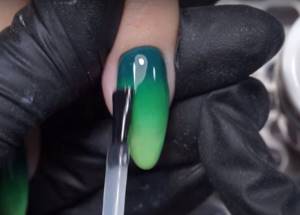
- Next, steps 2-4 are repeated in the same order so that the varnish layer is denser and the stretching is smoother.
- Where there is a clear border of colors, you need to go over the comb brush again to better shade it.
- After drying the second layer of gradient coating, apply topcoat and place your finger in the lamp.
For a more uniform shading of colors, the brush can be dipped into the clinser and slightly squeezed, and then worked along the boundaries of the transition of shades. You should move the instrument with short strokes in the direction of the stretch and at the same time make movements from the right sinus to the left and vice versa. You need to walk along the sides of the nails with a “hair”.
Manicure with color transition using baby boomer gel polish
A gel polish manicure with a color transition called “baby boomer” is done like this:
- After drying, a light beige flower garden is applied to oil-free nails coated with primer and base, covering each plate entirely. You will need 2 layers, both need to be dried.
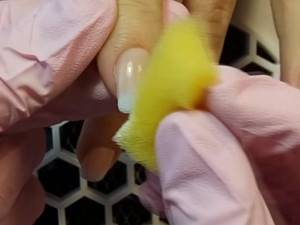
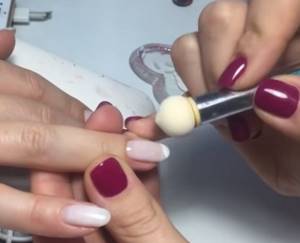
- Apply white varnish to the tip of the foam sponge and blot this layer on the foil. You just need to touch the glossy surface with the product several times.
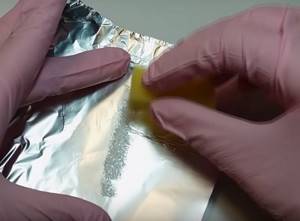
- Then tap the sponge along the free edges of the nails, almost to the center of the plates. The first layer must be dried and the second must be applied in the same way, and after the next drying, the third. The finger is again sent into the lamp, and the fourth layer is applied with a sponge. After drying, cover the nails with a non-sticky top, leveling them out. This is followed by final polymerization.
Gradient manicure at home with gel polish
Gradient manicure with gel polish requires the master to have some experience and knowledge of the main differences from the usual technique of performing a manicure at home.
The procedure is as follows.
1. Slightly stick around the nail using a file designed for this purpose.
2. Apply a thin layer of Bondex to degrease. Use a cotton swab to remove excess material. Then keep your fingers in the UV lamp for a minute.
3. Apply a small layer of foundation gel and dry again.
4. Remove the sticky layer. To do this, take a cotton pad pre-moistened with degreaser.
5. Lightly file the plates with a file to ensure better adhesion.
6. Apply the first shade to half the surface in the direction from the cuticle to the edges.
7. Cover the free surface with gel polish of the second shade.
8. Paint the borders between the two shades with the first color of varnish. This will make the transition smoother.
9. Dry your nails in a UV lamp.
10. Wipe your nails with degreaser to remove the sticky layer.
11. Apply clear finishing gel.
Now you know how to do a gradient manicure at home. The information received will help you save significantly on trips to the salon and update your nail design at any time.
How to transition nails with airpuffing
The transition on nails with a gradient manicure using air puffing should be done as follows:
- A darker shade of varnish is applied to the prepared and base coated plate, covering it completely.
- This layer must be dried.
- Place a little dense gel polish or gel paint of a lighter tone on a clean palette.
- It must be collected by air puffing, tapping the product with the soft tip of the tool.
- Then the same is done at the base of the nail so that the border with the darker color is blurred.
- The finger should be placed in the lamp.
- Then a new, smaller portion of light gel polish is placed on the palette, collected by air puffing and applied with a tapping motion as a second layer to the same area of the plate.
- Border shading is done with the clean side of the device.
- The finished design is dried.
- All that remains is to coat the nail with topcoat and place it under the lamp again.
After use, wipe the instrument with a cloth moistened with a cleaner.
French gradient gel polish
French gradient gel polish is done so that the tips of the nails are highlighted in a lighter or darker tone or several:
- The prepared plates are treated with a dehydrator.
- Then an acid-free primer and a thin layer of base are applied to the nail and dried.
- From the base to a third it is painted over with dark varnish.
- The remaining clean part up to the free edge is covered with a lighter tone.
- Using a comb brush, making small movements across the nail, pull the dark color towards the end, periodically wiping the pile on a napkin.
- This layer needs to be polymerized.
- Then steps 3-5 are repeated, only the border should be shaded more carefully, and the nail should be painted with a thin brush near the cuticle.
- After drying, a top coat is applied and polymerized again.
Watch the video on how to make a French gradient:
Manicure 2020 gradient – fashion trends
Many stylists use gradient manicure with gel polish or other coating to complement fashionable looks. The following trends are relevant for its design:
- a varied combination of shades can be chosen, using both two tones that smoothly flow into one another, and several different colors;
- The location of the pattern can be different, longitudinal or transverse. A diagonal option is also allowed;
- the ombre effect can affect the entire surface of the nail plate or only a certain part of it;
- to create bright evening looks, the presence of elements such as rhinestones, beads and all kinds of stones is welcome;
- the coating can have a smooth structure or contain a velvety effect;
- The varnish is available in glossy or matte finishes; a combination of these types of coatings is also allowed.
Manicure 2020 gradient
Gradient manicure for short nails
This type of nail art such as gradient manicure 2020 can be performed on shortened nail plates:
- due to the fact that the surface is small, it is recommended to use a discreet design;
- the color scheme can be discreet nude, this is a win-win option;
- bright colors are also allowed, for example, this is black and red nail art, but it must be decorated with great care.
Gradient manicure for long nails
This original type of nail art, such as a gradient manicure, can be done on elongated nail plates:
- Fashionistas will be able to fully express their imagination and realize their wildest ideas. So, the design can contain all kinds of drawings, openwork patterns;
- two shades or several can be used, which add brightness and saturation;
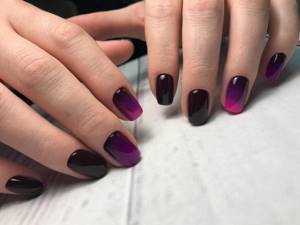
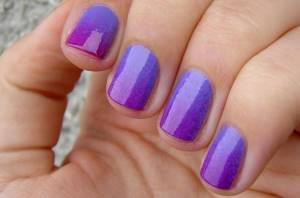
- Both deep colors are used, for example, this is a purple gradient manicure, and delicate pastels;
- Decorating with rhinestones, both minimal and abundant, would look appropriate.
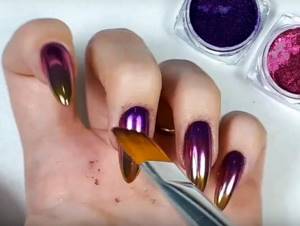
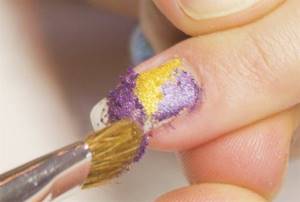
Gradient brush with glitter
A gradient with a brush can be made not only with different colors of gel polish, but also by highlighting areas of the nails with decor, for example, sparkles:
- A flower bed is applied to the dried base, covering the entire nail.
- After polymerization, a portion of glitter with a transparent base is placed on the tip.
- Using a brush, they are stretched towards the center of the nail so that the transition is smooth.

- The coating must be dried again.
- Finally, a top coat is applied, which is also polymerized in a lamp.
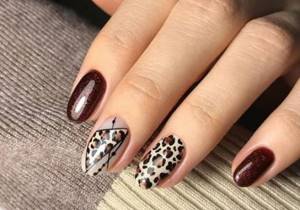
Predatory print
Brown color goes perfectly with leopard print. At the same time, nail designers do not advise overloading your nails. It is enough to draw the “spots” of a predator on one or two nails.
A predatory print will not add any anger to your look. On the contrary, a manicure with a predatory print makes the look softer and warmer.
Brown manicure with predatory print / Instagram
The editor-in-chief has compiled a gallery of beautiful options for fashionable autumn manicure from Instagram.
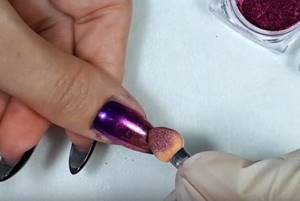
Gradient on nails with gel polish sponge and rubbing
A gradient on nails with gel polish using a sponge using rubbing is no more difficult than just using different colors:
- The nails are covered with a base and placed in a lamp.
- The next step is the flower bed, it is applied to the entire plate with a regular brush, in one layer.
- After drying, cover with a top coat without a sticky layer and polymerize.
- Using a sponge, scoop up a rub of one color and drive it in at the base of the nails to about a quarter of the length.
- Take turns using the same product in two more shades, apply to the middle of the plates and in the penultimate quarter.
- Excess rubbing is brushed off with a flat brush.
- All nails are decorated in the same way, and part of the free edge is covered with the brightest gold powder.
- All that remains is to shake off the excess, cover your nails with 2 layers of topcoat, and dry both.
You can use one color rub or a transparent silver one. But then the gradient is made with several shades of gel polishes, dried, covered with topcoat, polymerized, and mirror powder is rubbed onto all nails. The final layer is applied with a finish, which is also dried in a lamp.
You should always use a very small amount of rub, as the excess will come off the nails. If the product gets on the skin, remove it with a cloth moistened with a degreaser.
Watch the video on how to make a gradient using a sponge and rubbing:
Gradient on short nails with gel polish: which one should not be done
Gradient gel polish on short nails will look natural if:
- use no more than 2 colors;
- give preference to shades of the same range (white with pink, beige, latte or blue-blue, red-burgundy);
- make the base of the nail darker and lighten it towards the free edge;
- abandon the abundance of geometric lines and large ornaments.
All other ombre options, except the last one, are not only acceptable, but also ideal, helping to visually stretch out the plates and make them more graceful.
Manicure brown gradient
If it’s difficult to choose a specific shade of brown, take as many as possible, or even all of them.
A brown gradient manicure looks great on nails of any length. By giving each nail its own special shade of brown, you will get an unrealistically beautiful manicure.
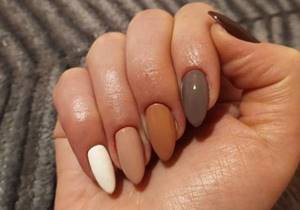
Fashionable brown manicure gradient / Instagram
Shading on nails with gel polish and sand
Shading on nails with gel polish and sand is called a sugar gradient and is done like this:
- A classic ombre is applied to the dried base. It can be a vertical or horizontal gradient, of two or three shades.
- The gel polish is dried in a lamp. Then the same tones are applied in a second layer, shaded and polymerized again.
- Now you need to cover your nails with topcoat and do not dry it. Sprinkle transparent powder or tint powder on top with a spatula, or you can use sand of several colors on different parts of the nail.
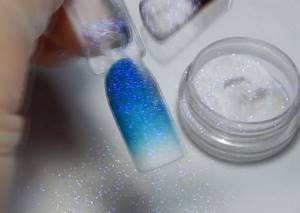
- You need to lower your finger down and tap so that the excess product falls off. Drying is needed again.
- Then they go over the nail with a trusty brush to remove the remaining unnecessary sand. The final stage is applying the top and polymerization.
Velvet sand cannot be used on the entire nail. Sometimes it is enough to highlight one or several stripes for them, near the sinus, in the center, along the cuticle, in a word, as your imagination dictates.
Watch the video for step-by-step instructions on how to apply a horizontal gradient with a sponge:
Matte chocolate manicure
In 2020, matte varnishes are in great demand among fashionistas, as they perfectly muffle the sometimes annoying gloss and make nails, and hands, visually more graceful.
The decor here will be unnecessary. A beautiful matte chocolate polish and carefully applying it to your nails is all you need for a chic velvet manicure.
Nail stylists say that chocolate matte polish fits perfectly on short nails.
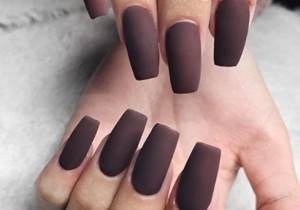
Matte chocolate manicure / Instagram
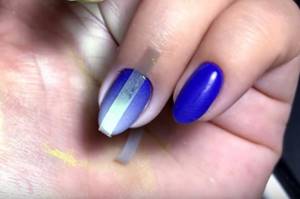
Gradient on nails with gel polish with white geometry
Gradient gel polish on nails with white geometric lines requires more effort than traditional ombre, although many of the steps are repeated:
- First, apply the base and dry it in a lamp.
- Then paint the nails with the main shade in 2 layers and polymerize.
- You need to go over the surface of the plates with a buff to remove the glossiness.
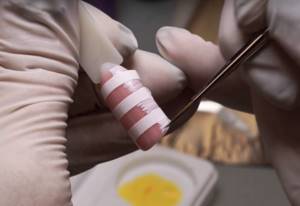
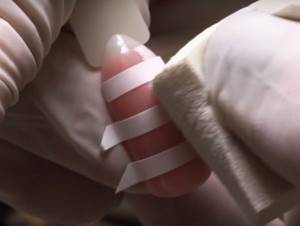
- Protective strips are applied to the nails where the base color needs to be left.
- White paint is sprayed onto the remaining open areas using an airbrush, maybe not evenly, but more on the free edge, less at the base.
- The protective strips need to be removed, and the ends of the nails should be lightly processed with a file to remove excess light pigment.
- Then, with a thin brush, white lines are drawn with gel paint along or across the plate, possibly diagonally, and polymerized.
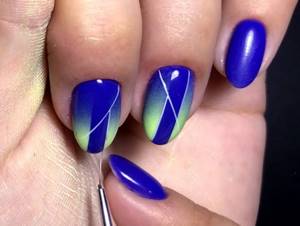
- All that remains is to apply the finishing coat and dry it too.
To complete this design, you can do without an airbrush and make transitions with a thin brush using white over a darker base tone.
Gradient gel polish using a sponge and stencil
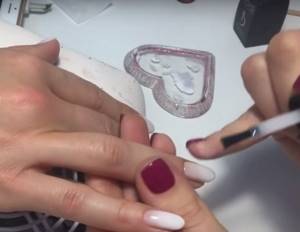
A gradient of gel polish using a sponge and a stencil turns out to be very catchy, so you can design one or two nails on each hand like this:
- The plate is covered with base and dried. The surfaces of the nails on which the stencil needs to be glued are treated with a buff.
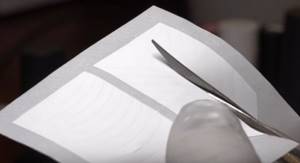
- Use a napkin to remove sawdust. The stencil is separated from the base with tweezers and attached to the nail. You need to smooth it out, fix it well and use scissors to cut off the parts that are outside the plate.
- Strips of gel polish are applied to the palette in the order in which they want to be seen on the nail, layering one color on top of another and blending the transitions. There can be 2-3 shades.
- A sponge is applied to this multi-colored print. And then it is leaned against the surface of the nail with a stencil so that the open areas are painted.
- Now you can peel off the protective film by carefully picking up the edges with tweezers and pulling in the direction of the design. The finger must be placed in the lamp.
- A top coat is applied over the dried gel polish. It is also polymerized.
A striped gradient is also made using stencils:
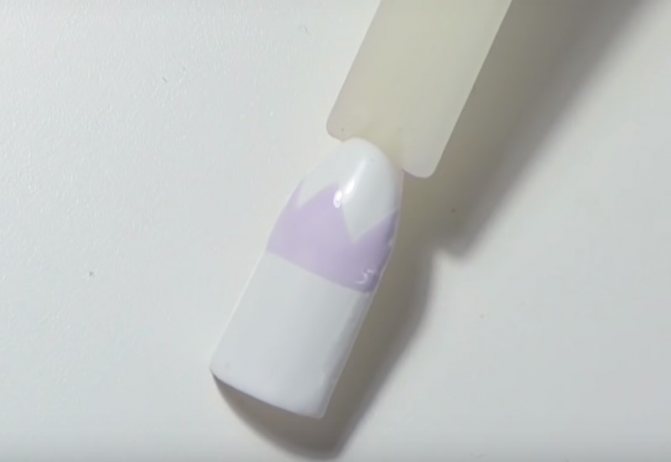
- The strips are glued onto a dried camouflage base across the plate.
- The remaining open space is painted with white gel paint on a third of the nail.
- Each mini-strip is shaded with a sponge closer to the middle of the plate.
- Dry and repeat steps 2 and 3 a couple more times.
- After the next polymerization, the strips are removed, the nail is covered with a top coat without a sticky layer, and dried.
- New stencil devices are glued again across the plate, but this time covering the gradient.
- Gel paint in 3 layers is applied to the open stripes, only on the other side of the nail and almost up to half of it.
- Each time it is shaded with a sponge and polymerized without removing the stencil.
- After drying the 3rd layer of white gel paint, the strips are peeled off.
- The last step is to apply topcoat and dry.
Watch the video on how to make a gradient with gel polish using a sponge and stencil:
Gradient sponge manicure at home
To quickly create a gradient manicure at home, you can use a sponge. The technique does not differ significantly from the previously discussed technique. The work is performed in this order.
First stage. Cut a piece from the sponge equal to your largest plate.
Second phase. Apply varnishes of the desired colors to a piece of sponge in the chosen order.
Third stage. Press the sponge onto your nails.
Advice! Renew your polish before each nail.
This technique is more preferable because you almost always have an unnecessary sponge at home, and you have to go to the store to buy a sponge.
At the end, cover the finished manicure with a colorless fixative.
Designing a gradient manicure using a sponge at home has an important nuance. If you are going to apply the sponge to the plates actively and quickly, use it to form no more than 3-4 fingers, otherwise the material will simply crumble in your hands. Therefore, prepare the required number of sponge pieces in advance. Fortunately, this is quite easy to do at home.
Geometric gradient gel polish at home
The following geometric gradient using gel polish at home is quite simple to do, despite the apparent complexity of the design:
- A little white varnish and colored varnish are laid out on the palette.
- A drop of the latter is mixed into the light gel using a “hair” brush.
- Using this mixture, draw 3 triangles in a row, the vertices of which should be at the beginning of the free edge of the nail.
- The coating is dried, and a little more color is added to the gel polish mixture.
- Use it to draw the next row of triangles, placing them lower and in a checkerboard pattern.
- After drying, steps 4 and 5 are repeated until the entire nail to the base is painted.
- The bottom row of triangles is made with dark varnish without adding white.
- After its polymerization, everything is covered with a matte topcoat and dried.
This design is done on 1-2 plates or on all fingers.
Geometry in combination with ombre can be in the form of waves, straight or irregular lines, and shapes. The main thing you need to do when creating a design this way:
- mix gel polishes with white on a palette or foil;
- work with a thin brush;
- dry each drawn detail.
Technologies for making gradient gel polish
To create a memorable gradient, you can use various techniques. Some require a little experience, while others are quite acceptable for beginners to create an unusual manicure at home. Please note that when applying gel polish or shellac, you must follow the general rules for performing a manicure with these products. For this you will need:

- UV lamp;
- base for gel polish;
- fixative;
- main varnish (if a gradient is applied to the nails, there should be several of them);
- nail polish remover.
Sponge application
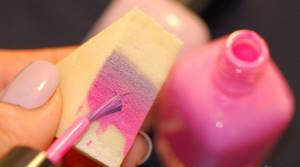
For one of the techniques for applying a gradient on your nails, you will need a dishwashing sponge or sponge. A small piece, slightly larger than a fingernail, is cut off from it. Two thick drops of gel polish of different colors are placed close to each other on the surface of the sponge. Using a brush, they should be mixed together, creating a color stretch. Then imprint the resulting gradient on the nails. It is important not to let the gel polish dry out.
Gradient brush
When using a brush, a gradient transition is created directly on the nail. You can do this in several ways, using different brushes:
- There is a fan brush used in manicure to create abstract designs on the nails. It is great for creating a gradient with gel polish. The shape of such a brush resembles a fan, and its size should not greatly exceed the size of the nail plate.
- The second option for making a gradient using a brush involves applying gel polish with a comb brush. Its width is much narrower than that of a fan brush, and in general it resembles an ordinary flat brush. Its difference is the sparse pile at the tip. It creates a smooth iridescence, and should be included in the manicure process at the stage of mixing two colors. You can also first apply one color of gel polish to the entire surface of the nail, and use a comb brush to carefully apply the second shade on top.
Advice: it is better to purchase brushes with rubberized handles. Plastic or metal can slip out of your hands at the wrong moment.
For short nails
With short nails, you can use all the same techniques as with long ones, except that they can cause difficulties due to the small surface being treated. In this case, gel polish can get on the cuticle and fingers. The most convenient way for short nails is the traditional one. The surface of the nail is covered with a base shade, and another is applied to it, creating a smooth transition with a narrow brush.
Vertical gradient
With this type of gradient transition, gel polish of different shades is applied in vertical stripes, overlapping one on top of the other. An interesting solution could be a transition that involves all fingers - it will start from the little finger and end with the big one. The shades should not contrast strongly with each other, and together the nails of one hand should represent a complete gradient transition.
Horizontal Gradient
When creating a horizontal pattern, you can be guided by two options: select colors from the same palette, resulting in a smooth color, or use contrasting colors, bringing originality and a little extravagance to the manicure.
Ombre gel polish
The term “ombre” refers to a gradient made with smooth shading of transitions from one tone to another. Ombre is done without sharp boundaries, unlike a regular gradient. You can use any application technique - sponge or brush. You need to know that doing ombre with gel polish is much more difficult than with regular polish, due to the consistency of the product, so it is better to first practice doing stretch marks on an artificial surface.
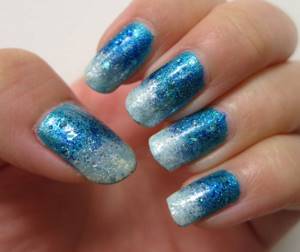
iridescent gradient
This solemn version of the gradient is achieved with the help of added sparkles. They are sold in specialty stores and are a loose, shiny powder. A manicure using it is performed according to the same rules as a regular one - you can create horizontal or vertical stripes, and apply glitter along the entire length of the nail before the fixer. Shiny shimmers look best on dark shades with a smooth transition from one tone to another.
Degrade
Degrade - transition from light to dark color. To do this, colors of the same tonality or the opposite are used, gradually moving from one to another through the use of intermediate shades. The degradation looks interesting if the gel polish is applied not in the usual way, but at an angle. You can also cover not all the nails on your hand with a gradient, while painting others with a single-color coating.
Glitter Gradient
There is a technique by which a gradient is created with colored sparkles. To do this, completely cover each nail with one color and apply glitter to the dried gel polish. This must be done by adhering to the rule: leave the base of the nail uncovered, and closer to the tip, press harder on the brush, adding more glitter. Thus, it turns out that the tip is covered with glitter will be thicker, which will create a gradient effect.
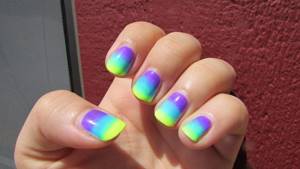
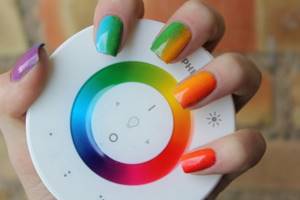
Rainbow Transition
This unusual type of nail coloring is distinguished by the selection of colors - they imitate a rainbow. You can apply them however you like - horizontally, vertically, at an angle, or by painting each nail a separate color. You can create a smooth transition by mixing three primary colors and creating additional ones from them, or apply gel polish in separate lines with clear boundaries.
Using an airbrush
This method of painting is also called air painting; it is performed using a special device - an airbrush. It is usually used in salons, but it is also easy to use at home. Its action is based on the jet spraying of a special paint, which is applied dropwise to the coated nail. It is enough to apply only a layer of fixative on top. This device greatly simplifies the application of a gradient thanks to a directed jet of pigment, which can be controlled and the color saturation adjusted. The paint is washed off from hands with ordinary soapy water.

Nail coloring with pigments
The use of dry pigments on nails has become widespread. This specialized product is a powder paint for adding color to the nail plates. The pigments are applied with a dry brush to the dried surface of the nail. You can cover the nail plate completely with one color and apply pigment powder only to the tip, but it is also possible to apply dry paint directly to the base, without using liquid gel polish. In any case, applying pigments is as convenient as possible—with a brush you can easily create smooth transitions.
geometric gradient
It is created from clear geometric shapes. In this case, the boundaries of different colors of gel polish do not mix, but retain their clarity. To get even shapes, you can use tape, but it is most convenient to use special stencils, of which a large number are now produced. Such patterns can be applied to all nails, or you can select only one or two.
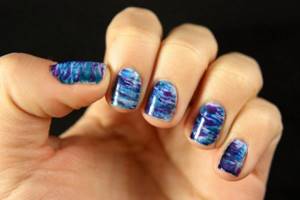
"Ink" gradient
The shading does not have to be symmetrical; chaotic also looks interesting, and it can be done in any tones:
- A drop of gel polish in two colors (for example, black and blue), as well as a top coat, is applied to the palette.
- The nails are prepared and the base applied to them is dried.
- At the base of the plate a top coat is applied in a stripe, the middle part is coated with blue varnish, and the free edge is coated with black.
- On the undried top coat, make streaks with both colors using a flat brush.
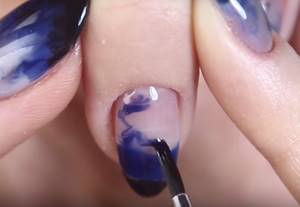
- It is used to smear the border between shades, after which the nail is dried.
- Then additional black and blue stains are applied with a hair on the transparent part.
- The free edge is drawn more clearly in the darkest tone.
- All that remains is to dry it, cover it with top coat, and polymerize it again.
Liquid varnishes are perfect for this manicure. But they need to work quickly. And the areas near the cuticle and sinuses should be painted with a thin brush after the first drying.
Watch the video on how to make an ink gradient:
Original gradient
The original ombre design involves painting each nail a different color, but all shades must belong to the same range. For example, tones from soft pink to muted red or from light green to sea green are used. This design looks more organic on young girls. And it is better to use pastel shades.
We recommend reading the article on how to do a manicure with red gel polish. From it you will learn about manicure design options for short and long nails and application techniques. And here is more information about how to remove shellac at home.
Gradient is the richest design option, and many of them are easy to implement. And at the end you can get a unique manicure, calm or flashy - whatever you want. After all, the technique of applying varnishes gives you the chance to use colors that differ by a couple of tones, and contrasting ones.
Gradient manicure at home with a sponge
The fastest way to create a gradient manicure at home. Prepare your nails first. Do the following:
- get rid of varnish if there is any;
- cut the cuticles with cuticle cutters designed for this purpose;
- give the plates the desired length and shape.
Gradient manicure at home is created in several steps. Follow the given sequence.
First step. Coat the plates and the skin next to them with peach oil.
Second step. Apply thick layers of your chosen polishes to the sponge. Apply them in stripes in the desired order.
Third step. Bring the sponge to the nail plate and seal. Do this carefully - the entire surface should be painted.
Repeat the procedure on all fingers. Renew the polish on the sponge for each new nail.
Fourth step. Remove any remaining coating from cuticles. At home, it is convenient to use a cotton swab pre-moistened in a special liquid.
Fifth step. Cover the finished manicure with a special fixer. Thanks to this coating, your gradient manicure created at home will last much longer. The fixative also levels out roughness and other irregularities left by the sponge.
Afrikantova: I weighed 80 kg, and now I’m 49! My diet is simple as hell. Write it down...
In order not to grow old, Ekaterina Andreeva constantly wears...
This will remove all the fat in your body! In a month it will go down to -30 kg! Read it before it's deleted!