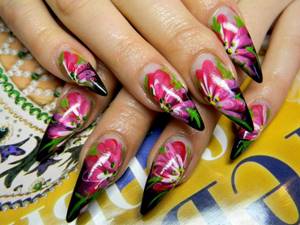
general information
If you want to do extensions at home, then the first thing to start with is determining the type and material. The choice of materials for the procedure will depend on this. The easiest way for beginners to work is with gel.
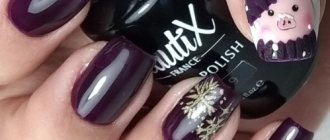
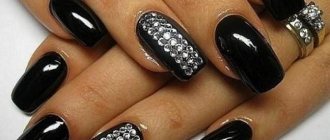
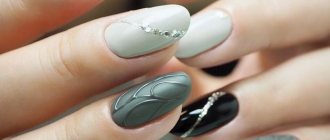
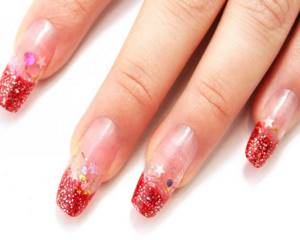
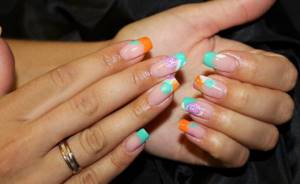
Extension can be done with gel, biogel or acrylic. Any material will last on nails for up to three weeks if the technology is followed. Gel and acrylic allow you to grow nails to any length, but biogel - only up to 3 mm. Gel nails are thicker but easy to repair. Acrylic ones, with the same strength, can be much thinner and more natural, but they cannot be repaired, but only removed and built up again. In addition, acrylic is harder to work with.
According to the technology, extensions can be carried out using forms or tips. Extension on forms allows you to create more natural and neat nails, but requires your own free edge of at least 1.5 - 2 mm. Tip extensions can be done to any length and complex shape, even on very short nails.
https://youtu.be/UTwqJcNckMU
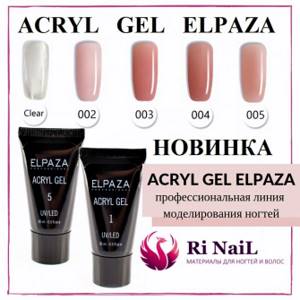
What is acrygel or polygel for nail extensions?
Polygel is a product that combines the best qualities of acrylic and gel:
- strength (in the formation of detachments, does not crack) - a plus from the acrylic system;
- plasticity is a bonus from the gel, because the material is suitable even for those with a very thin nail plate.
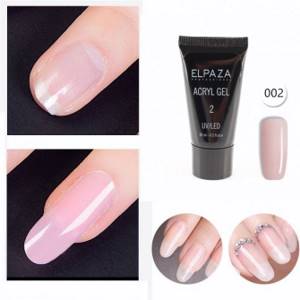
The product is ideal for extending and modeling nails and strengthening nails. One of the main advantages of polygel is that its consistency is softer than acrylic, but harder than gel.
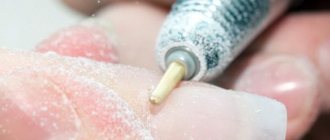
Acrigel is completely ready for use; there is no need to carry out additional manipulations with powder and monomer. The product comes in convenient tubes and to get started you just need to squeeze out a small ball.
Advantages of acrygel over gel and acrylic
Distinctive features of polygel:
It does not have a pungent odor or specific dust that is formed during operation, unlike acrylic. Polygel or acrygel for nail extensions does not contain monomer; its particles are much heavier, so they simply settle on the work surface and do not fly in the air.
Has a natural look after extensions. The acryl gel coating is much thinner than acrylic, so your nails look as natural as possible.
Polygel, unlike acrylic, does not harden during application until it is dried in a lamp.
This greatly simplifies the work of the master. Acrigel, unlike a simple gel, does not spread over the nails, does not flow onto the cuticle and remains in the place where it was applied.
What lasts better – gel or acrygel? Definitely: the second material exceeds the first in durability. Most often, the acrygel coating lasts until the owner of the manicure has a desire to make a correction due to overgrown nails.
Also, do not forget about the healing properties of acrygel. It is great for restoring injured nails and restoring corners.
Materials
There are a number of tools and materials that you will need regardless of what type of extension you choose. You will need them at the preparation stage:
- Wire cutters;
- Cuticle scissors (for trimmed manicure);
- Files;
- Grinders;
- Brush for removing dust when filing;
- Orange sticks;
- Degreaser (bond);
- Primer;
- Hand sanitizer;
- Brushes for one or another type of material.
[yandex2] [google2]
Gel nail extensions for beginners assume that you will purchase, in addition to those listed, the following materials:
- UV lamp of at least 36 watts;
- Forms;
- Tips;
- Glue for tips;
- Three-phase gel (several types of single-phase gels can be used, but this type is not too easy for beginners);
- Varnishes, decorative elements and other materials for creating design.
https://youtu.be/Dp9mWm3K3_g
When performing acrylic extensions, other materials and equipment will be required. So, you do not need a UV lamp, since acrylic dries in air. The choice between forms and tips and glue for them depends on the chosen technology. Varnishes and decorative elements remain the same as with gel extensions. But directly for sculpting you will need the following materials:
- Monomer;
- Sculpting powder;
- Camouflage powder (two shades when performing a French design).
Video training on nail extensions at home is presented below. It describes the main stages of some technologies.
Do-it-yourself nail extensions at home for beginners (video lessons)
Hello again. This is the umpteenth time we undertake to teach you such an undeniably interesting, and most importantly useful, activity as manicure. Now we will touch on the topic of nail extensions for beginners at home. The topic is more than interesting - after all, it is one thing to receive services of this kind in special beauty salons, but another thing is to personally control the entire process from start to finish. The main thing in doing nail extensions at home for beginners is not to give up. As in any business, skill is determined by experience, which, as we know, can be negative. There is no need to panic and give up everything at the first failure: the first pancake often turns out to be lumpy, isn’t it? To acquire basic knowledge, we recommend watching the first video lesson:
Well, the procedure for doing nail extensions at home for beginners doesn’t look as terrible and scary as originally expected, does it? However, you should not miss the fact that the sequence of actions plays a significant role - if you miss one of them, it is quite possible that you will have to start the extension procedure all over again. It is worth mentioning that there is no need to overdo it in filing a natural nail while preparing for DIY nail extensions at home: you just need to remove its top layer, but there is absolutely no need to damage it. Now we invite you to consolidate the basics. Let's watch the second video lesson: https://www.youtube.com/watch?v=6-HJWcDcxsg As you can see, there is nothing difficult in doing nail extensions at home. For beginners, the main thing is to start and not stop there, because the skill of doing your own nail extensions at home will not only be useful in cases where you do not have enough time, but also captivates the process itself. In general, the owner is the master, and it’s up to you to make a choice in the methods of carrying out the procedures. Whether it will be home nail extension with gel or acrylic is your choice, but since we are already learning, we will give advice: acrylic extension is more suitable for beginners. In any case, we hope that you will be able to master this simple skill with minimal blood loss. We express our gratitude for your attention. Finally, we offer another small piece of theory about nail extensions at home for beginners. Watch the video: https://www.youtube.com/watch?v=Jf_PINivQxQ We wish you success in your studies. We sincerely hope that you found it interesting and truly useful. As usual, we ask you to share your work (and if your portfolio allows, then the best) with us in the comments.
Preparation
Hand preparation is universal for any type of extension. Perform a thorough manicure, remove cuticles and reduce the length of the nail as much as possible when applying nail extensions. When extending onto forms, leave a small free edge.
Sand the plate using a coarse sander for natural plates. It is necessary not only to remove the gloss, but to level the plate. However, you shouldn’t over-file the plate either, especially with gel extensions. Strengthen the forms on the plates or glue the tips. When gluing tips, you need to carefully ensure that there are no air bubbles between them and the nail.
Treat the nail with a dehydrator and degreaser. After this, the plates must not be touched. Apply primer and wait a few seconds. As soon as the scales have opened and the nail has turned white, begin nail extensions for beginners at home.
https://youtu.be/f3VPP581P7c
Types of nail correction with gel
Each master carries out this procedure differently. It all depends on the condition of the surface and the applied design. There are several common options:
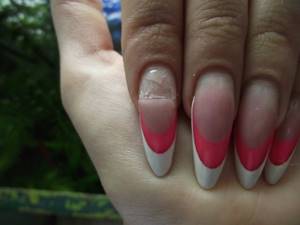
- Small gel correction. Repairs are carried out only on damaged areas where there is peeling or cracking. This requires a minimal amount of time and money. The photo below shows the condition of the nail requiring such treatment.
The photo was taken before correction.
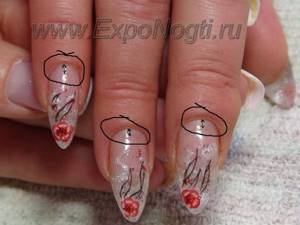
- Average correction. Thanks to this manipulation, you can hide the area of the overgrown nail plate.
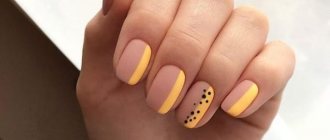
- Big correction. The procedure resembles a new extension process. The master will be able to change the design or form a different shape.
Step-by-step instruction
Nail correction with gel at home.
At the very beginning, it is important to remove the old polish and get rid of the cuticle, that is, do a classic manicure. If there is no experience in nail correction, then the cuticle is removed after all manipulations are completed. Otherwise, you can deform the base and make it sensitive. Below are step-by-step instructions on how to correct extended nails:
- Removal of the old gel layer and careful processing. Nail polish remover is taken and applied to the surface of the plate. The old layer where there are defects or peeling is removed with a file. The overgrown area near the base must be leveled with the level of the overgrown nail. There should be no air remaining under the gel, which subsequently leads to premature destruction of the material.
- The nails are given the necessary shape and length to create a new layer.
- Use a soft brush to thoroughly remove dust. The surface is carefully treated with a degreaser.
- To perform the procedure at home, single-phase material is perfect for beginners. It will help reduce correction time and simplify the task. When using a single-phase gel, there is no need to incur additional costs because it is quite liquid and easy to form. For more understanding, it is recommended to watch the video tutorial for beginners below.
- Coating nails with primer. This is a binding liquid that is used as a primer.
- Applying the first layer. It should be as thin as possible. After application, the nail is dried in an ultraviolet lamp for five minutes.
- When applying the second layer, it is necessary to fill all the areas that were cut out with the material. Drying time – 14 minutes (depending on the lamp).
- After complete drying, sawing and sanding is done using a hard file. At the end, the surface of the nail is degreased and dried.
- Applying the finishing layer and drying it in an ultraviolet lamp.
It is important that each layer is dried correctly. In this case, artificial nails will last a long time and will delight you with their attractive appearance. The end result will be a perfectly flat and smooth surface.
As you can see, the correction can be done at home, the main thing is to follow each step from the instructions step by step.
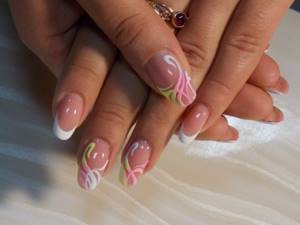
For French
Sometimes there is a need to correct a gel jacket; the following video tutorial for beginners will tell you about the features of this type of correction: