Basic scheme for drawing arrows on the eyes
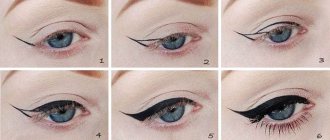
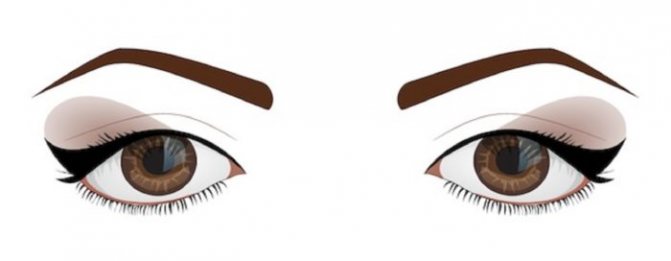
The basic scheme for drawing arrows on the eyes is quite simple. It will help beginners create smooth lines and “not reinvent the wheel.” Let's look at it step by step:
[/row]
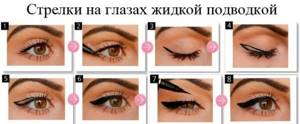
- First we draw the bottom line: it starts from the outer corner of the eye and continues the line of eyelash growth. At first, it is better not to make the notch too long - 0.8 mm - 1 cm is enough;
- From the center of the upper eyelid (guide by the pupil), draw a line to the created “tail”;
- Draw a connecting line from the inner corner of the eye to the top of line 2;
- We paint over the resulting voids in the resulting outline. The arrow is ready!
You can vary the length of the tail, the thickness of the arrow and its ending depending on your preferences and goals.
[/vc_column][/vc_row]
[vc_empty_space height=”20"]
At first, you will often have to redraw the arrows again, erasing the previous version, but over time you will get better at it and learn how to create the desired outline the first time!
Gel eyeliner, its pros and cons
Each makeup product has its own advantages and disadvantages, let's take a closer look at them:
Pros:
- Easy to use, even a beginner in makeup will be able to draw cute arrows with it.
- With gel eyeliner, you can draw: long, short or wide arrow, whichever you like best.
- This eyeliner is very long lasting and will not smear on the upper eyelid or crease into the corners of the eyes.
- It has a rich color; by the way, this is the only type of eyeliner that has such a rich and bright palette of colors.
- It lasts a long time.
- Will not irritate your skin, even if you have sensitive skin.
Minuses:
- It dries quickly on the eye, so to apply it you will need a special angled brush.
- Due to its persistence, it is very difficult to remove and will require special makeup removers.
How to choose the right arrow shape
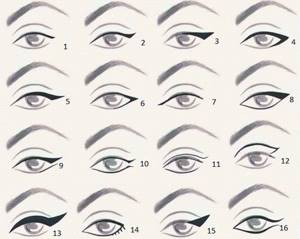
Depending on the location of the eyes and the shape of the face, the following recommendations can be distinguished:
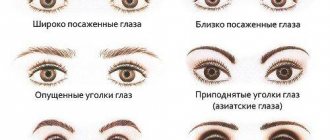
- For close eyes. It is recommended to create arrows, the top line of which starts not from the inner corner of the eye, but from the middle of the upper eyelid. This will visually widen the eyes. Forms No. 3 and No. 6 from the photo above are also good;
- In the impending century.
In this case, a special approach is required, which is discussed in detail in the following video lesson: [v[vc_empty_space height=”20"]
Types of arrows photo
It would seem: “What could be difficult there? Draw a line from the base of the eye to the temple and point it upward?” However, not all eye and face types are suited to the same eyeliners. At the same time, for high-quality implementation, it is necessary to study the theoretical part and learn to apply it in practice. In this case, problems will not arise.
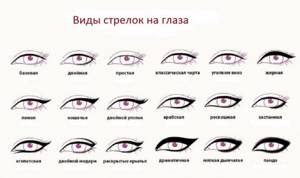
Almond-shaped eyes were luckier than others. Each type of arrows looks appropriate, beautiful and fashionable on them. An acceptable option for daily wear is classic arrows.
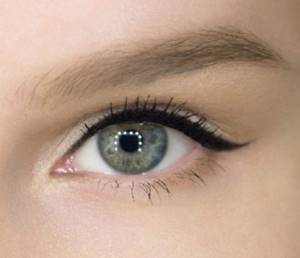
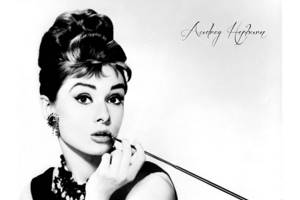
And also Audrey Hepburn's eyeliner.
On girls with small eyes , thin or double arrows will look better.
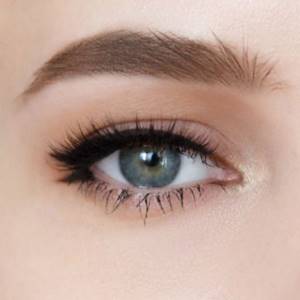
If nature has given you round eyes , it is better to lengthen them. To do this, apply wide arrows with a long end to the eyelid. At the same time, the width should remain uniform along the entire length.
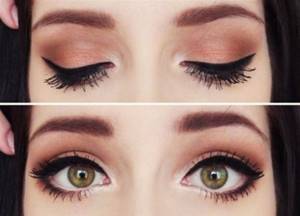
For girls with narrow eyes, the arrow is drawn strictly on the eyelid, without extending the tail beyond it. A light tone is applied to the lower eyelid.
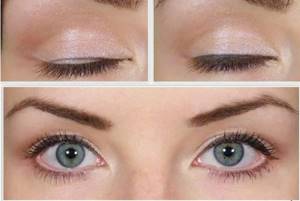
For representatives of drooping eyelids , a wide arrow drawn along the entire length of the eyelid with a long tail will come to the rescue.
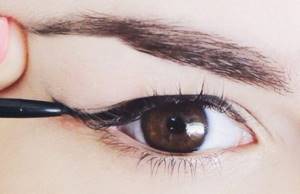
For girls with wide-set eyes, it will be possible to bring them closer with the help of arrows drawn to the bridge of the nose.
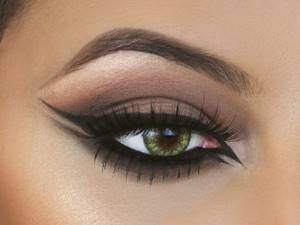
In the opposite case, if the eyes are close-set , the beginning of the arrow is at the middle of the eyelid and continues, with a rise, towards the end. Keep the line thin, with a bend towards the temple.
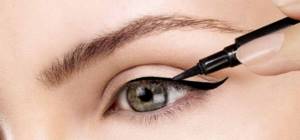
The raised corners of the eyes allow us to call them “ Asian ”. For them, a drawn arrow from the base of the eyes, which tends to the temple, would be appropriate. On the lower eyelid it is possible to use a thin liner, starting from its middle.

Correcting the shape of eyes with drooping corners will help with arrows drawn with a sharp, wide upward bend.
How to draw arrows on the eyes
It is very difficult to answer the question “what is the best way to draw arrows” - everything here is purely individual. The modern cosmetics industry offers numerous products, each of which has its own advantages and disadvantages, and you need to choose from them according to personal preferences only through a series of trial and errors! We will outline the main types of funds:
Eyeliner
For those who are looking for a way to learn how to draw arrows on their eyes, eyeliner will be an excellent help - an ageless classic, with the help of which fashionistas have created their arrows for decades in a row! Today at least 2 types of eyeliners are known:
[/ro[/row]
[/ro[/row]
Liner / Marker / Felt-tip pen
[/ro[/row]
Pencil
Before drawing arrows with a pencil, you need to consider some features of using this tool:
We draw arrows with a pencil along with a step-by-step video lesson from Elena Krygina:
[vc_[vc_empty_space height=”20"]
Shadows
Before drawing arrows with shadows, it is important to create a base for the shadows using a primer and prepare a thin angled brush. Let's look at the application step by step:
- Guided by the diagram above, we line up the body of the arrow, starting from the inner corner of the eye and ending with the tip. To do this, you can use a small amount of pigment so that in case of an error you can easily make a correction;
- Carefully connect the resulting points, trying to create an accurate, even line;
- Paint over the spaces;
- It is better to paint eyelashes only after the arrow is ready.
To make the color more saturated and bright, you can apply shadows to the finished arrow, made with a pencil or eyeliner.
Combinations of funds
To create perfect arrows, all means are good. You can easily combine several cosmetic products, for example:
- Gel eyeliner + shimmer shadows or metallic shadows. By working the arrow on top with shadows, you will add shine and brightness;
- Pencil + eyeliner. It is much easier to erase a pencil in case of a mistake. Therefore, a beginner can create an arrow first with a pencil, and then work on the finished version with eyeliner. In addition, the pencil ideally masks the gaps between the eyelashes, so it will be an excellent addition to the eyeliner in filling the space between the eyelashes;
- Pencil + matte shadows. An arrow drawn with a sharp pencil will look beautiful if you shade it a little with black shadows. Be careful to blend only the outer edge of the outline!
How to make arrows for eyes of different shapes
Liquid eyeliner is very difficult to apply. It is produced in the form of a felt-tip pen or in the form of a tube with a brush. Liquid liners can only be applied to the skin; a dry pencil is used to draw the mucous membrane. It takes a lot of practice to get the lines perfect.
When using liquid eyeliner, it is important that the arrows are uniform in color, otherwise they will look blurry. By changing the angle of the brush, you can change the thickness of the line. Liquid eyeliner dries quite quickly, so you need to draw quickly.
When buying a liquid liner, you need to pay attention to the expiration date, since dry eyeliner will not create perfect eyeliner, and it can also scratch the eyelid.
Eyeliners in makeup were first used in Ancient Egypt to create a cat-like eye shape. The Egyptians worshiped these animals and considered them sacred. Arrows with this effect do not lose their popularity today. The tail must be drawn sharp and wide.
The line should be drawn from the outer corner of the eye to the temple. The essence of the cat-eye technique is to lengthen and narrow the shape of the eye. When using black eyeliner, you may end up with aggressive makeup; in this case, you can use liquid liners of other colors depending on the shade of your eyes and skin.
Arrows must be selected depending on the shape of the eyes. Correct lines will help give symmetry and harmony. The drawing technique should depend on the type of girl’s eyes.
| № | Basic eye shapes | Description |
| 1 | Almond shaped eyes | The eyes are oblong in shape. The outer corner is higher than the inner corner. |
| 2 | Eyes with drooping corners | These are eyes whose outer corners turn down. |
| 3 | Small eyes | Eyes that are small in size compared to other facial features. |
| 4 | Round eyes | These are eyes that have a wide eyelid. As a rule, they are very voluminous and convex. |
| 5 | drooping eyelid | This is a type of eye in which the fold of the upper eyelid completely or partially overlaps the movable eyelid. |
| 6 | Asian eyes | These are eyes that have an elongated shape with a narrow slit. |
Almond shaped eyes
Almost any type of eyeliner and makeup technique is suitable for eyes of this shape. A natural line with a thickening from the middle of the upper eyelid will look most expressive. The tail should be thoroughly drawn, connecting to the lower lash line.
The almond shape is close to ideal, so you can experiment with drawing arrows. The main thing is not to make the eyes too elongated, but to maintain their natural shape.
With this type of eye, the look seems tired and sad. It is the arrow that can fix this. The line begins in the area of the pupil, the tail extends to the end of the strip of mucous membrane. With this technique, the corners are raised, making the look brighter. The inner corners remain untouched.
Small eyes
The arrows will help to visually expand small eyes. When drawing, you need to step back from the inner corner. The main thing is that it is not recommended to completely outline the outline, as this will make the small size of the eyes even more noticeable. You can shade the arrow line on top of the liquid eyeliner with a pencil. It is better to choose not black for drawing, but metallic shades (gold, silver, bronze).
Round eyes
The arrow will help visually give round eyes an almond shape. The line should be thin, and the end of the arrow should be drawn with a horizontal stripe. Thus, the arrow lengthens the eyes on the sides, making them less round. The main thing is not to thicken the arrow in the pupil area. You can also darken the mucous membrane of the eye with a pencil to visually reduce the roundness.
drooping eyelid
How to draw arrows with liquid eyeliner on yourself with a drooping eyelid, and in general, doing bright eye makeup is quite problematic. It is generally believed that this is a sign of age. But drooping eyelid is an anatomical feature that can also occur in young girls. Such an eyelid can hide the arrow, moreover, because of this, the eyeliner wears off faster.
It is better to choose a waterproof liquid eyeliner, so that the drooping eyelid will not be able to erase the arrow during the day. If your eyes are large, you need to apply eye shadow in addition to the eyeliner. This way the look will be more harmonious.
Asian eyes
Basically, eyes of this type are narrow in shape. It is best to choose thick lines. To make wide arrows perfectly clear the first time, you can first draw lines with a pencil. Life hack from makeup artists: if you draw the outline of the inner eyelid with a white pencil, your eyes will appear wider.
Slanted eyes should not be completely outlined with black eyeliner, because this will make the shape of the eyes more noticeable. You can draw both perfectly thin and wide arrows on your own using the above tips and recommendations. Experience will help you improve the skill of drawing light lines using liquid eyeliner. Arrows will make your look brighter and more expressive.
There are several main makeup trends with arrows:
- correctly drawn arrows add expressiveness and sexuality to a woman’s look;
- using various types of eyeliners, you can eliminate physiological defects in the shape of the eye;
- The arrows on the eyes add brightness to the image of a woman.

Currently, there are a huge number of eyeliners. They not only apply differently, but also create their own unique effect on a woman’s eyes.
Liner
The liner is an eyeliner with a hard tip.
In width they are:
- thick - for wide arrows;
- thin – for drawing a contour on the eyelid;
- classic - for arrows of different widths.
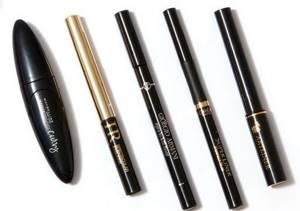
Based on texture, liners are divided into:
- gel - for bright arrows. Suitable for daytime and evening makeup;
- persistent - resistant to water, especially relevant in summer;
- powdery – they give a matte finish to the eyeliner, the look becomes expressive and not aggressive.
How to draw arrows on the eyes with eyeliner step by step, according to special instructions:
- Initially, the eyelid is degreased and powder is applied;
- You need to start painting from the outer edge of the eye;
- the bend of the arrow is a continuation of the lower eyelid, and the length does not exceed the length of the corner cilia;
- A line is drawn from the tail of the arrow to the middle of the eyelid, and from the middle to the corner of the eye.
The main features of the liners are:
- bright rich black color of the hands;
- various types of applicators, thanks to which you can draw classic and artistic arrows;
- the brightness of the hands remains throughout the day;
- the eyeliner is quickly fixed and does not spread;
- the arrows cannot be shaded.
Eyeliner-felt pen
The felt-tip eyeliner is a felt-tip pen with a felt tip.
There are different types of felt-tip eyeliners:
- waterproof;
- viscous;
- liquid;
- matte;
- glossy.
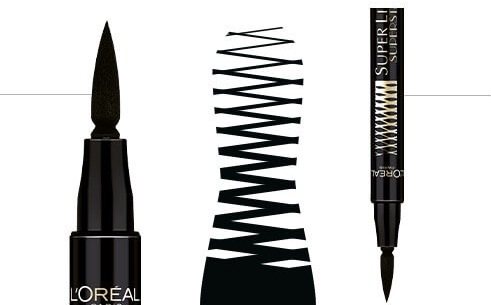
There are several tips for drawing arrows:
- good support is necessary so that the hand does not tremble;
- the felt-tip pen is directed parallel to the growth of the cilia;
- first, the interciliary space is drawn;
- the tail of the arrow continues the section of the eye, the arrow should look up;
- the arrow thickens towards the outer edge of the eye.
Among the features of this eyeliner are:
- ease of application;
- ease of use compared to classic liquid eyeliners;
- Saves time when drawing arrows.
Pencil
The pencil is used mainly for applying daytime makeup. To get beautiful arrows, you need a sharpened pencil.
It is important to remember when drawing arrows with a pencil:
- the interciliary space is painted over;
- symmetrical tails of the arrows are drawn;
- a line is painted along the eyelashes and connected to the tail. To make the arrow perfectly straight, it is necessary to pull the skin of the edge of the eye when drawing;
- The arrow needs to thicken towards the outer edge of the eye.
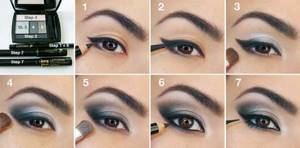
The main features of using a pencil include:
- natural looking arrows;
- difficult to use, not recommended for beginners;
- easy to shade;
- During the day, the arrows may become smudged.
Dry eyeliner
Dry eyeliner is based on wax. Professionals like to use it because they can achieve different makeup effects on the eyes. At home, applying eyeliner requires patience.
Basic application rules:
- it is necessary to wet the brush: the more water there is, the more intense the color;
- take the required amount of dry eyeliner;
- draw the eyelid;
- remove excess with a cotton swab.
Features of using dry eyeliner include:
- high durability;
- obtaining various effects on the eyes;
- minimum price.
Gel eyeliner
Gel eyeliner consists only of natural dyes and is based on various types of resins and wax.
To draw beautiful arrows, it is important to apply eyeliner correctly:
- To create arrows you need a special brush, thin and elastic. Sometimes it is sold complete with a product;
- you need to take a small amount of product and draw an arrow with small strokes;
- it is necessary to connect all the lines, draw a tail;
- shade.
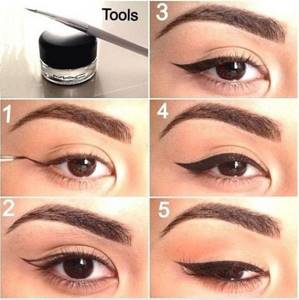
Gel eyeliner is loved by makeup artists because it allows you to apply makeup correctly and quickly.
Features include:
- easy to apply, arrows are clear and even;
- waterproof;
- dries quickly on the eyelid, so it will not rub off or smudge;
- There are many color pigments in the composition, the arrows are bright and saturated;
- does not cause irritation.
- economy of use.
Don't miss the most popular article in the section:
Fashionable haircut for short hair. Photo, front and back views.
How to draw arrows on the eyes with eyeliner: it is best to consider the process of creating classic arrows step by step. Classic arrows are a line on the upper eyelid, painted at the base of the eyelashes with a tail slightly raised upward.
To draw classic arrows you will need:
- large and small brushes;
- matte and light shadows;
- gel eyeliner;
- black pencil;
- base for shadows.
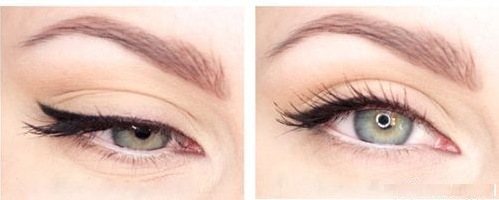
How to draw regular and even classic arrows:
- The upper eyelid is painted over with the shadow base;
- matte shadows are applied to the upper and lower eyelids;
- using gel eyeliner and a thin brush, draw the tail of the arrow; it is a continuation of the lower eyelid;
- a thin line is drawn along the eyelashes;
- the tail of the arrow is connected to the line at the eyelashes;
- The interciliary space is painted with a black pencil;
- Black mascara highlights the eyelashes. Tinted eyelashes will add softness and fullness to your look.
Double arrows
How to draw arrows using available tools
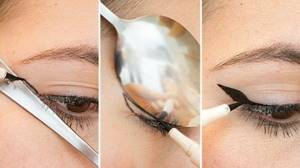
- Spoon. With a spoon it is easy to create graphic corners of the arrows. Use a teaspoon as a ruler, placing it firmly on the eyelid in the desired position and tracing it with eyeliner.
- Scotch. Thin transparent tape is a good helper in creating a beautiful arrow. Glue a small piece to the lower corner of the eye so that you can draw the bottom line. Make sure that the tape is applied symmetrically on both eyes! Also, in order not to spoil the result, it is not recommended to remove the tape until the cosmetics are completely dry.
- Stencil. Today there are many different stencils, with the help of which even experienced makeup artists sometimes draw arrows. You can buy them at any beauty salon, and the principle of their operation is in many ways similar to eyebrow stencils.
- A plastic card. Drawing arrows with a plastic card is quite easy if you manage to fix it well. Otherwise, if your hand shakes, your makeup will be ruined.
It’s not difficult to create straight arrows using improvised means. However, the best assistant here is experience. By training daily you will achieve excellent results.
Spoon
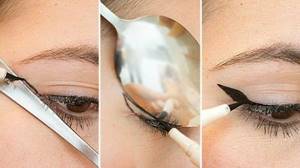
It seems to be the last thing that comes to mind when you think about using it in makeup (unless you've seen a video of it being used). Using this cutlery, you can draw arrows and even make an outline.
Plastic card or business card
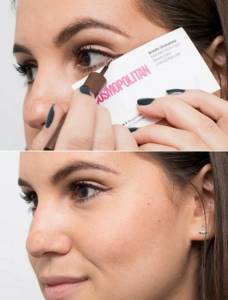
The principle is still the same: you need to apply the card to the skin at the desired angle and simply draw it as if along a ruler. Before use, it is recommended to wipe the card with an antibacterial agent or wipe.
Which brush is best to draw arrows?
Eyeliner brushes can have a pointed shape or a flat, beveled shape - both options have their place, and both have many of their fans. If you need the thinnest possible arrows and literal filigree of lines, then, of course, thin brushes are your option. If you need basic arrows and ease of application - so that the tail of the arrow literally appears on its own, then an angled brush (which is often used in eyebrow shaping) is your option. Everything is achieved with practice and you will come up with the final, most convenient option for yourself solely with experience.
By points
Who said that arrows need to be immediately drawn in one line without lifting your hand? Prepare a “draft” for yourself in advance to make the task easier for yourself. This technique will especially help those who like arrows drawn with liquid eyeliner - the most difficult to use. At the same time, when using felt-tip pens, pencils and other types of liners, this trick will also come in handy. Using eyeliner, place several dots in one row along the lash line. Or draw a dotted line. Here it is, a “sketch” of the future arrow. Next, simply connect the dots or strokes with one line. By the way, in order to minimize the risk of error, makeup artists recommend not working with eyeliner “by weight.” Your elbow needs support to keep your hand from shaking, so place it on the table.
