- 1863
- 0
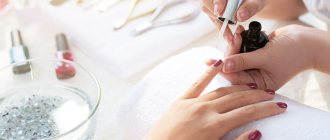
A beautiful and neat manicure can transform any woman, making her hands attractive and well-groomed. You can draw attention to your nails with an unusual design, using drawings or patterns on your nails. To create a bright and chic manicure, women have to turn to professional nail design artists, since not everyone has drawing skills. For those who are ready to experiment and want to do a trendy manicure on their own at home, we offer you to get acquainted with a fashionable novelty in nail art - stamping, with which you will quickly learn how to create fashionable nail designs, apply a variety of patterns, pictures, even without knowing how to draw .
What is stamping
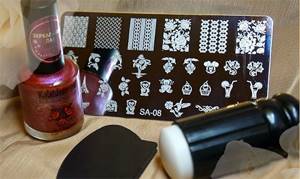
Stamping - from English. language "stamping". This is a modern nail design technology using a metal stencil, stamp and spatula. Provides the opportunity to apply equally complex designs to any nail.
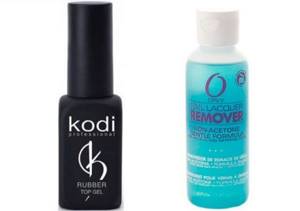
A stamping kit is offered in any specialized store. Choose high-quality sets, because the appearance of the manicure depends on this. The scraper must be tight to effectively remove excess varnish. Choose a stamp that is moderately elastic so that the design transfers well. Varnishes are preferably thick, with a bright and dense color, so that the design is printed as accurately as possible.
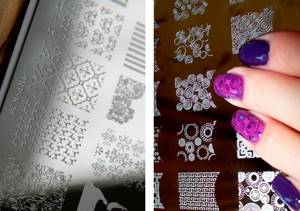
Set for stamping with gel polish
The metal stencil plate is produced in different sizes. The tool includes from 4 to 100 design options. Images vary in complexity. Both a minimalist style (lace, bows, flowers) and complex patterns reminiscent of a mantra are in fashion.
The advantages of stamping include:
- ease of use of the kit;
- quick application;
- the ability to choose a design;
- amazing result.
Step-by-step nail design using stamping technique
Before we start decorating our nails, we traditionally carry out procedures for preparing the handles. Don't forget to get rid of cuticles and shape your nails into the desired shape.
We cover the nails with a base coat and a layer of varnish of the main color. We dry the varnish thoroughly so that when applying the design it does not spread and spoil all our work.
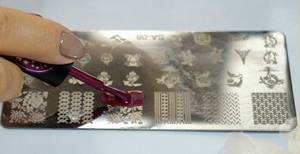
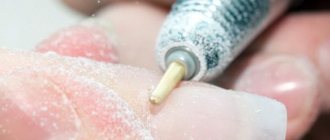
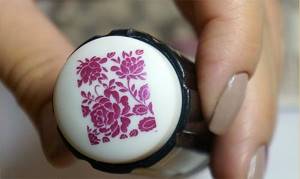
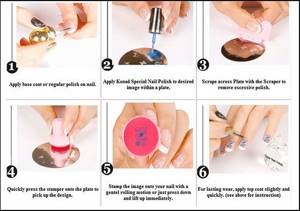
Now we take the stamping varnish and apply it to the image we need on a metal plate. With a fairly quick and confident movement of the hand, we remove excess varnish from the disc using a scraper.
We press the stamping stamp against the image on the plate. If the design is large and does not fit on the center of the stamp, you need to make several rolling movements to ensure that the entire pattern is imprinted. Here it is advisable to inspect the stamp and evaluate the quality of the design remaining on it in order to avoid possible errors. If necessary, it is better to repeat the procedure.
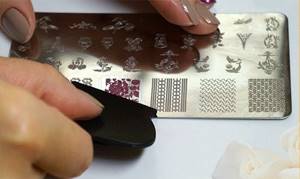
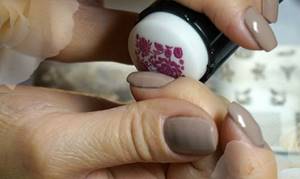
Now we need to transfer our decor to the nail plate. To do this, press the silicone stamp firmly against the nail and again make several rolling movements if the ornament is quite extensive.
It is advisable to perform manipulations to transfer the design to the stamp and from it to the nail quite quickly and with confident movements. Avoid letting the polish dry out, otherwise the resulting manicure will disappoint you with its errors. If the polish dries very quickly, you can use acetone-based nail polish remover. Moisten the stamping plate generously with it before applying colored varnish. This will extend the drying time.
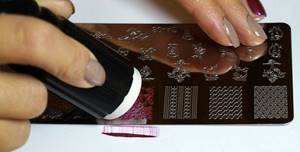
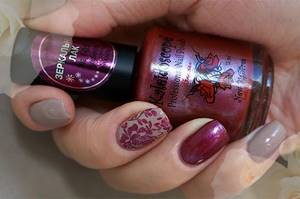
After transferring the ornament, let the drawing dry. As a rule, this happens quite quickly, since the pattern is applied to the nail in a thin layer. Finally, we cover the nails with a finishing layer and enjoy the result.
Execution technique
Beginners have a question about how to do stamping. Let's look at the detailed instructions:
- Apply any coating to your nails: polish, gel polish, extensions. Perform a manicure according to all the rules.
- Choose your favorite stencil plate and nail polish color. You can do stamping with gel polish. If the set is new, remove the protective film. Apply a layer of varnish to the entire surface of the print, avoiding going beyond the boundaries of the design.
- Remove excess varnish from the stencil plate using a scraper blade. The excess will remain on the scraper and the varnish will remain on the engraved surface.
Stamping on gel polish application technology, quick painting. Geometry on nails
- The next step is to apply the stamp. Place it close to the plate for 3 seconds, so that the entire area of the design remains on the stencil. Be careful not to blur the image. The drawing must be clear and bright, then the print will be of high quality.
- If you are convinced of the quality of the printed image, transfer it to your nail. To do this, attach a stamp with a design to your nail. Press the stamp firmly, being careful not to dislodge it. Evaluate the result.
- Clean any remaining coating from the stencil and stamp using nail polish remover.
- Carry out manipulations for the remaining nails.
- Secure the result with clear varnish or top coat.
- Remove polish from the side rollers using a special marker with a soaked tip or a cotton swab with nail polish remover.
How to do stamping on nails?
To learn how to do newfangled nail art correctly, you need to understand what stamping is, what tools are included in a special creativity kit, and how to work with it at home. To easily master the lessons of decorating marigolds, a step-by-step guide and master class of the process with detailed photos and videos for beginners will help you. We are sure that our colorful photos and video tutorial will be useful and interesting to you.
What is nail stamping - the secrets of the masters
Stamping is the creation of designs and patterns on nails using a stamp. The stamp allows you to transfer an image onto a nail plate coated with gel polish or shellac, as well as a base coat: colored or colorless. In a short time, knowing a simple technique, you can get a complex, extraordinary design and an original manicure with your own hands, which turns out no worse than a salon one. You can order a special stamping kit in any online store that specializes in selling nail art products. As a rule, this set is inexpensive, its price depends on the manufacturer, the quality of the tools and the configuration. The main advice from the experts is to purchase a set of good quality, the best option is the Konad set, with which it is easy to create an unusual design. Reviews about these sets are only positive. You need to understand that using the kit for the first time may not lead to the desired result and you may not get an interesting manicure right away, so it is advisable to practice more and use our tips and recommendations.
See also...
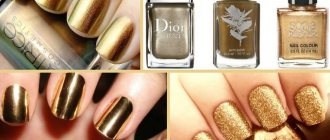
✅ Fashionable manicure with gold: 50+ chic ideas to show the master
✅ Fashionable nail design: new items and trends 2020-2021
✅ Ideas for manicure for short nails photo
✅ Gel polish for short nails: ideas for design, photos, new items
What is needed for this?
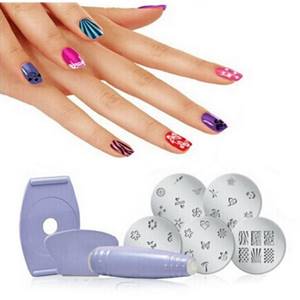
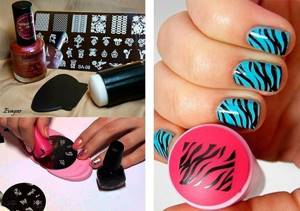
Nail stamping at home is done using the following tools and tools:
— a metal plate (disk) with engraved designs or prints;
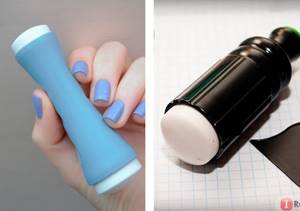
- a special stamp for transferring the image to the surface of the nail;
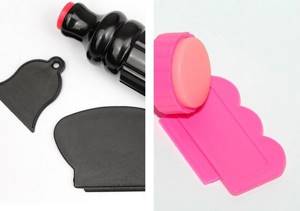
— scraper for removing and removing excess varnish for evenness and clarity of the pattern;
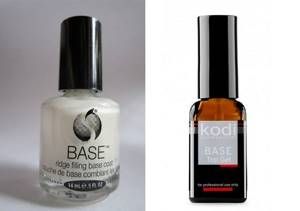
- basic base varnish or varnish of dense texture with a bright coating in one layer;
- fixative, nail polish remover.
Having prepared everything you need, you can start creating a fashionable manicure.
How to properly do a manicure at home - step-by-step design
The step-by-step guide below with detailed photos will help you quickly and easily create an incredibly beautiful manicure at home. 1. Before doing a fashionable manicure, you need to wash your hands well, degrease your nails with acetone and apply a base coat or colored varnish.
2. Apply varnish to the metal disc with the engraved design. Varnish paint is applied to the entire surface of the stencil.
3. Excess varnish must be quickly removed using a scraper; at this stage speed and speed are important. It is important to hold the scraper correctly at a 45 degree angle.
4. Take the stamp and transfer the pattern from the disk using rolling movements. To make the drawing clear and perfect, you should apply good pressure and force.
5. Using the same rolling movements, the image from the stamp is transferred to the nail. Let the drawing dry.
Stamping for nails - how to use with gel polish
For stamping, gel polish is used as a coating on which stamps are applied. The main advantage of stamping on gel polish is the repeated application of designs, without the need to paint your nails, applying a new layer with regular varnish if the picture is smeared and requires re-application. The base coat of gel polish or shellac remains. But, when applying a stamp to the surface of nails coated with gel polish, there are some secrets: - do not use gel polish for drawings, it will not be able to imprint on the surface; — it is necessary to remove unsuccessful pictures from the surface with a liquid without acetone; — using shellac as a base, you need to remove the top sticky layer from it before applying pictures.
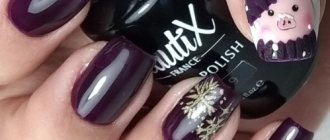
Fresh ideas and new products of the year
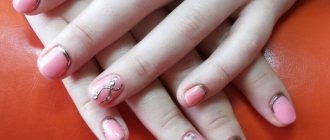
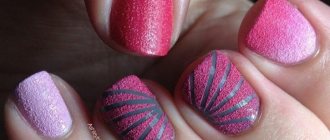
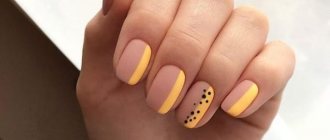
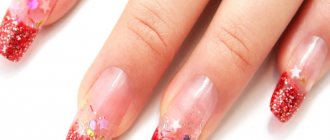
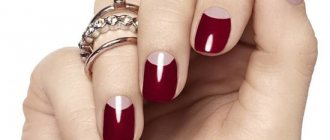
Thanks to stamping, you can create an impeccable and luxurious nail design at home on your own, without the help of professional artists. A little practice and nail stamping will become an exciting activity for you. We present to your attention photos of the latest manicure ideas and new stamping products that are current this year.
Reverse stamping
Reverse stamping is the creation of a three-dimensional multi-colored pattern using a stencil. To make a unique print on your nails, you don’t need any artistic ability, you only need imagination and a minimal set of tools.
How to do stamping correctly? Secrets and lifehacks!