Features of growing parsley on a windowsill
With a compact arrangement of containers with seeds, you can collect up to 2 kg of greens from 1 square place. If the width of the window sill is 25 cm and 1.5 m long, then up to 1 kg of greenery is collected from such an area per month. Well, from 3 such window sills, you will get a harvest of three times the volume.
Growing parsley at home has the following advantages:
- greens can be planted in winter;
- it does not contain harmful chemical additives;
- green leaves can be picked at any time, they are always at hand;
- the family is provided with vitamins and minerals all year round;
- green plantings bring joy on cold days, the energy of summer is on the window.
There are two options for growing parsley on a windowsill in winter: the seed method and planting with root crops. With the seed method, the first greens are cut after 2 months. This method allows you to pick herbs on the window for a long time.

What vegetables and herbs can be transplanted from the garden to the pot?
Many plants that are grown for one season are actually perennials. These are tomatoes, sweet and hot peppers, spinach, basil, mint, parsley, and not just asparagus, rhubarb, sorrel and horseradish, as is commonly believed. Therefore, after wintering in a pot, these crops can be planted in the ground again.
Some southern vegetables, such as eggplant, do not always ripen before frost - replanting them in a pot solves this problem.
Tomato
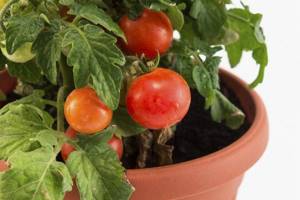
In a greenhouse, tomatoes usually grow up to one and a half meters in height. It makes no sense to transplant such a bush into a pot: it will take up too much space. For home cultivation, you should choose dwarf varieties. Cherry tomatoes are best suited for this purpose.
Plants need good lighting and regular watering (at least twice a week). If these conditions are met, they will bear fruit until the New Year, and maybe longer.
In addition, you can grow tomatoes from the tops of plants, which are cut from the bushes and rooted. They will not produce fruit, but in the spring cuttings are taken from them and planted in a garden bed or greenhouse instead of seedlings.
Pepper

Both sweet and hot peppers are perennial crops. With good care, the harvest can be obtained for several years. Pepper bushes are somewhat smaller than tomato bushes, so they are easier to transplant into pots and grow at home.
Pepper can self-pollinate, so it is quite possible to get ripe fruits from the buds on it by the New Year. To do this, you will need to supplement the plants with a phytolamp and feed them with liquid universal fertilizers (for example, Agricola) every 2-3 weeks.
If the plant is not given additional light, then in December - January it may lose leaves, but already in February new greenery will bloom, and flowers will appear in March.
If you planted sweet and hot peppers in pots, then you need to grow them in different rooms to prevent cross-pollination.
Eggplant
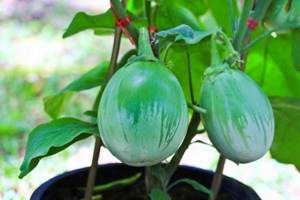
Eggplant, when grown in the middle zone in open ground, does not always ripen, so if it has green fruits, the vegetable can be transplanted into a 4-6 liter pot and grown in an apartment.
The plant does not tolerate frosts, which is why it should be dug up with a clod of earth before they occur. After transplanting into a pot and compacting the soil tightly, water the eggplant generously. Cut off some of the leaves and side shoots from the plant and place it on the sunny side.
Spray and water your eggplant bush regularly for the first few weeks. In addition, in the autumn-winter period the crop needs additional lighting. After 1.5-2 months, when the fruits ripen, remove them and cut the plant.
Onion
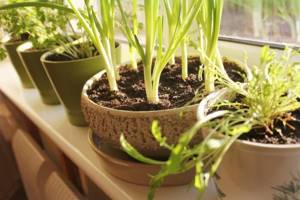
And the most common vegetable that has been grown at least once on the windowsill in every home is the common onion. Just put the onion in a glass of water and wait for the juicy green feathers to appear.
But at home you can grow not only onions, but also other types of onions: spring onions, slime onions, chives, etc. When the first frost arrives, dig them out of the garden and replant them in pots. You will be provided with fresh herbs until spring.
The perennial chives with their delicate purple flowers are often grown as a houseplant.
You can grow other vegetables and herbs on the windowsill by sowing their seeds in containers.
Mint
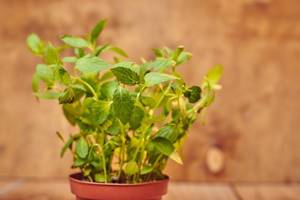
A cup of hot tea with fresh mint leaves on a winter evening will help fight colds and banish insomnia. The plant contains a lot of useful substances and vitamins. Therefore, if mint grows in your garden bed, do not be too lazy to transplant part of its bush into a pot, and it will fill your home with its aroma.
Before planting, carefully inspect the plant for pests. If you find them, then abandon the idea, because... It is impossible to treat mint with insecticides due to the consumption of its leaves as food.
Transplant a healthy plant into a pot and do not forget to water it regularly, because mint does not tolerate drying out. In the spring, replant it again in open ground, where it will gain strength for the coming winter, so that it can then move into the house stronger.
Conditions for growing on a windowsill
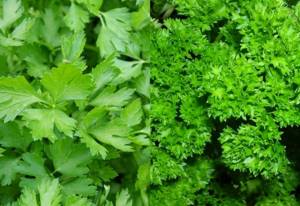
For winter plantations, choose southern and eastern windows. Light mode for at least 12 hours. If there is not enough lighting, use lamps for illumination. Without sun, the stems will stretch, become thin, there will be little foliage, and there will be a lack of vitamins. Such grass will not have any taste or aroma.
It is best to grow greens on the balcony, the humidity there is higher than in the apartment. If the temperature on the balcony at night drops to -2 -4 * C, then the growth of parsley stops or decreases.
If the plantings are located above the battery, where the humidity is below 50%, then the leaves dry out. It is necessary to grow parsley at home at 60-70% humidity. The temperature for the home garden is maintained at 19-22 degrees Celsius.
Pepper

Both sweet and spicy are suitable for transplanting into pots. With proper care, the crop will bear fruit for several years. Pepper bushes are slightly smaller in size than tomatoes, so replanting them is much easier.

Peppers are self-pollinating, so they will continue to produce until the next season. To do this, it is enough just to create good artificial lighting, as well as feed the plants with complex mineral fertilizers 1-2 times a month.

If you grow both sweet and hot peppers, then the pots with them must be kept in different rooms, otherwise cross-pollination will occur.
25 children of a childless man: an extraordinary reunion
Paralympian Talay without arms and legs: “the harder the fight, the greater the victory”
When toothpaste is harmful to children: permissible age doses
Parsley varieties for growing on a windowsill
Nowadays, planting material for home garden beds is sold in any flower shop. Breeders have developed varieties that allow you to grow greens in low light and low humidity. Early ripening varieties of greens are often planted in order to obtain aromatic spices faster.
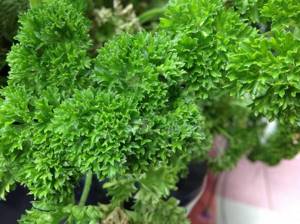
Varieties for growing parsley on a windowsill in winter:
- Morning freshness - early ripening leafy greens. The growing season is 55-65 days. The rosette grows up to 30 cm, the weight of one plant is 80-100 g. The yield is 3.2 kg per 1 sq. m.
- Curly Sue - a variety intended for forcing in closed and open ground. Ripening time is 50-60 days. The corrugated foliage contains a large amount of vitamin C. The rosette is semi-vertical; after cutting, the leaves grow back within a month.
- Vorozheya - mid-ripening, rosette height 20-30 cm. Leaves are curly, wide triangular in shape on short petioles. The weight of one bush is 40 g. The yield is 2.5-3 kg per 1 sq. m.
- Fragrant alley - growing season is 50-65 days, the rosette grows up to 25 cm in height. Harvest – 2.7-3 kg per square plot. The weight of one copy is 100-120 g.
- Emerald lace is a semi-vertical rosette up to 40 cm high. The middle sheet is triangular, corrugated. The weight of one bush is 50-65 g. The yield is 3.3-4 kg.
- Beads are an early ripening variety, 50-60 days from germination to ripening. The length of the rosette is 40 cm. The medium-sized leaf is located on a thin petiole. Harvest 1.5-2 kg per 1 sq. m.
Planting with root vegetables
To grow parsley at home using root vegetables, choose large roots, weighing 50-65 g, 2-4 cm wide. The larger the root, the more buds and leaves appear on it.
Selection of containers
For planting, use plastic containers, pots, wooden boxes, any container 20-30 cm deep. Special plastic long boxes fit perfectly into the home landscape. They are located as much as possible throughout the entire working area. The width of the container is 20-25 cm, the length is 50 cm.
Attention!
It is better not to use plastic bottles for planting parsley; plant roots do not synthesize chlorophyll in transparent containers, but mold appears due to elevated air temperatures.
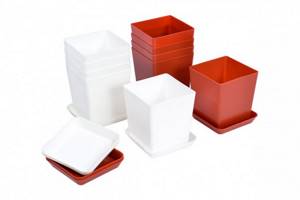
Some gardeners use plastic bags for planting. This method saves space in a small area, but it is more suitable for sowing seeds than planting rhizomes.
Before planting the roots, the container is treated with boiling water or manganese solution. Drainage holes are made at the bottom of the container to prevent stagnation of water. Place a 1.5-2 cm layer of drainage on the bottom of the pot.
Substrate for parsley
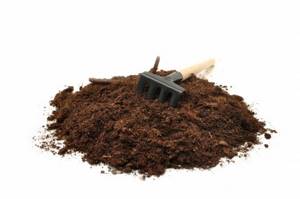
The soil chosen is slightly acidic, pH 6.5-7.0, loose, nutritious. Make your own mixture: peat, humus, garden soil, sand 1:1:2:1. You can find a ready-made substrate for violets in the store, add superphosphate and potassium to it. The root variety responds well to phosphorus supplements, while the leaf varieties prefer nitrogen fertilizers.
Second substrate option: mix coconut fiber and vermicompost 2:1. Before planting, water the soil mixture. Any soil must be disinfected by frying in the oven for 15 minutes at 70*C or spilled with a manganese solution.
Planting roots
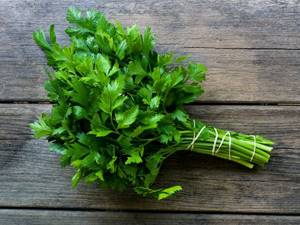
To plant in boxes, root vegetables are dug up in the garden bed before frost. The roots are removed along with the petioles and transferred to prepared containers with a nutrient substrate. If you don’t have a garden, but want to plant parsley at home, you can buy roots at a flower shop. Be sure to pay attention to rotten, dark spots or soft spots on the roots. Such specimens can die from the disease and infect neighboring plants.
If the root is long, it is cut with a sharp sterile knife so that it is 15 cm from the top bud. The cut site is treated with charcoal or lubricated with Kornevin.
May be interesting An unusual way of planting carrots How to care for currants in the spring so that there is a good harvest? Peculiarities of treating gooseberries in the spring against pests and diseases
Planting sequence:
- They make a hole in the ground and transfer the root crop;
- Perushka should be planted at a distance of 3 cm, leaving 4 cm between rows;
- sprinkle the roots with soil so as not to cover the growing point, leave the head of the root crop above the surface of the ground;
- place the containers in a dark place;
- the room temperature is maintained within 13-16 degrees;
- when greenery appears, the temperature is raised to 18*C and transferred to a bright windowsill;
- water 1-2 times every 6 days, feed root crops once a month.
- Parsley in a pot is turned to the light with different sides once a day so that the leaves grow evenly.
How to grow parsley at home
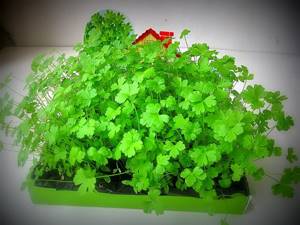
In the summer we have the opportunity to eat more fresh vegetables, fruits and eat more greens. With the onset of cold weather, you have to buy fresh herbs, for example, healthy parsley, at the market or in supermarkets. It looks beautiful, bright, but not as tasty as what was brought from the dacha. Typically, parsley arrives in stores already overgrown and with a high content of nitrates. This is beneficial to the sellers, but for people its nutritional value is not high, and even can be harmful. Therefore, we suggest that you abandon such a product and grow your own greens. How to grow parsley - read in this publication.
Benefits of parsley
If we talk about the benefits of parsley, then only when it is grown with one’s own hands, in one’s own garden beds without adding nitrates and chemicals. This parsley has a lot of advantages, the most important thing is a large amount of vitamin A, as well as vitamins B, K, C, biotin, PP and E. In addition, green grass is rich in folic acid, fatty acids and a large number of useful macro- and microelements (iodine, fluorine, manganese, potassium, phosphorus and others).
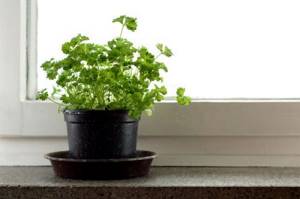
Parsley grown by yourself in the garden or on the windowsill will not only be healthy, but also very fragrant and will be an excellent addition to any dishes. Parsley can be added to fresh salads, used as a filling for pies (in combination with boiled eggs and onions), pizza and added to first and second courses. Fresh parsley is especially useful in the cold season (winter-spring). If you consume at least a few sprigs of parsley every day, you can get rid of a bad mood and feel a surge of strength. By the way, parsley is also used for medicinal purposes. For example, a decoction of young herbs will help cope with kidney diseases.
How to grow parsley at home
If you are used to growing greens in your garden in the summer, you can continue this tradition. During the cold season, parsley also grows well on the windowsill, so we suggest that you familiarize yourself with the recommendations on how to grow parsley.
First you need to choose a plant variety that is suitable for growing at home. To do this, we recommend going to specialized stores and buying a bag of seeds of early ripening varieties. Suitable varieties of parsley are “Harvest”, “Curly Sue”, “Curly”, “Sugar” or “Prima”.
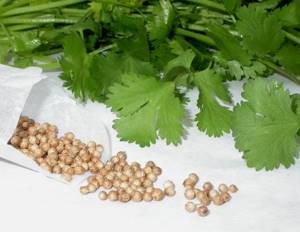
You can buy several packets of regular and curly parsley seeds. The second variety of plant is more suitable for decorating holiday dishes, as parsley grows brightly, and its leaves are beautifully curled in different directions. Only you should know that such a plant does not bring as much benefit to human health as ordinary parsley. By the way, advice from professionals: if you grow parsley on a windowsill, it is better to use regular parsley - it is healthy and suitable for decorating any dish.
If you pay attention to early-ripening plant varieties, you can grow parsley in a pot by a certain date; it will begin to ripen 2 weeks earlier than mid-ripening plant varieties. Among the quickly ripening varieties of parsley, the varieties “Astra”, “Beads”, “Aromatic”, and “Ordinary leaf” are popular among those who like to grow herbs on the windowsill.
There are 2 ways to grow greens on the windowsill - from seeds and from root vegetables. Parsley is a biennial plant, so you can grow greens either from seeds or by transplanting root crops freshly dug from the garden into a pot. First, let's look at the first option - growing parsley from seeds.
How to grow parsley seeds
If you really want to do everything yourself, then you can try growing your own planting material. In order to get seeds from parsley, you need to work hard and be patient.
Parsley is a biennial plant; in the first year of life after sowing purchased seeds, the plant forms sprigs of greenery and a root system is formed. During the winter, parsley goes into hibernation and, with the onset of warm weather, produces long stems on which seed pods appear.
Collecting seeds from parsley is quite difficult, since this is done not in the first year of planting, but in the second. It is important to try to save the plant until next year to continue the development cycle. In the 2nd year of planting, it is necessary to collect the umbrellas with seeds in time and put them in storage for use next year. It is allowed to sow parsley in winter at the end of October in order to get early greenery with the onset of warmer weather.
You can preserve the germination of seeds in this way: collect the planting material and place it to dry in a shaded, well-ventilated place. It is important that the seeds are not exposed to sunlight, and the planting material should not be dried in the oven.
After drying, the seeds are placed in jars, plastic containers or thick plastic bags and stored in a room where the air temperature does not exceed +5°C. A good place to store seeds would be a refrigerator or a dry cellar. If the humidity in the room is high (more than 70%), then the seeds will warm up ahead of time and their germination will decrease.
If planting material is stored correctly, parsley seeds retain their viability for several years (from 2 to 4).
Before you plant seeds, they need to be sorted and processed.
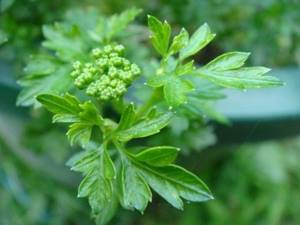
Parsley from seeds
To grow parsley from seeds, you need to try. There are both advantages and disadvantages in this matter. It is necessary to pay more attention to the seeds, since they take a long time to germinate, about 1.5 months from the moment of sowing. This is not very convenient, because many people want to quickly grow greens on the windowsill. But parsley grown from seeds produces a lot of fresh herbs over a very long period, about a year.
Before you start sowing parsley seeds, you need to prepare them in advance. 1-2 days before the expected date of planting the seeds in the ground, the planting material should be soaked in water. It is necessary to change the water to fresh water twice a day so that the seeds germinate at the same time and produce friendly shoots. If everything is clear with this, then we continue the following: 1-2 hours before sowing, you need to pickle or disinfect the planting material in a weak solution of potassium permanganate. Prepare warm water and add a few manganese crystals to it.
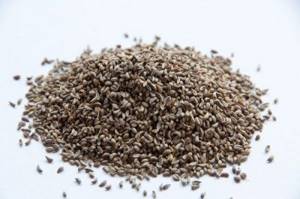
If you were unable to get potassium permanganate, you can carry out disinfection using other means, for example, hydrogen peroxide (2%) will do. The liquid must be heated to 40°C and the seeds must be kept in the hot solution for 8 minutes.
Hydrogen peroxide can be replaced with boric acid. Take half a teaspoon of acid and 1 glass of water. Soak the seeds for 3 hours, liquid temperature +30°C to the maximum. After processing, rinse the seeds thoroughly in clean water several times.
While the planting material is in solution, you can prepare the soil and pots. For planting parsley at home, an ordinary pot or box for growing seedlings is suitable. It is also advisable to treat the container with a disinfecting solution.
Do not forget that good drainage is necessary for normal plant growth. You can take the soil directly from the dacha or buy a package of ready-made soil in a specialized store. If you prepare the mixture for planting seeds yourself, you can add coconut fiber and vermicompost (2:1) to the soil from the garden bed. Mix all ingredients and set aside for now.
You will also need settled water, so you need to take care of this in advance in order to plant parsley seeds according to all the rules.
Rules for planting seeds:
- Place a layer of drainage on the bottom of the prepared container (pot or box),
- Place soil on top of the drainage and press it down lightly, compacting it with your fingers.
- now the ground needs to be watered with hot water and compacted again,
- We make grooves in the ground, up to 2 cm deep. It is most convenient to grow parsley from seeds in boxes for growing seedlings. In such a “mini-bed,” parsley will feel good, and you have the opportunity to sow the seeds according to all the rules, keeping a distance,
- we sow the seeds in moist soil, not deepening them too deeply - up to 0.5 cm will be enough,
- try not to sprinkle too many seeds in one place so that each seedling has the opportunity to develop normally. The seeds are very small, so try to plant them at least a short distance from each other,
- Sprinkle the seeds with barely damp soil so that a dry crust does not form on the soil. Layer of soil – up to 1 cm,
- Cover the boxes with seeds with film and choose a suitable place - dark and warm. As soon as the first shoots appear, we move the box to the windowsill and remove the film,
- every 2 days you need to water the parsley with settled water at room temperature,
- Parsley seeds take a very long time to germinate, so you will have to be patient and wait a little.
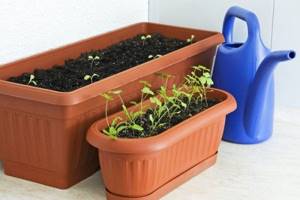
What else you need to know to collect a good harvest of greenery from the windowsill:
- Do not allow the soil to dry out, and do not try to overwater the parsley. You can water your home garden bed very carefully once a day so that the water does not erode the soil and the seeds do not end up on the surface.
- When the first shoots appear, watering needs to be increased, especially if the containers with parsley are located next to a hot radiator. In winter, indoor air is usually dry, so the plant needs to receive more moisture.
- Compliance with the thermal regime is also important. So, the ideal room temperature is +15°C; it is also possible to grow parsley in a room where the air temperature does not exceed +20°C. If the room temperature drops, the plant's growth will slow down, and if it is too hot on the windowsill, the parsley will begin to dry out.
- The duration of daylight hours can be extended artificially. To do this, install a fluorescent lamp above the windowsill, the distance is 60 cm.
- It is advisable to thin out parsley immediately after the first shoots if you sowed the seeds very densely.
- If you see that the parsley has already grown, cut off the young branches. A sign of maturity is a plant that has reached 12 cm in length.
- We prepare the container for planting. It is necessary to disinfect containers in a weak solution of manganese.
- Place a layer of drainage at the bottom (up to 1.5 m). We fill the rest of the pot or box with the following mixture: humus, peat, sand, turf soil. You need to take 2 parts of peat, 1 part of the remaining components. You can buy ready-made soil mixture in the store.
- Parsley roots need to be dug up from the garden at the end of October, when the soil has not yet frozen.
- The optimal size of root crops for replanting: length from 5 cm, width - approximately 2.5 cm. If you have large roots, this is even good, then more buds will appear on them.
- Now we transplant the root crops into boxes or pots, the denser the better.
- The soil should be well moistened before planting. You can plant large root crops, maintaining a distance of 3-4 cm.
- We bury the plant so that only the tops of the buds (heads) remain outside.
- We compact the soil and water it well after planting the root crops.
- Immediately after planting, remove the container with parsley to a cool place. If you have a glazed balcony, take out the boxes and leave them directly on the floor for now,
- We provide moderate watering to the plant. We do not allow the soil to dry out and do not try to flood the plants,
- as soon as the first sprouts of greenery appear, we transfer the containers indoors, ensuring the optimal temperature - up to +20°C,
- the pot or box must be turned at least once every 3 days so that the plant does not reach for the light,
- when there is no sun outside, organize artificial lighting - install a fluorescent lamp at a distance of 60 cm from the boxes with parsley,
- as soon as the greenery enters the stage of active growth, monitor watering - you need to water often and in large quantities,
- if you notice that the plants have begun to weaken, you can add fertilizer to the soil,
- With the onset of spring, boxes or pots of parsley should be taken out onto the balcony.
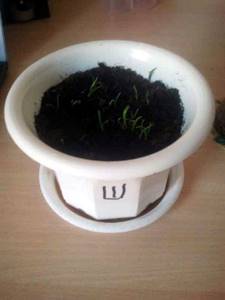
If you are looking for an answer to the question of how to quickly grow parsley, we suggest that you familiarize yourself with the second method of growing greens on a windowsill and planting parsley root vegetables in a pot.
This method is considered faster and more convenient, since you do not have to wait long for the seeds to germinate. You already have an adult plant, you need to create favorable conditions for it to grow and then you can harvest parsley all year round.
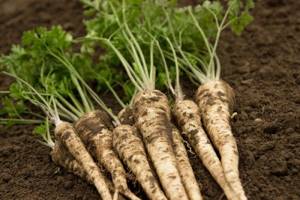
If you use root vegetables dug from your own garden bed, then there is no doubt about the plant variety.
How to plant root vegetables:
When growing greens on a windowsill, certain requirements must be observed, otherwise the transplanted parsley from the garden may quickly die.
Features of growing greens from root vegetables:
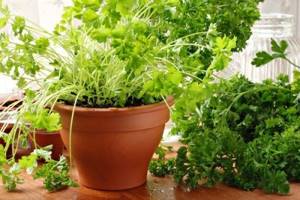
If all the recommendations have been followed, then at the end of December you can harvest the first harvest of fresh herbs from the windowsill. Fresh parsley, grown with your own hands on the windowsill, will decorate the New Year's table. During the winter, you can make several distillations of parsley in order to constantly eat fresh herbs.
About new products
Recently, new items have appeared in large supermarkets specializing in the sale of gardening products - modern containers with hydroponics (this is Aerogarden) and Click and Grow Smart Pots. The new product was developed by scientists for people who want to grow herbs and small vegetables at home, but cannot due to lack of time.
The electronic pot independently controls the entire process, from the condition of the soil, the presence of nutrients, temperature and air humidity, to such important stages in growing greens as lighting, watering, and fertilizer. You can even buy a replacement cartridge with flower or herb seeds. Once the plant has completed its cycle, you need to remove the old cassette and insert a new one.
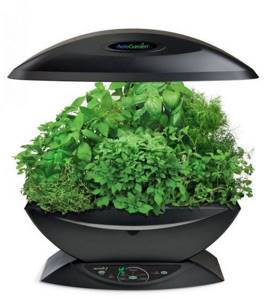
It’s easy to ensure a supply of vitamins throughout the winter if you try to grow parsley yourself. After the first shoots, fresh herbs grow very quickly, so you will have to constantly cut vitamin parsley and immediately find a use for it. Eat more fresh greens, because this is a healthy product for humans without harmful substances.
How to grow parsley on a windowsill, watch this video:
Parsley on the windowsill growing from seeds
Greens from seeds are more demanding to care for than those planted with root crops. The leaves are cut off for the first time after 40-50 days. Growing parsley on a windowsill in winter is not difficult; the green mass grows quickly.
Preliminary seed preparation
Pre-sowing preparation increases the germination rate of seeds and speeds up the time for sprouts to appear. Preparatory procedures include disinfection of the seed for 20 minutes in a manganese composition and the soaking process for rapid germination of seeds.
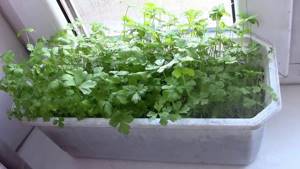
Soaking steps:
- place the seeds in damp gauze;
- transfer the gauze into a container, cover the container with a cloth so that the moisture does not evaporate quickly and there is access to air;
- put away for 2 days in a warm, dark place;
- The gauze should not dry out; it should be moistened periodically;
- To plant parsley from seeds, the seeds are dried before sowing.
Important!
The seeds should not float in the water; the fabric should only be slightly moistened.
Sowing seeds
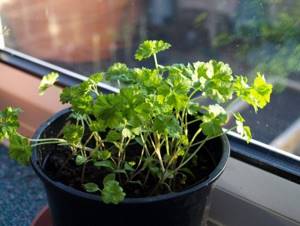
Planting parsley on a windowsill from seeds begins with laying drainage. Vermiculite, expanded clay, pebbles, sea pebbles, crushed stone, and gravel are placed at the bottom of the container. Place soil, make furrows 0.5-1 cm deep, and water them. Sow seeds and sprinkle with soil. Do not water the soil, but spray water with a spray bottle.
Transfer the containers for 12-14 days to a warm place at a temperature of 20-24*C. Water the soil every other day until sprouts appear. For a greenhouse effect, the container is covered with film and removed at the first shoots. The container is moved to a cool place for a couple of weeks, temperature 13-16 degrees. If the planting is dense, then leave strong bushes at a distance of 4 cm, the rest are removed.
Dates of first shoots and harvest
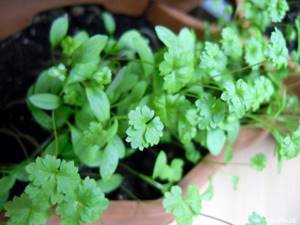
The germination time of sprouts depends on the preparation of the seed material, the use of growth stimulants and the nutrient substrate for parsley. Root crops produce the first greens faster than the seed germination method.
The first cut of leaves is made when the cuttings are 13-16 cm long. The stumps are left at least 2 cm. The parsley will hurt less and will grow back faster.
It is unacceptable for the soil to dry out for growing greenery, but it should also not be washed away. When the temperature in the house rises, the young plants will begin to dry out; at low temperatures, plant growth will slow down. Illumination lamps are installed only in winter, when the days are short. With proper care at home, you can eat fresh parsley every month and enjoy a long-lasting summer aroma and taste.
Which crops tolerate moving from garden to apartment well?
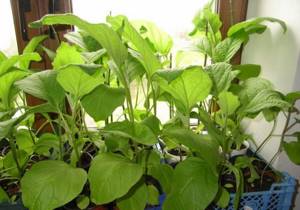
Not all people know that many garden plants that are grown in the garden are perennial. With proper care and good conditions, they will bear fruit for more than one season. These include:
- tomatoes;
- pepper;
- mint;
- eggplant;
- onion;
- basil.
After they have overwintered in the pot, they can be planted back into open ground. At the same time, their productivity will remain quite high. Let's look at each culture in more detail and learn about the features of each of them.

