What is contouring?
Contouring is a popular makeup technique that allows you to create a visual correction of any part of the face, highlight contours, and add expressiveness.
Principles of contouring:
- the ability to create ideal contours with a few brush strokes;
- ease of changing proportions using decorative cosmetics properly applied to the body and face;
- obtaining a visually narrower face by darkening the zygomatic and cheek areas.
If earlier the concept of contouring was available to professionals, makeup artists working with actors and models, today this technique is quite widespread.
Where can contouring be used:
- in cinematography, so that the actors’ faces looked three-dimensional, attractive, and had smooth, perfectly even skin;
- for a photo shoot, during which the face can be made as if it had recently been lifted, to get gorgeous photos;
- in everyday life (not all makeup artists agree with this, because this technique seriously changes a woman’s appearance).
To master this technique of creating makeup, you need to prepare a number of products that you will definitely need.
- Bronzer: used to darken the cheekbone, chin areas, and those areas that require visual reduction. It is important that the shade of the product is darker than the color of your own skin. An alternative to bronzer can be blush.
- Highlighter: is a powder with a creamy texture. It is designed to give a radiant effect, achieved due to the presence of shimmer particles in its composition.
- A fluffy brush with an angled base: convenient for applying and blending any loose cosmetics.
- Kabuki brush: has sufficient width, dense structure of bristles. Its round cut is ideal for working with dry products, while its straight cut is created specifically for the creamy consistency of cosmetics.
- The right type of brush: used for the dry variety of highlighter.
How to shape eyebrows at home step by step. How to choose eyebrow shape according to your face type
To get the perfect shape, you have to start with the basics. If you are planning to do eyebrow correction at home, you should start by determining your face type and then choosing the appropriate eyebrow shape. The bend, density, width and length of the eyebrows can visually balance the proportions, for example, give a roundness to an oblong face, and make a wide oval face slightly elongated. Determine what type of face your face is, and only then proceed with correction:
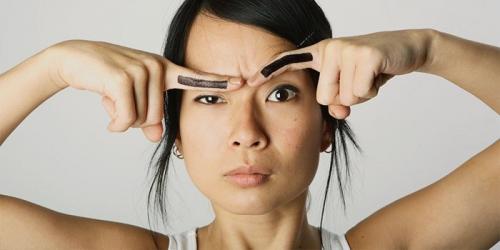
- A slight kink helps make a round face a little more elongated. It is necessary to model the eyebrows so that the outer edge is thinner and slightly pointed than the inner edge, which starts from the bridge of the nose. Trying to visually make the round oval of the face a little longer, choose the right place for the break: in relation to the entire length of the eyebrow, this point is located at a distance of two-thirds, if you step back from the inner edge of the eyebrow.
- A triangular face is the type for which you should choose a straight shape. It is acceptable to make the design slightly rounded, but there is no need for excess. If you bend them too much and make them round, the proportions will be disrupted, so you need to pull out the hairs in a straight line, and at the final stage, only slightly adjust the outer edge of the eyebrows.
- To make an elongated face more feminine, visually giving rounded features, straight eyebrows help. You should not make kinks, round them at the end, or make eyebrows with a thread or leave them wide.
- A square face is a type that requires an arched eyebrow shape. To visually achieve an ideal result, the line should be raised approximately in the middle. You shouldn’t sharpen your eyebrows too much, making your eyebrows look like “houses.”
Creating an outline
To create the perfect contouring you need to go through a number of steps:
- Cleanse the skin, apply a makeup base (so that it remains unchanged throughout the day), which can be any foundation.
- Use a concealer to hide existing skin imperfections. This may include working with bruises under the eye area and redness.
- Apply bronzer to the following areas: cheekbones, temples, under the ridge of the chin, on the sides of the forehead, nose.
- Use highlighter on the central part of the face: leave accents on the middle of the forehead, chin, nose, and in the hollow above the upper lip.
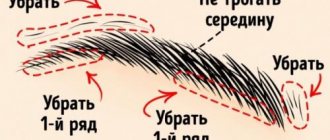
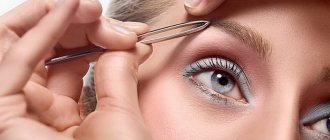
To obtain a harmonious result, it is necessary to correctly design the lines of the brow arches. To correct their contours, tweezers or another available depilation method are used.

Eyebrow contouring is usually divided into a number of stages:
- Place the hairs of the brow ridges using a special brush. This is necessary so that individual hairs do not stand out from the total mass.
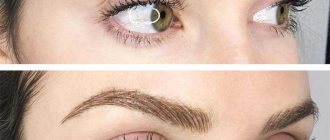
- To create the contour of the arches: here you will need dark-colored powder, which is used to highlight the upper and lower parts of the arch. They should not be made too clearly, otherwise the face will look overly graphic and unnatural.
- Fill the outline with a dark tone. Leave the area near the bridge of the nose untouched, which will help increase the visual length of the arches.
- Create soft transitions on the surface of the arches using the gradient technique (here you need to cover the sides of the eyebrows with a light shade). The powder should be applied in the central part, but not combined with the dark tone already applied.
- Blend the colors thoroughly to achieve a natural look. Create eye makeup by applying shadow of the desired shade to the fixed upper eyelid using mascara. Use dark powder to outline the boundaries of the arcs, acting gently, without unnecessary pressure.
To get the perfect result, you need to use dark and light colors of the product (powder, which is easy to shade, is better suited).
Formula for the perfect eyebrow: the “golden ratio” rule
There is a formula for how to make perfect eyebrows at home. Surfing the Internet, you can see several options. Most often they offer three.
Formula one
Take a cosmetic pencil and draw three dots . They will lie on different straight lines.
Let's remember geometry: only one straight line can pass through two points. This straight line will be our pencil.
Directions:
- straight line number one will pass through the corresponding wing of the nose and the inner corner of the eye;
- the second - through the wing of the nose and the pupil;
- for third straight lines, the second point will be the outer corner of the eye.
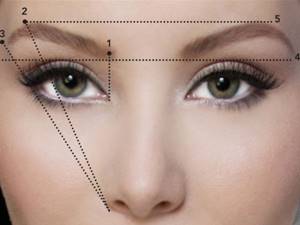
At the intersection of straight lines with an eyebrow, we get three points: its beginning, peak and end .
Formula two
Essentially the same thing, only the second straight line is drawn through the wing of the nose and the iris of the eye tangentially to its outer edge . In some cases, it is proposed to draw a line directly through the iris, strictly in the middle between the pupil and the edge.
Formula three
It also has a second name – “Hollywood”. For those who, having made perfect eyebrows at home, seem to want to become a star.
In this version, the peak of the eyebrow is maximally shifted to the outer corner of the eye .
We get the key points for creating eyebrows at the intersection of the same three straight lines, but they run differently:
- the first - through the center of the chin and the corresponding wing of the nose;
- the second - through the center of the chin and tangentially to the iris through its outer edge;
- the third - past the wing of the nose and through the outer corner of the eye.
If you build ideal eyebrow lines using these formulas, they will differ slightly from each other . Intuitively, you will suddenly feel that one of them suits you more than all the others.
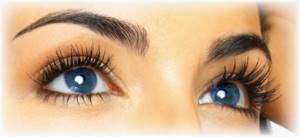
It's easy to create the perfect eyebrow shape with your own hands
Interesting fact! All these rules are simplified variations of the “golden ratio” formula. It is based on an ideal ratio, derived by Pythagoras. This is how two different parts of a single whole are ideally related to each other.
If you take a segment and divide it into two different parts, and the ratio of the larger part to the smaller part is equal to the ratio of the entire segment to the larger part, then the segment is divided beautifully. We are subconsciously repulsed by everything that goes beyond the “golden ratio” formula and are attracted to what corresponds to it .
This ratio is used by artists and architects when calculating the proportions and relationships of objects with each other. It is 1:1.618.
Attention! The elevation of the eyebrow relative to its ends should be in accordance with the “golden ratio” formula .
At this point you should already have a desire to close the tab.
The vast majority of women are not artists or architects. Many of them have not been friendly with mathematics at all since their school years. It is difficult for them to calculate the necessary formula based on the “golden ratio”.
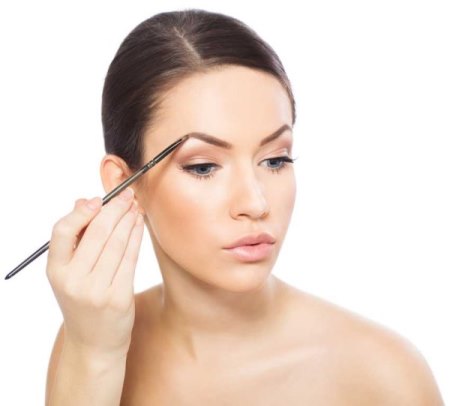
The eyebrow line can be drawn with a brush with a coloring composition.
For those who are inferior in their knowledge to Marie Curie and Sofya Kovalevskaya, ready-made formulas have been invented.
Draw a line based on one of them, then on the other, and you will feel everything yourself.
Those with close-set eyes will choose the option that spreads their eyebrows. Those with wide-set eyes, on the contrary, will decide to move their eyebrows and thereby get closer to ideal proportions.
Read an interesting article: Makeup lessons for beginners at home
Highlighter accents
To accentuate this with highlighter, apply it above the eyebrow. This approach will highlight the eyes, making them wide open and glowing.
Features of applying highlighter:
- take a small amount of the product;
- shade in the lateral parts of the eyebrows, closer to their edges;
- apply under the eyebrow, under the upper eyelid, which does not move;
- create a contrast with the color of the arcs.
If you don't have a highlighter, you can use a concealer; it creates about the same effect.
Important Rules
To perfectly sculpt your face, give it volume, expressiveness, and clear lines, you should follow the advice of professionals.
Important contouring rules:
- highlight all natural convexities of the face more clearly;
- highlight existing depressions with dark tones;
- emphasize the shadows that are on the face;
- select the shade of decorative cosmetics strictly to match your natural complexion;
- apply bronzer to the areas where the light shadow is located;
- carefully blend all applied products;
- darken the area under the cheekbones, temples, hairline.
After creating the contouring, you can proceed to applying the rest of the decorative cosmetics. It doesn’t have to be bright, but it must be present, otherwise the image will turn out unfinished.
Contouring or sculpting is an ideal way to create an inner glow of the skin and highlight the features of the facial relief. This technique is unlikely to be suitable for everyday life, but for special occasions it will be absolutely necessary; by the way, it will help you stand out among the crowd of people.
