How to make a snowball from padding polyester. Artificial snow at home. Starch and soap
Reading time: 5 minutes
Don't know how to make artificial snow? We have prepared the top 15 fastest and easiest recipes. Artificial snow is almost indistinguishable from real snow!
For crafts with children, interior decoration, or decorating holiday dishes, you often need to create a snow effect. Artificial snow is sold in cylinders and in bulk, but its prices are almost the same as oil. So that the financial side of the issue does not limit the creative side, we suggest making snow yourself.
Recipe No. 1
Ingredients:
— foamed polyethylene (used as packaging material for equipment, glass, shoe inserts) or polystyrene foam; - fine grater.
Wear gloves to prevent snow from sticking to your hands. Grind polyethylene or polystyrene foam using a grater (with a stick or fork). Voila! Fluffy flakes are now all over the house. To make the snow sparkle, add sparkles.
If you want to dust specific objects with this snowball, lubricate the surface with liquid PVA glue. Kids love to crumble the foam with their hands and watch how it sticks to their fingers.
Don’t deprive them of this joy, especially since such an activity wonderfully develops fine motor skills.
If the foam consists of large solid balls, it does not have to be grated; it can be manually broken into small crumbs.
Recipe No. 2
Ingredients:
— remains of dried polymer clay (plastic).
Handicrafts often have leftover polymer clay, which is a pity to throw away. If you grind it with your hands and then with a coffee grinder, you will get a light and multi-colored (when using colored clay) snowball. This artificial snow can be used to decorate cards and other hand-made products.
Recipe No. 3
Ingredients:
- coarse salt; - water.
Fill a saucepan with a small amount of water and place over low heat. Add salt until it stops dissolving.
Dip plants (beautifully curved tree branches, spruce or pine legs with cones) into the hot solution and leave for a day.
Sparkling frost is guaranteed! If you add brilliant green, food coloring or ink to a salty solution, the frost will turn out colored! Plants treated in this way look beautiful in winter bouquets and do not lose their attractiveness for a long time.
Recipe No. 4
Ingredients:
- white baby soap or candle.
Grate the soap (candle) on a fine grater. If you mix such snow with talcum powder (baby powder), then it is quite possible to decorate a child’s craft or drawing.
Another option is to use such snow to make toys “a la snow globe”, when glycerin and artificial snow are added to the water (you can also use sparkles or finely chopped rain).
The container is hermetically sealed and when shaken, the snowball smoothly sinks to the bottom.
Recipe No. 5
Ingredients:
- semolina.
Semolina can perfectly imitate snow on postcards or children's drawings. Apply glue to the area to be covered with snow and sprinkle with semolina. Shake off any remaining residue after drying. Instead of semolina, you can glue sea salt crystals.
Recipe No. 6
Ingredients:
- PVA glue; - shaving foam.
Mix PVA glue and shaving foam in equal proportions. You will get wonderful airy snow paint. You can add glitter to the paint. With this paint you can paint snowflakes, snowmen, polar bears and winter landscapes. After some time, the paint will harden, and you will get a voluminous winter picture.
Recipe No. 7
For crafts with kids, you can use torn white paper. This exercise is very useful for motor skills.
Recipe No. 8
You can use cotton pads, padding polyester, or foam balls as snow.
Recipe No. 9
Ingredients:
- sugar.
Dip the edges of the glass (glass) into water or syrup and then into sugar.
Recipe No. 10
Ingredients:
- gum arabic; - egg white.
Using these components, non-poisonous and non-bitter plants can be candied. For example, flowers of pear, apple, cherry, rose, violet, primrose, lemon, begonia, chrysanthemums, gladioli, pansies. Candied leaves of mint, lemon balm, and geranium turn out beautiful and very fragrant. Dissolve 12 g of gum arabic in ¼ cup of hot water (in a water bath) with constant stirring.
Cool the solution. Prepare sugar syrup: 100g sugar per ¼ glass of water. Cool too. Apply gum arabic solution first to the plants with a brush, and then sugar syrup. Sprinkle with fine granulated sugar (not powdered sugar). Dry on parchment or tracing paper. Such “snow-covered” beauty will not deteriorate for several months.
These flowers can be used to decorate a birthday cake or your favorite pastries.
Recipe No. 11
Ingredients:
- egg white; - sugar.
Beat egg white and sugar until foamy. Apply with a brush to the petals of the plant and sprinkle with powdered sugar. Place the plants prepared in this way on parchment and place in the oven over low heat. In two hours you can admire the beauty!
Recipe No. 12
Ingredients:
- a pinch of salt; - egg white.
Beat the egg white and a pinch of salt into a stiff foam using a mixer. Place this improvised snow on the meat and send it to the oven! Surprise your guests with chicken in a snowdrift! Never-fading frosty patterns on the windows
Recipe No. 13
Ingredients:
- beer; - magnesia or urea.
Real frosty patterns can be made on glass by applying a solution of beer and magnesia (sold at the pharmacy). Wash and dry the glass. Dissolve 50 g of magnesia or urea in 1/2 glass of light beer and apply to glass. You can use a brush, sponge or cotton swab.
When applying, imitate frosty “feathers” and curls. When the liquid begins to dry, crystals will begin to appear on the glass, similar to real frosty patterns. You can use a hairdryer to speed up the drying of the glass. This solution is easily washed off from window glass.
You can very beautifully decorate glass in interior doors or on the landing at the entrance.
Recipe No. 14
Ingredients:
- PVA glue; - powdered sugar.
To write congratulations or draw pictures on glass, you can use regular glue and powdered sugar. Apply the design with a brush or stencil and sprinkle with powder. The only negative is that the pattern may “float” if condensation accumulates on the glass. When decorating the glass with frosty streaks, don’t forget about the window sill.
Recipe No. 15
Ingredients:
- water; - sodium hyposulfite.
Don't be intimidated by sodium hyposulfite; you can find it in photography stores or chemical stores. It is also called sodium thiosulfate pentahydrate (this is a photographic fixer). Dissolve 30–40 g of sodium hyposulfite in half a glass of water and apply the mixture to the glass. Wait for it to dry. The crystals are dense, white, and opaque.
Which recipe to use is up to you to decide. It all depends on what you need snow for and what effect you want to achieve. Sometimes it is enough to simply scatter (or glue) pieces of padding polyester, cotton pads, or paper confetti.
Sometimes you need a texture paste or fluffy small granules. No one has canceled the old proven method of painting on glass with white gouache and toothpaste.
In fact, there are plenty of options to create a truly winter mood! Don’t wait for “manna from heaven”, create yourself a “snowy” mood right now!
Source: https://gardengrand.ru/kak-sdelat-snezhok-iz-sintepona-iskusstvennyi-sneg-v-domashnih-usloviyah/
How to make artificial snow at home, DIY snow crafts
Reading time: 5 minutes
Don't know how to make artificial snow? We have prepared the top 15 fastest and easiest recipes. Artificial snow is almost indistinguishable from real snow!
For crafts with children, interior decoration, or decorating holiday dishes, you often need to create a snow effect. Artificial snow is sold in cylinders and in bulk, but its prices are almost the same as oil. So that the financial side of the issue does not limit the creative side, we suggest making snow yourself.
How to make snowballs with your own hands
All kids love snow. And adults cannot resist the feeling of magic that comes with the first snowflakes. Snow is the culprit of the magical mood, and thanks to it, any winter holiday becomes lighter and brighter. It is also a source of games: you can go sledding, skiing, build a snowman with your children and, of course, snowballs.
But if you bring a snowball home, it will quickly turn into a puddle of water. Fortunately, resourceful people solved this problem long ago and decorate the house with artificial products, which, although not real, are very similar to the original. Do you want to know what to make a snowball out of with your own hands? Make yourself comfortable and get inspiration from our article.
Methods for creating snowballs from artificial materials
Decorative snowballs
- a good option for holiday decor. Place them in a bucket and place them in front of the door. Place on the fireplace, window sills, shelves. Place under the tree or make original toys that can be hung on the holiday tree. Create a beautiful composition for walls and curtains. The scope of imagination is not limited.
So, are you ready? Starts master classes on how to make snowballs.
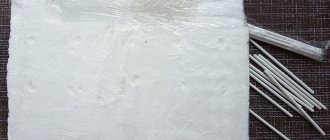
From cotton wool
The most common and accessible method that does not require much effort and time. Take:
- roll of cotton wool;
- hairspray with glitter (choose super strong hold);
- plastic bag;
- PVA glue.
Cover a piece of cotton wool about 30 cm long with glue. Take the end and, carefully picking up the edges, roll the cotton into a ball so that the glue is inside. Apply varnish in two stages: first one half, dry, then the other.
Snowballs turn out light, airy and shiny. If you use varnish without glitter, then you can apply it at the end of the work, after mixing it with glue.
Instead of PVA glue, you can make a natural paste. You will need 2 teaspoons of potato starch and a glass of water. Gradually add starch to the water, put on fire and heat, stirring constantly so that there are no lumps. As soon as the paste begins to boil, remove from heat and use.
From foam balls
Another simple method for which you will need:
- artificial snow;
- ready-made foam balls;
- wide brush and PVA glue.
Cover each ball with glue and immediately, before it dries, sprinkle with snow. To make your work more convenient, pour artificial snow into a saucer and simply dip the foam in it.
Before making snowballs with your own hands, stick pieces of plasticine on the table and insert toothpicks into them. Prick the finished balls onto them so that they dry completely.
There is another way to make snowballs from foam. You will need:
- foam balls;
- thick wire;
- putty;
- small knife.
Pin the foam onto the wire, forming a hook at one end, from which you can then hang the finished products. Lubricate the ball with a layer of putty. Then prick the second one and do the same manipulations. Hang the almost finished snowballs on the hook to let the putty dry.
Instead of putty, you can use a starch-soap mixture. To prepare it, grate white soap, mix with potato starch, white glitter and add a small amount of hot water to form a thick mixture. Beat it with a mixer and apply it to the foam balls. Leave to dry.
From paper
If you're not a fan of traditional solutions, it won't hurt to learn how to make a paper snowball. It's no secret that the most spectacular jewelry comes from the simplest materials. The advantage of paper snowballs is that you can use different types of paper to make them. Suitable:
- An ordinary napkin is probably found in every home.
- Corrugated paper is very flexible and makes it easy to make three-dimensional shapes.
- Quiet paper - thanks to its translucent structure, snowballs made from it look beautiful in the evening on a Christmas tree with glowing garlands.
Take:
- 16 white paper napkins (or another type of paper, the manufacturing principle will not change)
- stapler;
- scissors;
- wire;
- ribbon or strong thread to hang the snowball.
The snowball consists of 16 layers - 8 for each side. Take one napkin, carefully fold it into a fan and fasten it in the center with a stapler so that it does not fall apart. Do the same manipulations with the remaining napkins.
To create the first half of the ball, stack 8 blanks on top of each other, secure with a stapler, and round the edges with scissors. Straighten it out. Make the second half in the same way and connect it to the first with a piece of wire. Bend the tip with a hook and attach a ribbon or thread to it. The craft is ready.
From fabric
This method is suitable for those who are comfortable with a sewing machine. You can, of course, sew parts of the product by hand, but then the process will take a lot of time. You will need:
- white soft fabric;
- padding polyester (or any other filler).
Cut out three petals from the fabric and sew them together using a sewing machine, stitching from the inside out. Turn the cover right side out, put the filling inside and sew up the hole. Children love to play with soft snowballs.
From threads
If you don't know what to make snowballs out of, use thread. There are several options, and they are all worth considering.
To make openwork and delicate snowballs that will decorate any interior, you will need:
- white threads (do not take too thin, otherwise the work will take a long time);
- medical finger pads;
- PVA glue.
Inflate the finger pads and tie them to prevent air from escaping. Wrap each one with thread. Here you can get creative: wrap it tightly so that there are no gaps, or make an openwork pattern. In any case, you should leave a small hole on top - you will then pull the fingertip out of it.
Coat the wrapped ball generously with glue and leave to dry for at least a day. When the glue dries and the threads become hard, carefully pierce the fingertip with a needle and remove it from the ball.
If you are familiar with the felting technique, then wool snowballs will be a real find for you. Yes, and a washing machine can be used. Take:
- white wool threads;
- igloo;
- nylon sock.
Wind up a small round ball of thread. Pass a needle through the end of the ball of thread and sew through it several times. Cut off the unnecessary end. Place a ball of thread in a sock and throw it into the machine along with a couple of tennis balls. Turn on the hottest mode. At the end of washing, use the drying mode or place snowballs near the radiator.
Another way to make snowballs from threads is in the form of a pompom. Any thread will do, not necessarily wool, but preferably thick - this way the pompom will be fluffy. Also take:
Cut out two identical circles from cardboard, similar in diameter to the future snowball. Cut out a core inside each circle to make rings.
Connect them together and cut on one side - the thread will go into this slot. Now wrap the thread tightly around the rings and cut it in a circle by inserting scissors between the rings.
Tie a thread around the pompom in the middle and pull it out of the rings. Fluff it up and trim around the perimeter with scissors. The soft and fluffy lump is ready.
Now you know how to make snowballs from a variety of materials. And if you involve the rest of the family in the process, then at the end you will get not only a beautiful decorative decoration for the holiday, but a lot of pleasure and a good mood. Go for it!
We also advise you to read:
How to make snowballs with your own hands
DIY snow - New Year's decoration for the whole house
How to make snow from salt and sugar
Source: https://www.eli.ru/articles/176/
Toys made from cotton wool and paste
Artificial snowballs made from cotton wool are the simplest craft. If you have completed this task, try making funny toys from cotton wool and paste. They are made very simply, and the pleasure from the process is great. In addition, you can do this with children - applied art perfectly develops fine motor skills.
Necessary materials:
- wire
- paste
- paints (gouache, watercolor)
- sewing threads
Preparation method:
- Make a wire frame, creating a kind of “skeleton” of the future toy character.
- Wrap the frame with cotton wool, securing it in the desired position with sewing thread.
- Soak small pieces of cotton wool with paste and stick them on top of the base wrapped with threads.
- Place the product to dry in a warm place.
- When the paste dries, coat the toy with paint. It is advisable to choose “calm” tones, since such products are light, vintage, and “flashy” shades will not suit them.
In this way you can make anything, from a simple Christmas tree decoration made of cotton wool and paste, to the tree itself. Don't forget about glitter - it will give your craft a fabulous shine.
New Year is a wonderful holiday that can be made even more magical if you put in a little effort and a little imagination. You have the power to create a fairy tale with your own hands, especially since now you know what you can use to make artificial snowballs for children with your own hands!
If you like to decorate fir branches, windows, or various New Year's crafts with artificial snow or frost, these tips will definitely suit your taste. We will tell you about homemade and very budget alternatives to store-bought cylinders. The most important thing is that it will not be difficult to repeat any of the seven ideas with your own hands, and in some cases, spraying will be even more durable and durable than the store-bought version.
Stock up on pine branches, New Year's wreaths and other paraphernalia - let's start decorating!
Method one: regular cotton wool
If you don't want to fuss for too long, this method is just for you.
What do we need?
- cotton wool or cotton pads
- PVA glue
- tweezers
- glitter (optional)
How to do it?
The cotton wool needs to be torn into small pieces - the smaller the better. If you use cotton pads, then only the inner, soft part will be used.
Dip each piece in glue for a few seconds and immediately apply it to where we are creating the spray.
Before the glue has time to set, sprinkle the product with glitter - you get the effect of sparkling snow.
When everything dries, the accessory will look no worse than powdered with ready-made artificial snow.
Method two: foam
You'll have to rustle, of course. If you are annoyed by the squeaking of polystyrene foam, this master class is not for you. And if you don’t care, and you want to get artificial snow quickly, inexpensively and, ultimately, beautifully, this is the place for you.
What do we need?
- Styrofoam
- grater
- PVA glue
How to do it?
You just need to grate the foam on a grater (medium and oblong). If it is not of the best quality and simply breaks, then crumble it into grains with your hands.
Now we grease the spruce branches (or any other accessory) with glue and simply sprinkle them with the prepared material.
The foam sticks well to the glue and looks really realistic. Especially if you manage to grate the “flakes”.
Method three: snow made of salt
If you don't mind tinkering a little, this tutorial is for you. Don't worry, everything is simpler than it might seem. And most importantly, the result will definitely please you.
What do we need?
- salt (take regular coarse stone salt) – 1 kg
- water – 1.5 liters
- blue paint, copper sulfate or ink (optional)
How to do it?
First you need to prepare a strong saline solution. To do this, pour salt into the water and put it on low heat, stirring constantly. As soon as the water has boiled and all the salt has dissolved, remove the pan from the stove.
At this stage, add dye if you want to get artificial snow blue.
We take coniferous branches (real, not artificial) and immediately lower them into the water: all at once or one after the other - it doesn’t matter. A few seconds will be enough for the salt to cling to the branches.
Now we need to take our future snowy branches out into the cold. If possible - on the balcony, but better - on the street. If both options are not for you, put them in the refrigerator in a bowl.
After 7-8 hours, we take out the branches and hang them somewhere. You need to let them dry thoroughly.
In a few hours, our “New Year’s” branches will be ready. They will turn out truly magical and incredibly beautiful. Even artificial snow from a balloon cannot be compared here!
Method four: sweet frost
If spraying needs to be done quickly, this option will be optimal. Just keep in mind that the finished branches should not be stored for too long, because the “snowball” will consist of a food ingredient.
What do we need?
- sugar
- liquid glue
How to do it?
Dilute a little liquid glue in a container with water. In principle, you don’t need to use glue at all, but it will still serve a good purpose for more reliable fixation.
Now dip the twigs in this solution, and then take them out and immediately sprinkle them generously with sugar.
When the water dries, the sugar will stick to the branches.
There is a little trick to make this beauty last even longer. When everything is completely dry, spray the branches with hairspray. However, there is also a minus: the varnish can extinguish the pleasant pine smell.
Method five: fluffy and soft snow made of yarn
If you want your artificial snow to be not only beautiful, but also pleasant to the touch, make it from yarn. This method is especially good for those who have children in their home. The little one is always drawn to snow-covered Christmas trees. To prevent the kids from injecting themselves and touching the chemicals, without which store-bought artificial snow in balloons is simply unimaginable, replace the decoration with something really pleasant.
What do we need?
- several twigs (not necessarily coniferous)
- scotch
- white yarn (it is best to take shaggy and soft “grass”)
How to do it?
First, the rods need to be cleared of bark. It will be more convenient to work with smooth branches.
We take a thread and glue it to the base of the twig using thin tape. Then we simply wrap the branch to the end. You don’t have to do it very tightly - let the twig show through, it’s even more interesting.
We also secure the end of the thread with tape.
In this way you need to wrap all the rods, and then simply make a composition out of them.
It would be optimal to make something like a bouquet: “snow-covered” branches + ordinary spruce or pine branches and cones. If you want something more interesting, you can twist the rods into a wreath (we have already told you) by adding a few pine branches and various New Year's paraphernalia.
This method is in no way inferior to the others. Yes, it looks less like real snow, but it still looks beautiful and very cozy.
Method six: cold snow from soda
If you want your homemade artificial snow to look and feel like the real thing, try this simple recipe.
What do we need?
- pack of soda
- can of shaving foam (take the simplest one)
How to do it?
No tricks: just pour the baking soda into a bowl and gradually squeeze the foam into the container, constantly mixing the mixture with your hands. There is no need for an exact proportion here - it depends on the quality of the foam. As a rule, a 500-gram pack of soda requires a whole can of foam. If you need less, rely on the touch: as soon as the consistency becomes similar to wet snow, from which you can make snowballs, our mass is ready.
If you really want to make something out of this “snow” (snowmen, for example), add a little more foam. If you need a crumbly snowball, you will need a little less.
Method seven: snow from diapers
Yes, yes, we will make snow from diapers. The fact is that they contain sodium polyacrylate - a component that cannot be found anywhere else. And that is exactly what we need.
For clarity, we suggest you watch the video master class - it will be clearer.
As you can see, there is nothing complicated, and the result is really impressive. This is perhaps one of the best ways to make artificial snow with your own hands.
All these methods will help you make artificial snow at home. From seven master classes, choose the one that meets your requirements for New Year's decor: soft, cold, durable - each has its own distinctive features. Whatever you choose, the result should please you, because the snow will help you feel the holiday approaching and create a New Year's mood!
Views: 40,177
How to make a miracle with your own hands. This is a question that mothers of many children ask themselves when a holiday approaches.
Often at children's parties you have to show all your fantasy and imagination to make the holiday truly a success. For example, often many mothers have to decide how to make snowballs with their own hands or something similar. Making a snowball from cotton wool is not that difficult. It is enough to show a little effort and ingenuity, and now a piece of a winter fairy tale is ready.
So, how to make snow balls from cotton wool. All family members of absolutely any age can take part in the creation of a small miracle, but very young children may not be allowed to discover the secrets of magic. It will take very little time to create the craft. At first it may seem that this is quite difficult, but this is only the first impression, which, as usual, is deceptive. After you see the result of your creativity, you will have a desire to do something else just as magical.
So let's get started. Ordinary cotton wool will be useful as a starting material. It can be purchased at a fairly affordable price at the pharmacy. It matches the color one hundred percent and can, with a little effort, take on any shape. When choosing, pay attention to synthetic. It will make your craft more believable.
You will also need to purchase a number of other items: silver glitter and starch.
We would like to present you with a fairly simple and accessible method on how to make a snowball out of cotton wool for the delight of children:
- First of all, you need to pour about 5 ml of ice water into a capacious vessel and gradually add 2 tsp there. starch, while slightly stirring the resulting mixture;
- Then you need to put what you got on moderate heat and bring to a boil. At the same time, do not forget to stir. When the solution begins to bubble, immediately remove from heat. While the paste is cooling, you need to roll small balloons from the existing cotton wool;
- Next, paint the balls with the resulting mixture using a small brush. The most important thing is not to leave any painted areas. Next, place the future balls on a large baking sheet and place them next to a heater or radiator. It is advisable to cover them with silver glitter. The resulting balls must be turned over so that they dry evenly and gradually.
You will have an excellent opportunity to independently control the size of snowballs made of cotton wool and their quantity. You can create small snowmen in a similar way, decorating them as you wish. In general, there can be a great many ideas. Everything is limited by your fantasy and imagination. For example, there are a number of other ways to create a snow miracle. You can roll up a small piece of cotton wool to form a ball, add white PVC glue, make sure it is inside the ball and spray the resulting snow with hairspray. If the polish has glitter, it will look perfect.
Chamomile Clown
Hello friends!
Let me introduce myself, I am Chamomile the Clown. I work as a children's animator and am passionate about twisting—modeling balloon figures with my own hands and decorating holidays with balloons. I run a YouTube channel “Daisy Clown”
, where I regularly publish master classes on twisting - making figures from balloons with your own hands.
Today we bring to your attention our new video master class (video lesson) of Chamomile Clown on making snowballs from padding polyester with your own hands for kindergarten, New Year's parties and games with Father Frost and the Snow Maiden.
How to make a snowball with your own hands or what you can make snowballs from
How to make a snowball with your own hands.
For the New Year, it is customary to decorate the house with all kinds of decorative elements, tinsel, candle arrangements, decorate the Christmas tree, decorate the windows, etc. We propose to go further and decorate the house with snowballs, of course not real ones, but very similar to the original.
Below we will tell and show with various examples how to make a snowball with your own hands. Decorative snowballs can be put in a bucket and placed at the front door, they can also be effectively displayed on wall shelves or a fireplace, and of course, decorate the New Year tree with them.
If you are interested in the question of what artificial snow can be made from, we recommend reading this review.
How to make a snowball from a foam ball and artificial snow
In the “Everything for Creativity” stores we purchase the required number of small foam balls.
We cover each of them with a generous layer of PVA glue (it is convenient to apply the glue with a wide brush), and immediately sprinkle it with artificial snow.
For convenience, artificial snow can be poured into a plate, and simply dip the glued balls into its composition. After that, the ball must be pinned onto a toothpick and secured to a piece of plasticine until completely dry.
Textile snowballs
From soft snow-white fabric we cut out three petals, which we sew together on a sewing machine, from the wrong side, we turn the cover inside out, we put padding polyester inside, and we sew up the remaining hole with our hands.
Snowballs made from foam balls and putty
We string the ball onto a thick wire (we form a hook at one end of the wire), cover it with a layer of putty, which is convenient to apply with a small knife designed for butter. Hang the snowballs on the wire by the hook until they dry completely.
How to make a snowball with your own hands.
Snowballs made from sewing threads
We go to the pharmacy for medical finger pads, inflate them, tie them so they don’t deflate, take the thinnest snow-white threads and wrap them around the balls from the finger pads, generously cover the top of the product with a layer of PVA glue, and leave them to dry. When the balls are dry, pierce the fingertip with a needle and pull it out into the hole from above.
Snowballs made of cotton wool and PVA glue
We form a small ball from cotton wool, cover it with a layer of PVA glue, cover it with another layer of cotton wool on top, and again dip it in PVA glue, this must be done until the size of the ball corresponds to the average size of a real snowball. To finish, cover the top of the ball with a final layer of PVA glue and sprinkle with white glitter. Leave to dry.
How to make a wool snowball in a washing machine
We take white woolen threads, wrap them around our fingers (see photo), then tie them in the center, create a winding of threads to form an even ball. We thread the end of the thread into the eye of the needle and stitch through the ball several times, cutting off the excess tip of the thread.
We place the balls in a nylon stocking; if there are several balls, then tie a thread between the balls. We put the balls in the washing machine on the hottest setting, and put several tennis balls in the machine with them.
After the washing is completed, you need to turn on the drying mode, if this is not the case, then simply take out the balls and leave them to dry in the sun or near the radiator.
How to make a snowball pompom
We cut out two circles from cardboard, cut out round holes in the inside of each of them, and as a result we get two cardboard rings. We connect the rings together, cut them from one part, and wrap them with thread.
When the rings are sufficiently wrapped with thread, we cut them in a circle with scissors, connect them in the middle with a thread of the same tone, then fluff the pompom with our hands, and trim it around the perimeter with scissors.
The result is a soft and fluffy snowball.
DIY snowball made from soap and starch
You can also make a snowball with your own hands from soap, starch and a foam ball. Take snow-white soap, grate it, add potato starch, mix, pour in hot boiled water, add white sparkles into the mixture. Beat the resulting composition into foam with a mixer. Apply the mixture with your hands to the foam ball and leave to dry.
How to make a snowball with your own hands.
How to use artificial snowballs
So, in front of you are ready-made white balls. What can you do with them next:
- Make
- Make toys for the Christmas tree.
- Place it under the tree.
- Collect snowmen or animal figures.
- Make a beautiful composition in a basket in combination with colored balls.
These are just a few possible ideas for using snowballs. Use your imagination and you will get some great interior decorations.
As you can see, you can make cotton wool snowballs with your own hands in different ways. Choose the right one and create original winter decor yourself or with your children.
On New Year's Eve, kindergartens regularly organize matinees, where Father Frost and Snow Maiden give gifts to children and tell fairy tales. But in order to create a fairy-tale atmosphere, it is not enough to just decorate the Christmas tree and dress the teachers in costumes. Toys made from cotton wool and paste were invented especially for this purpose. A simple method allows you to transform any room and breathe real New Year's spirit into it!