Basic attributes and components of cake pop
- Biscuit.
- Bonding cream. You can use sour cream or butter cream, chocolate ganache. You can also seal the sponge cake with jam, jam or condensed milk.
- Chocolate or chocolate icing. The chocolate must be melted in a water bath. To make the chocolate frosting, add a little butter or warm cream to the melted chocolate. You can also make glaze from milk, cocoa, sugar and butter. (But, for those who adhere to a healthy diet, it is better to use raw chocolate with stevia, honey, or other natural sweeteners).
- Decor. Decoration options depend entirely on your imagination. These can be confectionery toppings, marzipan figures, patterns made from icing sugar or melted chocolate, or you can cover the balls with multi-colored mastic, roll them in nuts, oatmeal, sesame seeds, etc.
- Sticks. It is very convenient to use wooden skewers. You can buy special sticks in confectionery stores. Before inserting the stick into the cake pop, dip the tip into the melted chocolate to help the ball stick to the stick better.
Decoration
Before we continue, we need to prepare something where we will stick the cakes on sticks. You can take polystyrene foam, cereals, sugar or salt, and low glasses.

This is a piece of foam plastic wrapped in cling film. Holes for sticks must be made in advance.
I'll be decorating the raspberry cake pops first. For this purpose, I take white chocolate and melt it in the microwave in pulse mode. This means I put it in the microwave for 15 seconds, then mix thoroughly. And so on in a circle until the chocolate reaches the desired consistency.
The white chocolate began to melt.
The white chocolate has almost reached the desired consistency.
You can also melt the chocolate in a water bath. To do this, pour water into a saucepan and put it on fire. When the water boils, place a bowl of chocolate on the saucepan. The bowl should be larger than the saucepan and not fall into it. The water in the saucepan should not touch the bottom of the bowl. The bowl will get very hot, use oven mitts!
It is important not to overheat the chocolate. If the cocoa butter contained in chocolate gets too hot, it can burn the cocoa powder and the chocolate will be unusable.
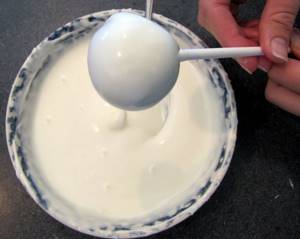
That's why I started working with chocolate that had not yet completely melted. Take your cake pops out of the freezer, dip the sticks in chocolate and stick them into the cake pops. This is done so that the cake pops sit well on the sticks and do not fly off or spin on them.

Sticks in cake pops.
Now I finished melting the white chocolate in the microwave.
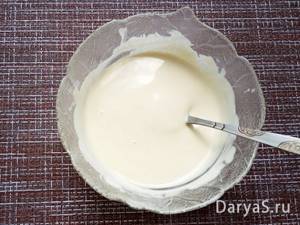
White chocolate has become a smooth, beautiful consistency.
Dip the cake pops in chocolate, shake off the excess and place them on the table. I wrote above how you can put cake pops on the table.
Don't make all the cake pops at once! I do three. If your coating hardens too quickly, then do 1-2 pieces at a time.
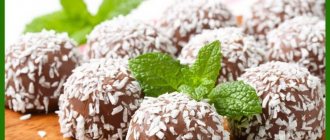
While I was pouring chocolate over the third ball, the first one was almost frozen. I rolled it in coconut flakes.

Twist the cake in the coconut shavings and press down a little so that the shavings are imprinted into the chocolate.
The second one I decorated with biscuit crumbs.

Roll the cake pops in biscuit crumbs.
We do the same step by step with the chocolate cake pops.
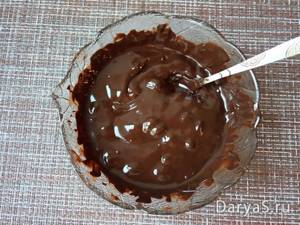
Melt the dark chocolate.
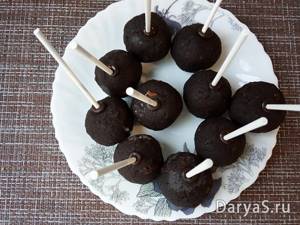
The sticks were dipped in chocolate and stuck into the balls.
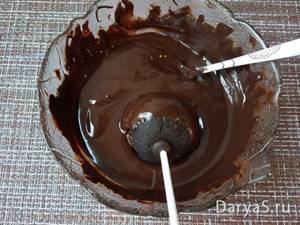
They dipped the balls on a stick into chocolate, shook off the excess, and placed them on the table.
I roll the chocolate cake pops in chopped nuts. I have almonds.
Place the finished cake pops and stand in the refrigerator for at least half an hour. The chocolate will harden and they can be removed from the stand and placed horizontally.
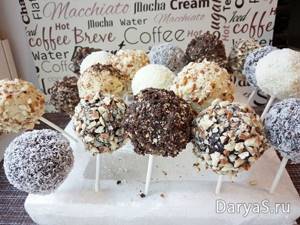
This is the forest of cake pops I got.
So, cake pop recipes
The quickest recipe for your cake pops is any cookie + filling. For example, Oreo + Nutella cookies. Simply mix these ingredients in a blender or by hand into a homogeneous mass (proportions to taste). Roll into balls and place in the refrigerator. Melt the chocolate in a water bath, cool slightly, dip the stick into the chocolate, and place the cake pops on it. If desired, dip the cake pops in chocolate and roll in whatever you like.
Chocolate Cake Pops Recipe
Ingredients:
- biscuit – 1 pc. (it's better to cook it yourself)
- condensed milk - to taste
- chocolate – 200 gr
- confectionery topping
- sticks
How to cook:
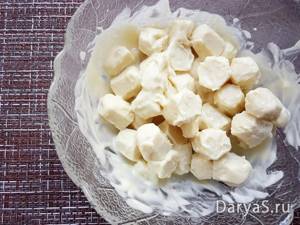
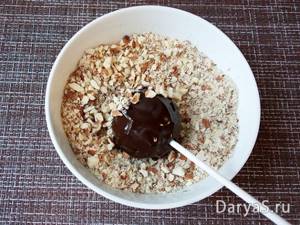
Crumble the biscuit with your hands. Add a little condensed milk to the biscuit crumbs and mix with your hands. The finished mass should be dense and pliable, like plasticine. Roll small balls the size of a walnut (you can use an ice cream scoop for this), place the balls on a plate and refrigerate for 1 hour.
Break the chocolate into pieces, place in a bowl and place in a water bath. Remove the melted chocolate from the water bath, stir and cool slightly. Dip one end of the cake pop sticks into chocolate and insert into the biscuit ball. Place in the refrigerator for 10-15 minutes. Take the ball by the stick and dip it into the melted chocolate, shaking off the excess glaze by twisting the stick. Immediately decorate as you wish (there are a billion variations on this theme, as you remember). Once the chocolate has set, the cake pops are ready!
Cake pop recipe for the oven:
Cake pops can be baked in the oven. To do this, you will need special metal or silicone molds. Such forms consist of two parts - a base with recesses for dough and an identical lid.
Ingredients:
- eggs – 3 pcs.
- flour – 150 g
- butter – 150 g
- sugar – 150 g
- baking powder - 1.5 tsp.
- chocolate – 200 g
- confectionery topping
- sticks
How to cook:
Before baking, grease the pan with butter and put it in the refrigerator. Preheat the oven to 180 degrees. Beat softened butter with sugar. While continuing to beat, add the eggs one at a time. Sift flour with baking powder. Add the flour to the creamy mixture, gently mixing everything with a silicone spatula. Fill the recesses of the bottom of the mold with dough (it’s very convenient to do this by transferring the dough into a pastry bag), cover with the top of the mold and place in the oven. Bake for 20 minutes. Readiness can be checked with a toothpick through special holes in the mold. Cool the finished balls in the mold, then place them on a plate.
Melt the chocolate in a water bath and cool slightly. Dip one end of the stick into chocolate and insert into the ball. Place in the refrigerator until the chocolate hardens. Dip the ball into the melted chocolate and shake off the excess. Decorate the cake pops as desired.
Cake pops baked in the oven are softer and more tender, and also have less calories, since they do not contain sweet cream.
Rainbow Cake Pops
Ingredients:
- eggs – 3 pcs.
- flour – 150 g
- butter – 150 g
- sugar – 150 g
- baking powder - 1.5 tsp.
- liquid or gel food colorings – 3-4 colors
- chocolate – 200 g
- confectionery topping
- sticks
How to cook:
Before baking, grease the pan with butter and put it in the refrigerator. Preheat the oven to 180 degrees. Prepare the dough: beat the butter and sugar with a mixer. Continue beating, adding eggs one at a time. Sift the flour and baking powder and fold into the dough with a spatula or whisk. Divide the dough into 4 bowls. Add coloring drop by drop to each bowl and stir until desired color is achieved. Place dough of all colors into each cavity in the mold; you can mix the colors a little using a knife or toothpick. Fill the entire pan, cover and bake for 20 minutes. Check doneness using the classic method (with a toothpick).
Next, according to the old scheme: chocolate in a water bath, dipped in cake pops, shook off excess, rolled in your desired decor.
Source: hochu.ua
Cake pops - a very detailed master class! Lots of photos, recommendations, nuances! We guarantee: you will succeed the first time!
Cake pops are a popular sweet treat today.
Children especially love it: the balls on sticks decorated with multi-colored sprinkles are so inviting! That’s why cake pops are almost always important guests at candy bars—that’s the fashionable name for the sweet table—at children’s parties. That is why it is extremely important to learn how to make them correctly: so that the cake ball can “sit” tightly on a stick at room temperature for quite a long time and not spoil. The dessert seems very simple (in general, it is, once you learn it :)), but there are many little secrets that you need to know, and several important rules that you need to follow, and then everything will certainly work out! It seems to me that when I was making cake pops, and I had several attempts, I made all possible mistakes and only then came to a decent result :) But this is very good. After all, this means that now I can tell you everything, and if you follow my advice and take into account my “punches”, then there is a very high probability that your experience working on cake pops will be extremely pleasant!
So, today I tell and show, as always, step by step and with many photos, how to make cake pops .
Basically, what are cake pops? This is a good old potato cake - sponge crumbs and cream. But if the “potatoes” are formed and placed on a plate/substrate, then the cake pop should hold tightly on the stick, that’s its whole trick. This means that if the consistency of the dough is incorrect or the cream is not very stable, the balls will not hold up and will begin to fall apart when left outside the refrigerator for a long time (usually several hours). It is also very important to learn how to cover them beautifully with chocolate (glaze). Despite the apparent ease of this process, it has its own characteristics, which it is better to know about in advance. I will tell you what I managed to read, review and check, and, with your permission, I will also describe my mistakes so that you do not repeat them.
For cake pops, we need a sponge cake (it can be baked on a baking sheet in the form of a layer, like for a roll, this will be faster than in a round form) and any stable cream, that is, a cream that quickly sets in the refrigerator and can withstand room temperature: does not flow, does not melt, holds its shape for a long time. And also, of course, chocolate! Lots of chocolate! We need the balls we roll to be completely immersed in it. Chocolate can be either dark, milk or white. I will show with the example of white. It is very important to choose a suitable bowl into which you will pour the chocolate glaze: it should be deep and narrow, then the consumption of chocolate will be significantly reduced. Readers suggest that it is good to use a glass for this. And you'll also need chopsticks! Confectionery stores sell special sticks for cake pops: they can be made of compressed paper or plastic. Of course, it is more convenient and best to use them. But if you don’t have any, you can try making cake pops on wooden barbecue skewers or paper cocktail straws. Well, and of course, take care of decorations: confectionery sprinkles, beads, food glitter, colored sugar, chocolate of contrasting color, mastic elements - anything edible that your imagination suggests will do!
Well, I’ll note right away: from the amount of ingredients given in the recipe, we got 27 decent-sized cake pops - such that one is enough for a cup of tea. Reduce or increase the quantity, maintaining the proportions, if you need fewer or more cakes.
So, let's go!
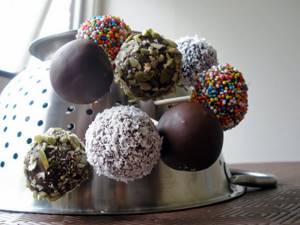
In fact, my adventures did not end there. At first I ran around the house looking for something to put the cake pops in so they wouldn't fall out. This is a separate task, I strongly recommend that you think about the question of what you will put them in, even before you go to bake a biscuit for them :) In any case, think through the options :) When I finally found the ones that were suitable, as it seemed to me , glasses, and carried them to the shooting location, the cake pops fell out of them and fell on the floor. It was, of course, a super fail and I wouldn’t talk about it, but! Look what they look like after the fall! Yes, some of the sprinkles were lost, but they were intact and even cute! This means the experiment was a success!
I should also note that the cake pops stood perfectly well in glasses for several hours at room temperature.
Now you also know how to make cake pops !
And very soon there will be a master class on creating New Year's cake pops, don't miss it!
Happy adventures in the kitchen!
Source: pteat.ru
What do we need for cooking?
You can use any jam. I took it to my taste. Apricot jam helps bring out the chocolate flavor. And I just love raspberries. You can also replace jam with jam or marmalade.
I make chocolate glaze from chocolate, which is sold in confectionery stores. Once I took “Alenka” for these purposes. I didn't like the result. After the first melting, when the chocolate began to harden, I tried to melt it again, but nothing worked. I had to spread it onto the cake pops with a spoon. You understand that the appearance of the sweets has deteriorated as a result. Therefore, now I only take good confectionery chocolate. With chocolate it is difficult to achieve an even surface on the cake pop. It's much easier to work with icing. It lays down in a thinner layer and hardens faster. But the taste is not the same. That's why I prefer chocolate.
Cake pop decor is a creative process. You can come up with something unique! My imagination is poorly developed, so I simply rolled the cake pops in natural sprinkles. Namely, in coconut, nuts and biscuit crumbs. You can use multi-colored confectionery sprinkles, colored icing, and mastic. You can make your own colored glaze. To do this, add a little fat-soluble coloring to the melted white chocolate. The type of dye is important! The water-soluble coloring will cause the chocolate to curdle.
Sponge cake (for 24 cake pops weighing 40g each)
- Sugar - 240 g.
- Wheat flour (highest grade) - 240 g.
- Chicken egg C0 - 6 pcs. (372 g). You can take 7 C1 eggs.
- Cocoa powder - 30–60 g (needed only for chocolate sponge cake).
Impregnation
For chocolate cake pops (makes 12):
- Apricot jam - 100g.
- Cream 33% - at least 40g.
For raspberry cake pops (makes 12):
- Raspberry jam - 100g.
- Cream 33% - at least 40g.
Decor
For chocolate cake pops (makes 12):
- Dark or bitter chocolate - 100–200g.
For raspberry cake pops (makes 12):
For both types:
- Cocoa butter - 50–150g (optional). If it is difficult to work with chocolate, add cocoa butter and melt it. I don’t use this method because I prefer pure natural chocolate.
- Coconut flakes - a handful.
- Chopped nuts - a handful.
- Biscuit crumbs - a handful (the remains of the biscuit that we will bake at the beginning of cooking).
We will also need sticks. Special sticks for cake pops can be purchased at a confectionery store or take wooden sticks for kebabs.
And now I present to your attention a simple step-by-step recipe for making cake pops with photos and detailed descriptions:
CAKE POPS ★ Recipe from Pokashevarim (Issue 283)
Let's cook
Published: 2 years ago
Do you like sweets? Then this recipe for cake pops (cake balls) is for you. These are small round sponge cakes on sticks. They are very juicy, moist and comforting. Try making cake pops, you will love it. ★ Based on advertising. Evgeny Svalov https://vk.com/esvalov ★ Zhenya's group https://vk.com/bestmarketer ★ Cool knives, like I have here https://goo.gl/F5oKQP Ingredients: FOR THE BISCUIT: Eggs - 6 pieces Flour – 230 grams Sugar – 180 grams Cocoa powder – 2 tablespoons Baking powder – 2 teaspoons Vanilla sugar – 1 teaspoon Salt – 1 pinch CREAM: Butter – 100 grams Condensed milk – 70 grams OTHER INGREDIENTS: White chocolate – 3 bars Dark chocolate Pastry topping Sticks —————- LET’S COOK ON SOCIAL NETWORKS ① Official website https://www.pokashevar. oi video on the topic: DESSERTS AND SWEET PASTRY https://www.youtube.com/playlist?list=PLtgZAIFmyCdaKL2UE7FlSXgSZUyp5iKkN COOKING MEAT https://www.youtube.com/playlist?list=PLtgZAIFmyCdYtZ3xK3PBuVXJfFWzQ4jLc POULTRY DISHES S https://www. youtube.com/playlist?list=PLtgZAIFmyCdarvbfzswmMH-v2wezm074G BLUE.
aqmujfcYjBZjzqgUFrE ———————— For channel development: Webmoney wallet: R265065116488 Yandex money: 41001844306837
Source: minecraftvideo.ru
How to prepare the base for cake pops and cake balls
You can create any kind of dough for the base of cake pops: biscuit, yeast, cupcake. The most important thing is that it is soft, since it needs to be broken into small pieces and mixed, for example, with condensed milk or something similar.
After this, you should roll it into balls or give it any other shape for future delicacy. And the final stage is the baking process. As soon as the made figures are baked, they need to be placed on skewers and decorated.
You can use powdered sugar, coconut sprinkles, syrup and much more as decoration.
Chocolate sponge cake
Chocolate desserts are considered the most delicious and high-calorie. To give the biscuit a chocolate flavor, confectioners add cocoa powder. But this deliciousness can be made at home.
The recipe is simple. Ingredients you will need:
- butter – 120 g;
- sugar or powdered sugar – 120 g;
- chicken egg – 2 pcs.;
- milk – 6 tablespoons;
- cocoa powder – 4 tablespoons;
- the amount of flour depends on the consistency of the dough; it should not be very dense.
The creation process is as follows:
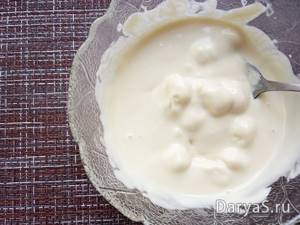
- Place butter, powder, eggs, milk and cocoa powder in one container and mix thoroughly until smooth.
- Gradually add flour, stirring the dough. The amount of the ingredient should be such that the dough is not dense.
- Then you need to roll the balls or give the product any other shape. Baking is required in a silicone mold.
- As soon as a golden brown crust forms, you need to take it out and put it in the refrigerator to cool.
Cake pops for children
Organizing a children's party takes a lot of time and effort. The lion's share of time is taken up by compiling a menu for the sweet table, because it is very important to think through both the design and types of desserts, which should be both tasty and beautiful. Recently, it has become popular to create a themed Candy Bar, which is designed based on famous cartoons. Depending on the child’s age and gender, candy bar desserts can be filled with cupcakes and cake pops with Smeshariki or in the form of characters from games.
Our company’s confectioners offer to take on all the hassle of selecting sweets for your child’s Candy Bar so that the birthday boy and guests are satisfied.
For glazing
The base for the cake balls is ready. It was baked and cooled down. Now you need to decorate the future dessert in the most original and delicious way. For example, cover with glazed syrup.
Every pastry chef and housewife uses frosting for cupcakes. This is a simple, fast and original method. In addition, with the help of glaze you can draw various designs and add originality to your baked goods. You can use either simple chocolate or original colored glazed filling.
Below are some of the most popular and delicious recipes.
Chocolate icing
The most common way to decorate cake balls is with chocolate icing.
To make it you will need a white chocolate bar - 175 g or candy glaze - 200 g.
The process of making glazed syrup is simple. A bar of white chocolate or candy needs to be melted in a microwave oven or in a water bath.
Ready. Now you can decorate the cake balls.
Reference! To make a mirror glaze, use glucose syrup. Simply add a small amount of this ingredient to melted chocolate or candy.
There is another recipe for making chocolate glazed filling.
For this you will need:
- butter – 50 g;
- cocoa – 3 tablespoons;
- sugar – 2 tablespoons;
- sour cream – 100 g.
Mix all ingredients in one bowl and place over low heat. You need to stir constantly to get a homogeneous mass.
Sugar icing
Sugar filling is considered the simplest recipe for decorating a sponge cake.
To prepare glazed filling of various shades for cake balls you will need:
- egg white – 1 pc.;
- powdered sugar – 200 g;
- lemon juice – 1 tablespoon;
- food coloring - at the discretion of the housewife.
To cook, you need to start whipping the protein, gradually adding powdered sugar and juice to it.
Reference! If you need to fill one shade, then dyes are added immediately. And if you want to make an original drawing, then it is better to do it on a frozen glazed fill.
Mix the ingredients until you get a homogeneous mass of the required thickness.
Cake balls are simple but delicious delicacies that will decorate any holiday table, not only for children, but also for adults. And preparing such a dessert is simple and quick, just follow the step-by-step instructions. Give it a try.
Dessert design options for boys and girls
All girls are little princesses for their parents and loved ones. They love fashion, beauty, flowers, fairy tales and cartoons about fairies and good witches. Our “Frozen Heart” cake pops are perfect for decorating a girl’s sweet table. Desserts can be in the shape of a funny snowman Olaf or beautiful baby blue balls with snowflakes, they can be decorated with edible images of princesses Elsa or Anna.
Very young ladies will definitely appreciate the Candy Bar, which is designed based on the cartoon “Malyshariki”. Tiny characters are perfect for decorating mini desserts.
The design of a candy bar for boys can be done in several ways. Taking into account the age of the child, he may like the following sweets:
- cupcakes and minions cake pops;
- mini desserts in the shape of trolls;
- Teenage Mutant Ninja Turtles Cakes.
Our craftsmen can design any confectionery product according to your child’s preferences.
Delicious cake pops with cream cheese
This delicious cake on a stick will be a great alternative to a birthday cake.
For the test you will need:
- 80 g flour;
- 5 g cocoa powder;
- 3 g salt;
- 5 g soda;
- 230 g sweet butter;
- 300 g sugar;
- 4 testicles;
- 200 g low-fat sour cream;
- 100 ml milk;
- 5 drops vanilla extract;
- red food coloring.
For filling and cream:
- 30 pcs. almonds;
- 150 g milk chocolate;
- 450 g Philadelphia cheese;
- 120 g butter;
- 80 g sour cream;
- 300 g powdered sugar;
- 300 g white chocolate.
Cooking stages.
- Mix and sift flour, soda, cocoa, salt.
- Separately, use a mixer to mix sugar and slightly melted butter. Add eggs one at a time and continue beating.
- Add milk and sour cream. Beat for another 3 minutes.
- Vanilla extract and dye are added to the resulting mass.
- Add the dry mixture to the dough and stir with a mixer on low.
- Bake the cake on a baking sheet sprinkled with flour at a temperature of 190°C for 40 minutes.
- For the cream, beat the cheese, sour cream and soft butter with a mixer.
- Add the powder in parts, whisking on low until smooth.
- To make the filling, melt the chocolate in a water bath and dip each nut in the resulting mixture. Place the nuts in the refrigerator for an hour to harden the coating.
- The cooled biscuit is crushed into crumbs.
- Mix with prepared cream cheese.
- Small rounds are molded from the dough, placing a glazed nut inside each one.
- Before processing, keep the workpiece in the refrigerator for 2 hours.
- Each ball is placed on a skewer and dipped in melted white chocolate.
- Decorate as desired.
- The products are kept in a horizontal position until the coating hardens.