What are the different shapes of pies?
Without delicious pastries, the history of Slavic cooking is unthinkable. Over the years, new ways to beautifully sculpt pies have regularly appeared. The main secret to obtaining original baked goods is a combination of tasty filling, good dough and the skill of the cook. It is worth noting that pies are an unusual dish, because depending on the filling they can be:
- dessert (made with jam or cottage cheese);
- appetizer (made with vegetable or mushroom fillings);
- main dish (made with meat, potatoes or fish).
The uniqueness of flour products lies not only in the wide variety of fillings, but also in the form of baking. You can make pies from different doughs:
- yeast (prepared using sponge or straight method);
- yeast-free (custard, puff pastry or cheburek).
Making pies from yeast dough turns into a real art if the housewife shows her imagination. The shape of the products can be square, round, oval.
To ensure that your pies excite the appetite of everyone who looks at them, it is recommended to sculpt them, following some cooking rules:
- Pour a little sunflower oil on your palms so that the workpiece does not stick to your hands.
- To ensure that the edges of the cakes stick well, they can be greased with water or egg white.
- Before putting the pies in the oven or frying pan, leave them for 15 minutes under oiled cling film. Thanks to this, the baked goods will become fluffy and appetizing.
- To ensure that the pies have a golden brown crust, you need to brush the tops with beaten egg yolk.

Round products take us back to childhood. These pies are made with apples and other fruit fillings. This will help keep all the juice inside. To get nice round products:
- Roll out small cakes from the dough, about 5 millimeters thick.
- Place the filling in the center.
- The edges of the cake are gathered in the middle of the pie.
- Pinch the edges to make a pouch.
- Place on a baking sheet, clamp down.
Oval is the most popular form of yeast pies. For filler, you can take onions with eggs, cabbage, liver, etc. How to make oval-shaped pies:
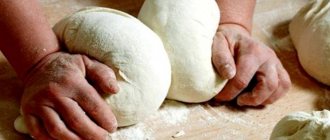
- Divide the dough into balls.
- Roll each ball into a roll.
- Cut the resulting rolls into 4 cm pieces with a knife.
- Roll each piece into an oval cake 3-5 mm thick.
- Place the filling in the center.
- Place one edge of the workpiece on the other, mold the pie in the shape of a semicircle.
- The pies should be placed seam side down in the pan.
Triangular products are, as a rule, baked goods with an open filling. Meat, potatoes with chicken or fish are suitable as a filling for them. How to make triangular shaped pies:
- Roll out a rectangle, 0.5 cm thick.
- Place the filling in the middle.
- Fold the two edges on top of each other (you should get an arrow).
- Fold the remaining edges up.

Relief pies will help surprise and delight loved ones. The filling can be salty or sweet, only the thick consistency is important. How to make embossed pies:
- The dough is rolled out into a layer.
- Cut out ovals from the resulting layer.
- In the middle there is a filling (sausage).
- The top and bottom of the workpiece are turned in a quarter.
- The corners are folded crosswise along the wide edge (as if swaddling the filling).
Methods for making pies
To make baked goods not only tasty, but also beautiful, you need to know the technology of cooking. There are many ways to make pies with a variety of fillings. The first step in preparing products is kneading the dough. Depending on its type, you need salt, sugar, flour, milk, yeast (not for all recipes) and chicken eggs. The size of the pies determines the amount of filling. When rolling out the dough, you already need to form identical balls. Otherwise, the pies will turn out to be different sizes.
Traditionally, one of the following methods is used to prepare flour products:
- Prepare the dough, tear off equal-sized pieces from it, and form into balls. Place the preparations on the kitchen table. Roll out the dough into circles using a rolling pin.
- Cut off a significant portion of the finished dough, roll it into a sausage, and cut into portions. The resulting pieces are dipped in flour on both sides and placed on the work surface of the table. The pieces need to be kneaded with your fingers or rolled out with a rolling pin.
- You need to cut off a significant portion of the finished dough and roll it out using a rolling pin. Take a glass and cut out pie circles from the dough.
Delicious recipe! Cooking fish in batter in the oven
LiveInternetLiveInternet
All of us, housewives, want our dishes to be not only the most delicious, but also to have a memorable appearance. It’s not enough to learn how to bake pies! If you know how to decorate them beautifully, your family and friends will immediately appreciate it :0)
Making decorations for pies is a kind of “baker’s sculpture”, which is almost impossible to do without interest, love and imagination.
Decorations can be used to add an attractive personality to each cake.
The main thing is that the decorations are spectacular, but their production is not too labor-intensive and does not distract unnecessary energy. The edges of the pie can be decorated in various ways, I will show you some of them - the simplest ones that will not take much time :0)
So let's get started. Prepare the pie dough. Roll out a large ball of dough and place it in the pan.
Small tricks
* First of all, you need to carefully align the edges. Trim the edge of the dough with a knife and press it flat.
* Decorations for pies are made from the main dough, or a special butter dough (always containing sugar in the recipe) or grated dough (from flour, water and yeast, taken in arbitrary proportions) is prepared separately.
* Lightly rub the dough left for making decorations in flour so that it becomes stiffer and can hold the shape of the decoration.
* Moisten the edges of the pie so that the dough sticks together well. You can also wet your fingers with water, then the dough will definitely not stick to your hands.
* Decorations made and attached to the surface of the pie are greased with a light foam of whipped egg white, milk or just water before baking.
1. Edge formed with a fork Carefully trim the edges of the dough at the level of the edge of the pan in which the pie will be baked. Using a four-prong fork, press the dough firmly and evenly toward the edge of the pan. Walk along the entire border. You can make a continuous pattern, or you can do it at certain intervals. If the fork sticks, dip it in flour as needed.

2. Openwork spoon
Press the rounded tip of a spoon into the edge of the cake. Then lower the spoon and repeat, or use a smaller spoon that also has a rounded edge.

3. Curly edge Using scissors, trim the dough leaving about 1/2 inch above the edge of the pan and fold the edges of the dough down. Using your thumb and index finger, alternately squeeze about an inch of dough around the index finger of your other hand. Continue all the way around the edge.
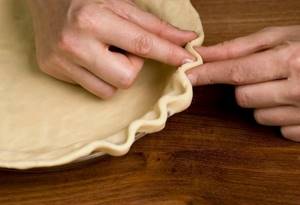
4. Fluted edge Using scissors, trim the dough, leaving about 1.5 cm above the edge of the pan. Fold excess dough down. Place the index finger of one hand on the OUTSIDE of the curb. Gently wrap your index finger and thumb of your other hand in a “V” shape to create a frill. Repeat the same around the entire edge. There should be 5mm between each frill.
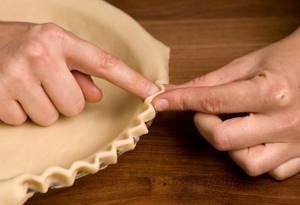
5. Sharp Grooved Edge Place the index finger of one hand on the INSIDE side of the curb. Grasp it tightly with the index finger and thumb of your other hand - you will get a groove. Repeat the same around the entire edge of the pie. There should be 5 mm between the grooves.
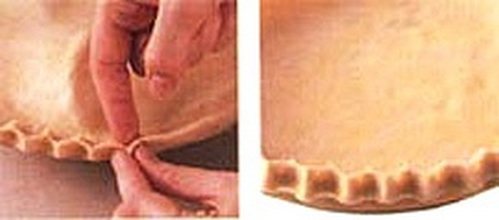
6. Twisted rope Place your thumb at an angle to the edge of the dough. Then grab the dough between your thumb and index knuckle. Place your thumb in the groove left by your index finger. Pinch. Repeat the same steps around the entire pie.
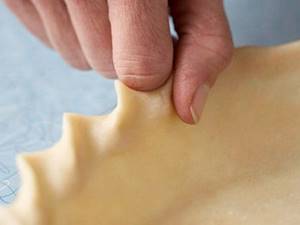
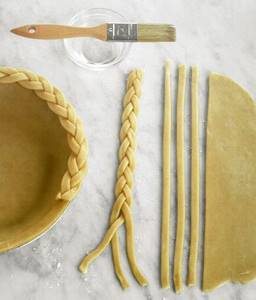
7. Braids A braid is prepared according to the size of the pie circumference or, if the size of the pie is quite large, two braids are made according to the size of the semicircle of the pie. * The easiest way is a single strip braid. Using a knife, cut the dough evenly along the edge and press down. Cut a long ribbon about 2 cm wide from the scraps of dough. Moisten the edge and press one end of the ribbon. Carefully twist it along the axis to form a beautiful spiral and press it to the edge again. Continue along the entire edge.
* A braid made of two strands. Roll out two identical pieces of scrap dough into thin strips.

Intertwine them together, twisting them into a rope to fit the circumference of the pie. Moisten the edges of the pie with water (or brush with yolk) and carefully lay the braid along the carefully pinched wet edge of the round or oval pie
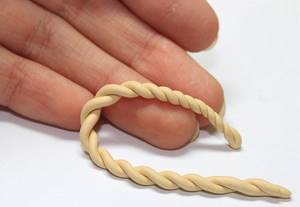
* Three-stripe braid . Braids for decoration are braided from three thin round rolled flagella or narrow and long strips cut from dough. Take 3 long strips of dough of the desired width. Braid them. Moisten the edges of the pie crust with water and attach to the moistened edge.
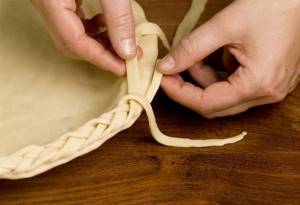
Or place the finished braid on the pinched edge of the pie, greased with yolk, and slightly flatten it to secure the decoration to its surface.
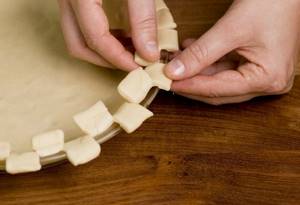
8. Chess With a knife, cut the dough evenly along the edge. Using kitchen scissors, make approximately 1cm slits around the edges of the pie. Fold across one to the center.
9. Profile edges Using a knife, cut the dough evenly along the edge and press down. You can cut out flowers or other figures from a layer of dough using special molds and decorate the pie with a composition of them.

Or you can make decorations yourself.
* Leaves . Trim the dough flush with the edge of the pan. Roll out a small piece of dough into a layer 2–3 mm thick, cut it into strips of the desired width and cut them into small or large diamonds. Give each diamond the shape of a leaf, using the blunt side of a knife to press out the “veins” on the leaves. The edges of the leaves can be slightly cut or left smooth. If you have time, use a small pastry cutter to cut out decorative leaves from the scraps of dough. Moisten the edges of the dough and press the leaves into place, slightly overlapping each other if necessary.
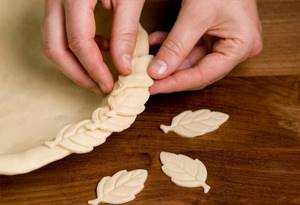
By the way, you can cut out other figures in this way: diamonds, hearts, stars. Well, the base of the pie is prepared and beautifully decorated. All that's left to do is add the filling.

and bake our culinary masterpiece

Ughsssssssssssssssssssssssssssssssssssssssssssssssssssssssssssssssssssssssssssssssssssssss Real jam!
For hostesses:
Apple pie with prunes
How to pinch pies beautifully
How to bake and roll a sponge roll
Soft apple cookies
How to make pies correctly
The shape of the pies depends on the dough and filling. There is only one rule: baked goods with meat, vegetables or fish must be closed (to preserve juiciness). Pies with jam, cottage cheese or other moist fillings can be made open. Below are the ways to properly prepare pies:
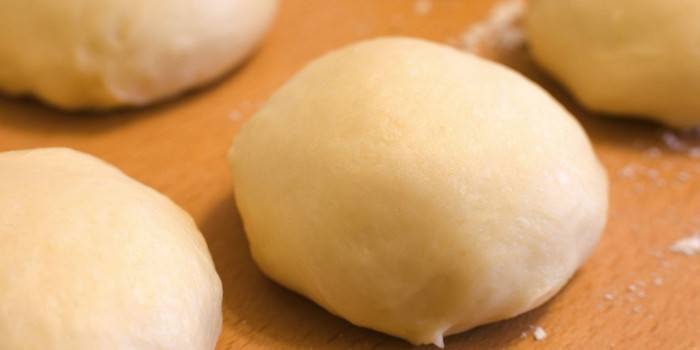
- Divide the dough into small pieces. Form neat balls by rolling between your palms. At the same time, you need to add flour so that the dough does not stick to your hands. Roll out flat cakes into round shapes using a rolling pin. Do not make the dough too thin, because it may tear from the filler. The size of the workpieces also matters; pies that are too large do not look aesthetically pleasing and are not very convenient to eat.
- Place the filling (about 1 tbsp) in the center of each tortilla.
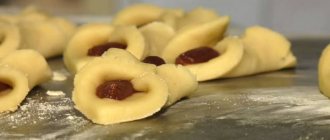
- Taking into account whether you plan to fry the pies in vegetable oil or bake them in the oven, you can fold the cake into a crescent shape or, by lifting the edges of the dough, mold it (a seam strip will be in the middle).
How to form pies
There are many original ways to seal pies. It all depends on the filling of the product and the type of dough. You can make oval (boats), square (envelopes), round pies (bags), constantly delighting your household. If the cooking method is yeast, then it is better to sculpt round or oval-shaped products. This is the easiest and fastest way to get food for a family tea ceremony. It is recommended to lubricate your hands with vegetable oil when forming pies so that the workpieces are of high quality and do not stick to your palms.
How to fill oval or round pies:
- Take the prepared ball, knead it into a circle about 5 mm thick.
- Place some filling in the center.
- To obtain an oval shape, connect opposite edges and pinch. Round pies need to be sculpted like a bag, stretched upward.
- If you brush the edges with water, the pies will not open when frying, making them juicy and tasty.
To obtain square-shaped products, a layer of dough is rolled out with a rolling pin and cut into rectangular pieces. The filling is placed in the center and the product is molded like an envelope. This is a particularly good option for puff pastry. Housewives often prefer to make triangular-shaped pies. The method is similar to the previous one, but instead of an envelope you need to make a corner.

How to wrap correctly
After you have rolled out the blanks and prepared the filling, you need to wrap the pies beautifully. There are several ways to make an original product:
- Connect the ends of the workpiece to form a seam at the top. Make an effort so that it cannot come unglued during heat treatment.
- Place the sausage-shaped filler on one side of the workpiece. From the same side they begin to wrap the filling to make a pie in the shape of a rolled up tube.
- Make square products, like wrapping a postal envelope. In this case, you can improvise at your own discretion, the main thing is that the filling does not fall out of the pie.
How to beautifully pinch the edges of pies
The neat edge of the product will make the baked goods beautiful, as in the photo, and appetizing. How to sculpt products with an original seam:
- Pigtail. Take the workpiece in your left hand, with the thumb of your right hand, wrap the edges so as to get a twisted rope. Pinch off the resulting ends along the edges so as not to spoil the look.
- Hedgehog. Pinch the product so that triangles are formed along the edge or make small cuts every 1 cm, which will need to be folded diagonally.
- Roll out the cake, trim the edges to form a rectangle. Place the filler in the center, seal the two upper edges at an angle of 45 degrees. After this, also connect the bottom edges. The center is sealed last. Turn the seams into tight strands.
How to roll out the dough
Everyone loves dough products. It is used to make cakes and various pies, delicious fluffy buns and rolls, pizza, pasties and dumplings. For virtually all products, the dough is rolled out to the desired size and thickness. Roll out the dough so that it is smooth and bakes evenly. Since all types of dough have their own consistency and design, the methods for rolling them out may be different. We will tell you about some tricks that you need to know before rolling out the dough.
Instructions
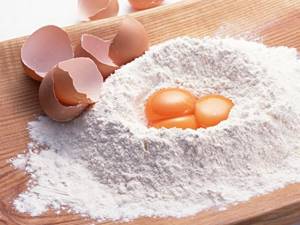
1. To prevent the dough from sticking, roll it out on a flat surface sprinkled with flour in advance. Add flour as needed during the process. Use rolling pins for rolling. A comfortable rolling pin size is about 40-45 centimeters with a diameter of about 5 centimeters. It would be great if it was equipped with handles on both sides. 2. Traditionally, the dough is rolled out in 2 directions, turning it as you go so that the entire area is rolled out evenly. You need to start rolling out the dough from the middle, from the center, using forward and backward movements. 3. If you need to roll out the soft and sticky dough thinly, then to do this you need to place it between two large sheets of oiled parchment paper, lightly sprinkling them with flour. Later we will do this more closely with a rolling pin. If there is no paper, then instead of a rolling pin, in order to roll out such dough, we will use a bottle with cold water and a tightly closed neck. The rolling process must be done little by little and carefully, avoiding sheet tears. 4. For dumplings, dumplings, chebureks, manti and khinkali, the dough is rolled out using two methods. In the first, a large thin sheet is made, from which mugs are cut out with a glass or saucer, depending on the dish being prepared. The remaining dough is rolled out again. In the second method, a sausage is formed from a piece of dough, cut crosswise into bars, which are dipped in flour on both sides and rolled out with a rolling pin. An experienced housewife produces mugs of a positive shape and identical size.
Dumplings are famous in every world, they are prepared in China, Mongolia, Siberia, even the countries of Southeast Asia and the Middle East have their own version of dumplings. All of them, finally, are of different shapes, sizes, and the recipe is also different. The dough for real Russian dumplings is prepared using wheat flour, rolled out thinly, making them small and round.
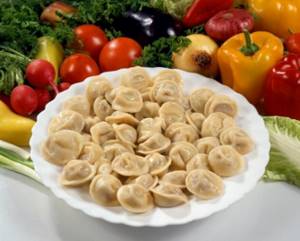
You will need
- 500 g wheat flour;
- For the dumpling dough:
- 2 eggs;
- 1 tbsp. l. vegetable oil;
- 200 g water;
- 1/2 tsp. salt.
- For the test in advance:
- 1 glass of water;
- salt;
- 2 cups of flour:
- 3 egg yolks:
- flour for dusting.
- To color the dough:
- 1 g ground saffron;
- 1 tbsp. l. tomato paste or 120 g of tomato puree;
- 250 g boiled beets;
- 1 cup spinach puree.
Instructions
1. Sift the wheat flour, pour it in a heap on the table or large board, and make a depression in the heap. Pour salted water, eggs, and vegetable oil into the well. Knead the dough first with a spoon, making sure that the liquid contents do not spill out, and little by little adding flour from all sides of the “crater”, then knead the dough with your hands until it becomes homogeneous, flexible and quite sharp. 2. Knead the dough in parts: after each liquid has been mixed with flour, separate a small part from the total mass and knead it with your hands on the board, forcefully flattening and reassembling the dough into a ball. The dough is divided into parts in order to facilitate the difficult process of kneading, which requires large energy costs. As a result, you get several koloboks; cover the koloboks with a towel or bowl and leave to stand for 20-30 minutes. 3. Save the remaining dough for dumplings: if the filling is over and there is still dough left, you can store it in the refrigerator for a week by adding separately prepared preservative dough. To make this dough, bring one glass of salted water to a boil, add two glasses of flour and stir quickly, without waiting for lumps to form, keep the dough on the fire for 2-3 minutes, stirring all the time, then remove from the heat, cool slightly and beat in 3 egg yolks, knead into an elastic dough, adding flour if necessary. 4. Mix the choux pastry with the remaining dough, form into a ball, cover with a bowl and leave to stand at room temperature for a day or two, then put in the refrigerator. 5. Color the dough for dumplings: to purchase red dough, add a tablespoon of tomato paste in a ratio of 1 spoon of paste to 1 egg, or add tomato puree in a ratio of 120 g of puree to 250 g of flour. Make purple dough: boil the beets, chop them, add salt and add 250 g of boiled beets to the dough in a ratio of 2 eggs. Make a green dough: add spinach puree to it instead of water in a ratio of 1 part puree to 2 parts flour. Video on the topic
You no longer need to think about what base to choose for your summer berry pie! Try making this sour cream dough and you will remain its follower: crispy, light, thin, but at the same time beautifully calming the pressure of juicy berries!
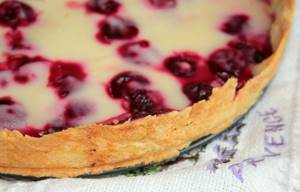
You will need
- – 400 g butter;
- – 5 glasses of flour;
- – 2/3 cup sugar;
- – 1 and 1/3 cups sour cream;
- – 1 tsp. salt;
- - ice water.
Instructions
1. Mix flour and salt in a large container. 2. Cut the cold butter (it’s best to put it in the freezer about 30 minutes before cooking so that it freezes) into small cubes. Take half of the cubes—put the other half in the refrigerator—and begin rubbing them into the flour mixture. As soon as the first half is finished, we do the same with the 2nd. The result is a light, fine flour crumb. 3. Mix sour cream with sugar in a separate container. Add the liquid ingredients to the crumbs, mix thoroughly so that the mixture looks like “shaggy”. 1 tsp. start adding water until a dough begins to form. 4. Divide the finished lump into 4 parts. We wrap everything in cling film and put it in the cold for a period of 1 hour to 24 hours. After this, you should easily roll it out, put it in a mold, fill it with your favorite filling and bake it in the oven. After 30-40 minutes you can put on tea!
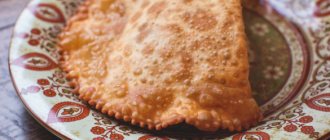
Chebureks are pies, so to speak, made from thin and unleavened dough with various fillings. For the filling, not only minced meat is used, but also cabbage, cheese, mushrooms and potatoes. To prepare chebureks, it is extremely important to use the correct dough recipe, then the chebureks will turn out unusually appetizing and soft. Please your household with delicious and rosy pasties, the sight of which no one will be able to resist.
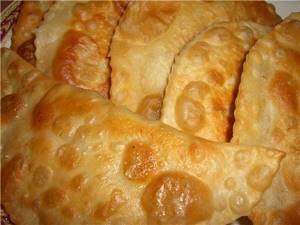
You will need
- 1.5 glasses of hot water,
- 4 cups flour,
- salt,
- 1 teaspoon granulated sugar
- 8 tbsp. l. vegetable oil.
Instructions
1. To prepare the dough you will need a bowl. Pour 1.5 cups of boiled hot water into it, add a couple of pinches of salt and one teaspoon of sugar. Mix everything thoroughly. 2. Measure out a little more than four cups of flour and sift through a sieve. Make a depression in the center of the flour slide and pour hot water with dissolved salt and sugar into it. 3. Add one teaspoon of vodka and eight tablespoons of vegetable oil, knead the dough . Cover the dough with a clean napkin or towel and let it rest for a while. 4. After a while, knead the dough and cover with a napkin, let it rest. Knead the dough 3 times in this way. 5. All that remains is to roll out the dough into a layer 3 mm thick and cut out circles using a saucer. Place a little mince on each circle of dough and bring the edges together. Make a border with a fork, pressing the cloves to the edges of the dough, and deep-fry with a large amount of vegetable oil. Note! When preparing the dough, it is not necessary to add eggs, because they reduce softness and plasticity. The dough for chebureks must be brewed, therefore it must be kneaded in boiling water, this will give the dough a special lightness and subtlety, which is the main component of appetizing chebureks. Vegetable oil added while kneading the dough will help give the finished chebureks a special bubbly quality. Vodka added to the dough makes it a little crispy and flaky when fried. Useful advice During Lent, you can cook pasties with cabbage filling. You can try making pasty dough with the addition of beer. To do this, you will need one glass of clear beer, to which you need to add salt, sugar, and one egg. Add the required amount of sifted flour. The dough should lie under a towel for some time, knead regularly. The dough should rest for at least one hour. Instead of beer, you can add mineral water, due to gas bubbles it will become more tender.
Experienced pizzaiolos - Italian masters at making pizza - invariably roll out the pizza dough into a thin flatbread to create a delicious, crispy crust. The Neapolitans even demanded that the European Union adopt a special law prescribing certain standards for pizza. This law states that the thickness of the cake itself should be no more than 3 millimeters.

Video: how to make beautiful pies
Found an error in the text? Select it, press Ctrl + Enter and we will fix everything!
-Video
—Categories
- 1000. +1 tip (309)
- Tips for all occasions (104)
- Little tricks of big cooking (86)
- Note to the hostess (122)
- Self-development (88)
- Memory development (48)
- Life tips (18)
- Time management (11)
- Communication Skills (9)
- Speed reading (3)
- Dancing (83)
- Latina (29)
- Zumba, dancing for weight loss (16)
- Dance elements (7)
- Club dancing (5)
- Go-Go (5)
- Oriental dance (25)
- FAQ (83)
- FAQ video (20)
- Useful (1)
- LiRu (2)
- Decoration (6)
- Memo (27)
- Our smaller brothers (667)
- Dogs (35)
- “They live like a cat and a dog” (25)
- My beast (5)
- From the life of cats -1 (156)
- From the life of cats-2 (35)
- Interesting things about cats (64)
- Kittens (19)
- Cats (pictures) (238)
- For cat owners (38)
- These nice little animals (75)
- On the World Wide Web (328)
- MuzCollection (33)
- How far has the progress come? (8)
- I want to know everything (114)
- Creative (17)
- Myths and facts (37)
- You can't make it up on purpose (3)
- Passionate faces (43)
- Amazing things are nearby! (14)
- Showbiz (40)
- Everything about everything (39)
- Life is a joy (679)
- Live easy (188)
- Rituals, fortune telling, signs (132)
- Holidays, traditions (101)
- Money Magic (73)
- Man and Woman (51)
- Simoron (36)
- Numerology, horoscope (28)
- For the soul (25)
- Feng Shui (17)
- Esoterics (4)
- Palmistry (1)
- Shrines (5)
- ABC of Faith (108)
- Health (834)
- Help yourself (382)
- Self-massage according to all the rules (82)
- Diseases (71)
- Qigong, Tai Chi Quan, Tai Chi (66)
- Acupressure, reflexology (44)
- Is old age not a joy? (27)
- Vision correction (9)
- Traditional medicine (9)
- Oriental medicine (8)
- Live healthy (136)
- Traditional medicine (50)
- Cleansing the body (43)
- Last cigarette (24)
- Israel (146)
- Cities (33)
- Promised Land (11)
- Useful information (5)
- Izravideo (21)
- Photo reports (11)
- Yoga (213)
- Yoga complexes (126)
- Yoga solves problems (43)
- Exercises (30)
- Asanas (9)
- Yoga for fingers (mudras) (7)
- Tips (2)
- Beauty without magic (1258)
- Gymnastics for the face, exercises (272)
- Luxurious hair (138)
- Massage techniques (100)
- Japanese beauty, Asian techniques (88)
- Secrets of youth (63)
- Original manicure (22)
- The path to glowing skin (120)
- Cosmetic bag (56)
- Flawless Makeup (105)
- Problems (45)
- The art of being beautiful (37)
- Style (139)
- Care (286)
- Cooking (785)
- Baking (97)
- Side dishes (18)
- First course (13)
- National cuisine (9)
- Dessert (56)
- Snacks (119)
- Dough products (84)
- Food served (51)
- Meat (118)
- In a hurry (31)
- Drinks (76)
- Vegetables and Fruits (118)
- Recipes (25)
- Fish, seafood (34)
- Salads (62)
- Sauces (8)
- Terms (16)
- Useful sites (11)
- Photos (8)
- Photo editors (3)
- Food (7)
- Useful links (7)
- Programs (11)
- Through life, laughing. (139)
- Video jokes (34)
- Photo jokes (3)
- Toys (24)
- Rugrats. (thirty)
- Tricky stuff (31)
- Just great! (17)
- Needlewoman (211)
- Knitting (22)
- Handicrafts (11)
- Repair (3)
- DIY (81)
- Create comfort (37)
- Sewing (72)
- Poetry and prose (252)
- Lyrics (154)
- Proverbs (68)
- Aphorisms, quotes (25)
- Prose (4)
- Catchphrases (1)
- Perfect body (653)
- Bodyflex, oxysize (121)
- Pilates (42)
- Aerobics (26)
- Callanetics (22)
- Milena. Fitness (18)
- Gym (17)
- Bodytransforming (5)
- Anatomy (1)
- Tips (70)
- Fitness program (89)
- Stretching (41)
- Exercises (248)
- Photo world (63)
- Artists (5)
- Nature (5)
- Photos (16)
- Photographers and their works (31)
- Flowers (8)
- Photoshop (5)
- Let's challenge excess weight (563)
- Trapped by diets (66)
- Laws of nutrition (121)
- Eat to live. (76)
- Healthy lifestyle (16)
- Products (73)
- Losing weight the smart way (130)
- The path to ideal (106)
Delicious recipe! Eggplant stuffed with Korean carrots recipe
-Music
—Search by diary
—Subscription by e-mail
— Regular readers
Wednesday, September 12, 2012 11:42 + to quote book
Pies (small pies) are small-sized products made from yeast dough. They are usually elongated or crescent shaped. They are usually baked in the oven or fried in oil (deep-fried).

The filling in pies can be very varied: mushroom, meat, vegetable, sometimes very complex, consisting of several components.
It is important for housewives to pinch the edges of the pie well so that the filling does not fall out during baking.
Here are some ideas on how to beautifully pinch the seam, which will not only hold the filling inside, but will also become a decoration for the pie.
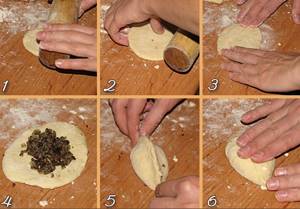
The most popular way:
Method for making pies from Irina Moiseeva:
And this is how you can “pinch” the whites:
And here, too, is an interesting way of pinching pies (see video) Pies with cabbage and eggs
Note to the owner:
