Hands are constantly visible and convey in detail a woman’s attitude towards her appearance. Even beautiful clothes and hairstyle will not be able to save the situation if your manicure is sloppy.
Painting nails for women is as natural as wearing heels, because it is a kind of manifestation of femininity. But only knowledge of the secrets and nuances of an ideal manicure will allow a woman to be proud of her well-groomed hands.
Of course, professional manicurists can handle this best. But if you don’t have the money or time, then just learn how to properly paint your nails at home.
Practical tips: how to paint your nails correctly
Be prepared for the fact that not everything will work out the first time, because painting your nails correctly also requires skill and some experience. In the meantime, listen to our advice:
First, you should properly prepare your nails for painting. To do this, you need to thoroughly wash your hands and dry them without a towel, the lint from which can interfere with the smooth application of the varnish.- Now degrease all your nails with formic alcohol (available at the pharmacy) or nail polish remover.
- Cover your nails with a base coat, which evens out the surface and allows for a smooth, even application of the polish. In addition to the visual effect, the base protects the nail from the chemical components of the varnish.
- If desired, you can protect the skin around your nails. For this purpose, use a corrector or simply smear the skin with any cream without affecting the nail area.
- Prepare the varnish, which should have an oily structure and medium thickness. Shake the bottle well before use.
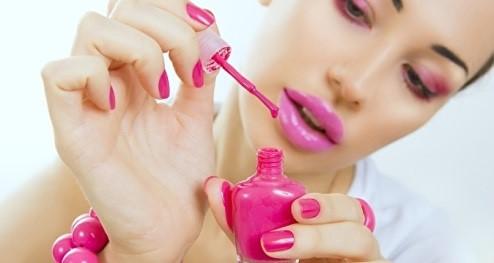
How to properly paint your nails at home
To properly paint your nails with nail polish, you do not need any special knowledge.
Just follow the advice of professionals and you will certainly succeed! It is advisable to select the color of the nail polish not only to match the outfit, but also based on the skin tone. Any tones are suitable for white skin, including bright ones: red, berry, pink. Medium skin tones include wine, olive and blue undertones. Deep red tones suit dark skin, but it is recommended to avoid turquoise and green shades.
So, here’s how to properly paint your nails at home:
- It’s better to start learning how to paint your nails with light-colored varnishes: this way the errors will be less noticeable. Over time, you will be able to carefully and beautifully apply even black varnish.
- It is advisable to start applying varnish with the little finger of your left hand (if you are right-handed).
- First, apply 1 coat of polish to your nails and let it dry thoroughly. And only then apply the second one.
- It is better to place your hand at a slightly downward angle: this will not allow the varnish to flow onto the cuticle.
- It is more correct to apply polish from the sides of the nail, and not from the middle, but this is not important.
- When the varnish is completely dry, you should cover it with a transparent protective layer.
Tip: erase blemishes only after the nail polish has completely dried, otherwise there is a high probability of damaging the manicure.
Keep your fingers on the table so that they do not shake and have support. Make sure the light is coming from the left. Immerse the brush completely into the bottle, renewing the polish for each nail.
If the varnish has thickened, it is not advisable to dilute it, as this will lead to a change in structure or even color.
Strengthening nails
Water treatments to strengthen nails
If you do your own manicure, you can pamper your hands with special baths. Soak your hands in the soapy water for a few minutes to thoroughly steam them. Then dip them in a bath of herbs or pine needles.
Chamomile bath
Take 2 tbsp. l. dried chamomile flowers and pour 1 liter of boiling water over them. Let it brew. Dip your hands into the warm solution and hold them for 10-15 minutes.
Bath with calendula and olive oil
Pour a few tablespoons of calendula flowers with water and place your hands in the still hot infusion (but at a temperature that can be tolerated). After a few minutes, add a few drops of olive oil and keep your hands in the water for a little longer.
Bath with oregano and ammonia
Pour 1 tbsp. l. herbs 1-2 cups boiling water. Add a little ammonia to the infusion. Keep your hands in it for at least 10 minutes.
Pine bath
The needles have an extremely beneficial effect on the skin of the hands, softening and disinfecting it. After such a bath, you don’t even need to treat your hands with cologne or alcohol. (But after it, and also in case of damage to the skin, be sure to disinfect your hands).
Some people add baking soda and ammonia to the water and use this solution to prepare their hands for the manicure procedure. If you don’t have any grass or pine needles at the right time, you can also follow this example. Or add a little vegetable or olive oil to warm water.
Baths made from a decoction of potato peels also soften the skin of your hands very well and have a beneficial effect on the condition of your nails. They can be combined with compresses made from softened boiled potatoes.
Baths improve blood circulation, make the skin smooth and soft, and most importantly, soft, which is necessary for a manicure. When starting a manicure, remember that your hands must be thoroughly steamed.
From time to time, add a little hot water to the solution bath. When you feel that the skin of your hands has already steamed sufficiently, start doing a manicure.
If your nails do not have sufficient density and strength, we can recommend a bath with table salt. Dip your fingertips into the hot solution, hold them there for 15 minutes, then take them out and lubricate the skin around the nail with a nourishing cream. By doing this procedure at least a couple of times a week, you will soon achieve the best results.
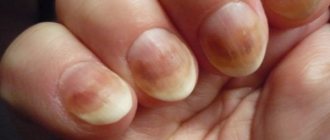
Many women take care of their nails themselves. However, despite their efforts, nails do not always look attractive. Imprecise movements, ignorance of manicure techniques, and failure to comply with hygiene rules lead to undesirable results.
Some limit themselves only to “filing”, forgetting about treating the nail fold. Meanwhile, the need for this procedure is explained by the fact that the adherent bead impedes the access of oxygen to the nail root. As a result, it does not receive enough nutrition and soon becomes brittle.
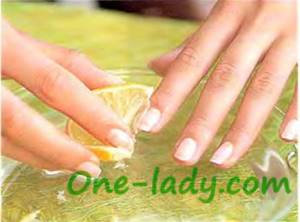
The skin does not need to be trimmed as long as it is peeled back regularly. Remove dirt under your nails with a wooden stick, wrapping its end in cotton wool, soaking it in lemon juice or a weak solution of hydrogen peroxide. Rub the dirty areas. After this, dry your hands and coat your nails with varnish.
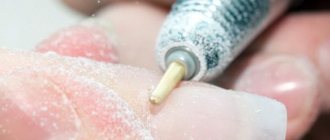
If the nails are uneven, soft and too fragile, and the surface is injured, rub special or vegetable oil into the skin around the nails. You can replace the oil with a special fatty cream. But remember that a third of castor oil must be added to any of the formulations.
After these procedures, remove excess cream and remaining varnish, wipe your nails again with a dry cotton swab and the skin of your hands with a damp cloth.
Before painting your nails with polish, carefully prepare your nails. The varnish will adhere perfectly only to the smooth surface of the nail.
So if your nails are rough, buff them lightly. And if they have numerous scratches, carefully treat them with a pumice stone.
Scrape nicotine stains from the surface of the nail using the cutting edge of nail scissors. This must be done very carefully so as not to damage the structure of the nail plates.
Cover cracks in your nails with special medical glue. And if your nails do not have any defects, lightly polish them with a small piece of soft suede.
In addition, the polish will not adhere well to the nails if there are traces of oil on their surface. Therefore, thoroughly degrease them: wipe with a cotton swab dipped in alcohol.
It is absolutely unacceptable to varnish your nails if they have not been pre-treated. If your nails and hands do not look perfect, it is better to avoid decorating them with bright varnish: this will highlight their flaws and attract unnecessary attention from others to them. In addition, it is unlikely that the varnish will be able to lie neatly on the untreated surface of the nail.
No matter how well the manicure is done, if you immediately start doing laundry, washing dishes or washing floors, only pleasant memories will remain from it. Moreover, after such an “onslaught,” not only the appearance of the nails will suffer, but hangnails will appear on the hands. And if an infection gets into a cut that is invisible to the eye, an inflammatory disease cannot be avoided. Therefore, if you have done yourself a manicure (especially at home - such an effort), postpone your household chores to the next day. It is better, of course, to take care of this in advance. If there are urgent matters waiting at home, it is better to choose a day when nothing will interfere with getting your nails in order.
Remember: if manicure is done too often and carelessly, many short transverse grooves will appear on the surface of the nail plate, in its central part, and it will become wavy.
Due to the excessive use of acetone and preparations for strengthening nails, longitudinal grooves, cracks, brittleness and delamination are observed. Therefore, keep in mind an important rule: do not abuse these funds.
We recommend that you massage your fingertips every day, while rubbing in a nourishing cream or special manicure oil. As a result of such constant processing, the cuticle will become soft and tender.
If you don't have manicure oil, remove the cuticle the traditional way (more on this above). In this case, do not use sharp tools under any circumstances. And to loosen the cuticle, dip your fingers in a hot soapy solution or heated oil. By the way, the last procedure is especially useful: the nails and the skin around them become soft and elastic. The oil protects nails from drying out.
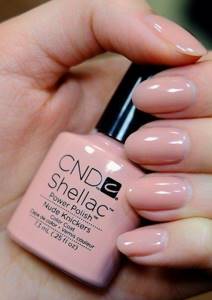
How to properly paint your nails with shellac at home
If you have problematic nails that are constantly peeling and the polish does not stick to them at all, we recommend trying to apply shellac on them, which is a durable coating that does not wear off or peel off for several weeks.
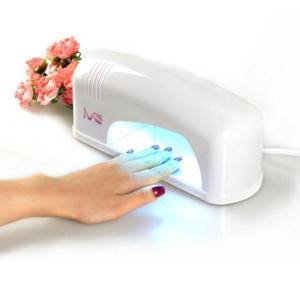
To properly paint your nails with shellac at home, you should purchase the following tools: a UV lamp for drying nails, shellac and its remover, a nail file, a cuticle stick and softening cream, a base coat for shellac.
Work algorithm:
- First you need to do a standard manicure, removing the cuticles and polishing the nails.
- Then the nail plates are degreased, capturing the skin around the nails.
- After this, carefully apply the shellac base and dry the layer under a UV lamp for 1 minute.
- Then apply colored shellac, drying each layer under a lamp for 2 minutes.
- Paint the top coat onto the dried shellac, also drying it with a lamp, and remove the top film with nail polish remover.
- Moisturize the cuticle with cream.
You will probably like shellac, because it not only makes your nails beautiful, but also prevents the nail plate from deteriorating.
How to paint your nails with gel polish correctly
Gel nails are very popular among women due to the durability and durability of the coating. The work algorithm is very similar to applying shellac: first, a manicure is done, the nails are polished and degreased.
Do not buy an expensive degreaser: it is not profitable, because it can be easily replaced with nail polish remover.
For work, stock up on gel polish, base (for better adhesion of the gel to the nail plate) and TOP (for shine of nails) coatings. A prerequisite is the presence of a UV lamp.
Attention: The UV lamp must be 36-Watt, otherwise the gel may not dry.
How to properly paint your nails with gel polish at home:
- Apply a thin layer of base coat;
- dry the first layer with a lamp;
- then cover your nails with gel;
Experts advise starting to apply gel with your thumbs: this will guarantee even drying. Important: do not apply gel to all nails at the same time!
- if necessary, after the gel has dried, the shape of the nails and their thickness are adjusted using a special file;
- then a thin layer of protective coating is applied to the nails and also dried using ultraviolet light.
You can read more about how to properly apply gel polish in our special article.
We paint correctly
Before you paint your nails, you need to choose the right polish. It’s worth turning on all your pickiness. The coating should have a dense structure, good pigmentation, apply neatly and have a fast drying time. Some brands even have separate lines aimed specifically at pedicures. They have a modified brush, which is more convenient for working on small nails.
However, if you were unable to find such an innovation, it is enough to purchase a regular decorative coating in the chosen color. Do not forget, in order to paint your nails accurately and efficiently, you will need such additions as a leveling base and top coat. These two components will significantly simplify your work and also extend the life of the coating.
The color of the enamel on the legs does not have to be identical to the manicure coating. According to many experts, painting your toenails the same color is very old-fashioned. It is better to give preference to beautiful varnishes that can complement each other. For example, you can choose a white shade for your hands, and perform a pedicure in the red spectrum. Pedicure polish can be either bright or pastel, light or dark.
The only exception is complex shades related to brown, mustard, greenish-gray. Such shades look ugly on your feet; it gives the impression that you just have dirty feet. To replace them in a similar range, you can use chocolate, neon green or sunny yellow shades.
So, how to paint toenails, if we talk about at home. First of all, a base is applied to the prepared nail, which must dry completely before applying the decorative coating. It is better to apply varnish from the middle to the edge of the nail. Try not to go into the cuticle or skin borders at the edges of your fingers. In this case, you cannot hold your hand suspended.
If you were unable to stay within the boundaries of the plate, do not be discouraged. To remove the varnish after it has dried, it is enough to use a toothpick or a special corrector. Do not forget that you will have to paint your nails with colored polish in two layers. Depending on how bright the shade is no. Two-layer application is necessary to ensure an even coating and no streaks. So, the color of the varnish will be saturated.
After the first layer of coating has been applied, you must wait for it to dry completely and only then begin applying the second layer. To extend the life of the varnish, a top coat is applied on top. If you are running late and need to dry your nails quickly, all you need to do is use a special quick-drying product.
They are sold both in the form of regular bottles of varnish and in the form of an aerosol. You will have to wait an hour before putting on your shoes and going for a walk. During this time, all layers of coating will dry completely, and your pedicure will be safe.
By the way, a special rubber spacer for fingers is a good helper in home pedicure. If the brush in the varnish is too wide for you, you can paint your nails with a separate thin one.
How to properly paint your nails with cat eye gel polish
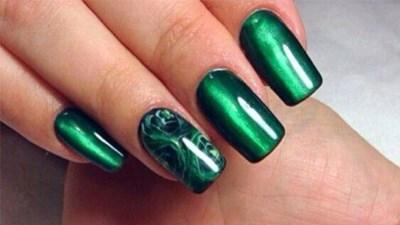
If you like a non-standard approach to manicure, try doing the so-called “cat eye”.
To implement this idea, you need to purchase a magnet and Cat's Eye magnetic gel polish, which allows you to create a unique pattern on your nails.
A pattern is applied to the magnet, which, when interacting with a special varnish, collects metal dust from the gel into a specific pattern. The result is a unique 3D effect.
First, they do a manicure, then they apply magnetic varnish to their nails and hold a magnet to them. This must be done as close as possible and held without moving for about 10 seconds!
Be sure to dry your nails using a UV lamp. An amazing manicure can be complemented with rhinestones, gold sand or stones.
Tip: to avoid loss of beneficial properties, after completing the manicure, remove the magnet away from the magnetic gel polish.
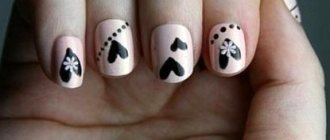
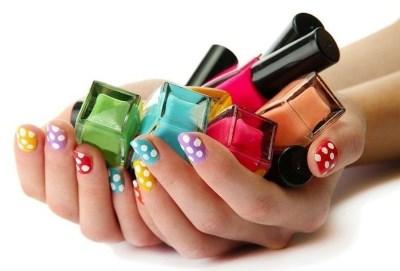
Creative manicure
You can paint your nails at home in such an unusual way that no one will doubt that you just recently left a beauty salon.
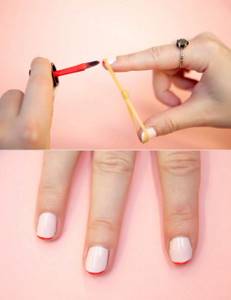
Needle
Yes, an ordinary sewing needle will make your nail fantasies come true! To do this, paint the nail plates in 2 layers and, without waiting for them to dry, apply droplets of contrasting colors. Now, by connecting them together using a sharp needle, create patterns and creative elements.
Newspaper
For this manicure, stock up on clear and white varnishes, 10 pieces of newspaper and ethyl alcohol.
Prepare your nails as usual: manicure and apply base. Then paint the plates evenly with white varnish.
Once it is thoroughly dry, take a piece of newspaper and dip it in alcohol for about 10 seconds. Quickly apply to your nail and wait for the image to print.
For each individual nail, take a new piece of newspaper. You can apply the scraps at different angles and in a chaotic order. The final “chord” will be coating the nails with a colorless fixative varnish.
Scotch
You can paint your nails with tape, using it as a limiter for a French manicure. Any geometric shapes can be cut out of tape and used as a stencil.
Tip: To make the tape lose its excessive stickiness, stick it several times into the skin before applying it to your nails.
By regularly doing a manicure at home, you will very soon learn this skill so that no one will distinguish its quality from a salon one. It will also be useful for you to read the article about the benefits of red pepper for nail growth.
Arm yourself with an elastic band
Pinterest
If you don't want to bother cutting out stencils, take a regular rubber band. Secure it near the tip of the nail in the desired position. A few minutes - and your fingers will be decorated with a flawless French manicure.
Read also: 35 manicure ideas with triangles