Homemade recipe
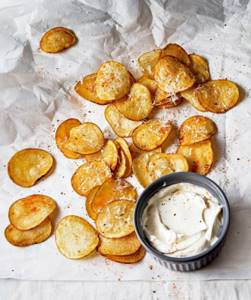
Ingredients : several large potatoes, sunflower oil, salt, spices.
How to cook: Peel or wash the potatoes thoroughly. Cut into thin circles - it is better to do this with a paring knife or using a grater, the side with only one notch. Place the slices on a plate so that it is convenient to take one at a time. Pour a 2-3 cm layer of oil into a deep frying pan or saucepan and bring to a boil. Place potatoes into the boiling oil, one slice at a time, so that they do not touch each other.
They will brown very quickly, and you need to immediately take them out when they are ready. Take out the finished chips and let the remaining oil drain off. Place on a plate lined with paper towel to absorb any remaining oil. Add salt and spices to taste while hot.
Cornmeal Chips (Homemade Tortillas)
If you are using pre-made corn tortillas, skip the first couple of steps. Just keep in mind that homemade tortillas are a filling and healthy product that is easier to prepare than you think. Be sure to try it!
Ingredients needed:
- 2 cups finely ground cornmeal;
- 1.5-2 glasses of hot water;
- half a teaspoon of salt;
- parchment paper and rolling pin;
- round plate
Step 1: Prepare the dough
Mix cornmeal and salt in a bowl.
Add 1.5 cups of hot water. Mix the dough with a spoon first, and when it becomes too thick, continue kneading by hand for about 2-3 minutes. Stop stirring when you can form the mixture into an even ball that does not stick or crumble.
If the dough is dry and rough, add a little water and mix until smooth. If the dough is too sticky, add more flour.
The dough should look like this:
Cover the bowl with a kitchen towel and let the dough rest for an hour and a half. This will soften the flour and subsequently the cakes will not crack when you press them.
Step 2: Form the flatbreads
Now divide the dough. First, divide it in half, then in half again, and the third time in the same way. As a result, you will get 16 identical balls.
From a roll of parchment paper, cut 2 pieces of 25 cm x 25 cm plus 16 pieces of 18 cm x 18 cm. You will need the larger pieces for rolling out, and the smaller ones to prevent the cakes from sticking together when you place them.
Also prepare a rolling pin and a plate.
Place one ball between 2 large sheets of parchment. Use a rolling pin to flatten it. You need to get a round cake with a diameter of about 15 cm and a thickness of 2-3 mm.
Carefully remove the rolled out cake from the large piece of parchment and place it on one of the smaller sheets.
If you want perfectly round edges, place a plate on top of the dough and cut around the edges with a knife.
Continue this process, placing the tortillas on small sheets of parchment to prevent them from sticking.
Step 3: Fry the tortillas
Heat a dry cast iron skillet over medium heat.
Place the tortillas in the hot pan and cook them for about 1 minute without oil. Then flip and cook for another 1 minute. The tortilla should be slightly charred and puffed up.
Step 4: Make the Chips
Here's what you need to turn these pancakes into crispy snacks:
- 16 corn tortillas;
- 2 tablespoons sunflower or olive oil;
- 1 teaspoon fine sea salt;
- freshly squeezed juice of 2 limes (if you want to make them lime flavored!).
How to cook:
Cut each tortilla into 4 segments. Lightly coat each piece with oil on each side. Preheat the oven to 200 degrees.
Place the triangles on two baking sheets in a single layer, sprinkle with salt and place in the oven.
Bake at 200°C for about 10 minutes until golden brown and crispy.
Squeeze the juice of two limes into a small bowl. Sprinkle the pieces lightly with lime juice when they come out of the oven. This will dry out the slices even more. Ready!
In the oven
![]()
photo: Getty Images/EyeEm
Ingredients: 2 large potatoes, vegetable oil, ground white or black pepper, salt.
How to cook: cut washed and peeled potatoes into thin slices. Place the resulting circles in a salad bowl or soup plate. Add salt, pepper and mix carefully so as not to break the slices. Leave for a few minutes to soak the potatoes in the spices.
Place the chips on a baking sheet so that they do not touch each other and place in an oven heated to 180 degrees. The chips will bake for about 10–15 minutes, it is important to ensure that they do not burn. Remove the pan from the oven and place on a plate lined with a paper towel to absorb any remaining oil.
How to prepare this delicacy?
How to make chips at home in a frying pan? Place thin potato slices in a large bowl, add cold water to cover completely, and stir to release starch. Strain the potatoes well, then repeat until the water runs clear. Then place the slices in a deep bowl, pour half a glass of distilled white vinegar and 6 glasses of water on top. Leave to soak for at least thirty minutes, optimally up to two hours. Then drain the water and vinegar and dry the potatoes.
Place a deep saucepan with a heavy bottom on the stove and pour a thick layer of oil into it. Use a food thermometer and check the temperature of the oil as it heats. Once it reaches 150°C, divide the potatoes into six equal batches and begin frying one at a time. The chips in the pan should be rotated periodically to fry evenly. Each batch will take you approximately five minutes to prepare. Once the slices are golden brown and crispy, remove them with a slotted spoon and place on a plate lined with paper towels. Immediately sprinkle sea salt over hot chips.
Chips in the microwave
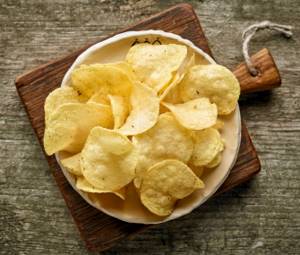
photo: Getty Images/iStockphoto
Ingredients: potatoes in the right quantity, pepper, spices, salt, vegetable oil.
How to cook: cut peeled potatoes into mugs. The finished slices should be placed on special baking paper so that they do not come into contact with each other. Drizzle them with oil, sprinkle with seasonings and salt to taste. The chips take about 5 minutes to cook. Once the chips are browned, turn off the microwave and place the cooked chips on a plate covered with a paper towel. During the cooking process, you can take a break: open the microwave door to release steam - then the chips will turn out crispier.
From lavash

A crispy and filling pita dish is an excellent alternative to unhealthy chips that cooks incredibly quickly. Ingredients:
- 1 package of thin sheet pita bread;
- 100–150 ml sour cream;
- 1 egg;
- 3–5 cloves of garlic;
- salt;
- black or red pepper.
Beat sour cream with egg, pepper and salt. Finely chop the garlic or pass it through a press and add to the sour cream.
Unroll the pita bread, place it on the table, brush the entire surface of the sheet with the resulting mixture, and divide it into pieces using a knife. Chips can be made in any shape, but it is more convenient to cut the pita bread into triangles or small squares.
The dish can be baked either in the oven or over a fire. Cooking time: 5–7 minutes. Lavash bakes and fries quite quickly, especially over an open fire.
Why homemade chips aren't crunchy?
- Too cold potatoes: if you kept them in the refrigerator, and then quickly peeled, cut and washed them, they will warm up a little, but longer. It will take longer for the oil to displace excess moisture from the potatoes, resulting in chips with either soggy cores or too greasy.
- Oil not hot enough: If the oil is really hot, it instantly “seals” the surfaces of the chip, creating a crust. And if it is not warmed up well, the potatoes will float in the fat, absorbing it into themselves. The result is a softened mush instead of a crunch.
- Low-starch potatoes: These have more moisture and take longer to cook. Chips from it can be cooked in the microwave or oven, but not in oil.
- Do not allow excess oil to drain off: if you are frying chips, you need to carefully place them on a paper towel so that the excess oil is absorbed into it and not into the chips.
Pros and cons of nail extensions using tips
Before we consider in detail all the stages of extensions using tips, let’s determine for ourselves all the pros and cons of such extensions.
Let's start with the cons:
- soreness. If you have very small nails, you may experience pain during extensions. In addition, after the procedure you may experience pain if you pull or accidentally catch your nail;
- may crack due to sudden temperature changes;
- the thickness of the extended nail may be greater than the natural one, which does not look entirely natural;
- thinning of the nail plate in preparation for extensions;
- duration of the procedure. The extension procedure itself will take about 4 hours, so you should stock up on time and patience.
Well, now about the positive aspects, there are more of them than the negative ones;
- the very first feature is the duration of such extensions; for about 3 weeks you can forget about making your nails beautiful;
- This type of extension can be done by both a novice master and you yourself at home;
- when choosing a French manicure after extensions, your nails will look as natural as possible; if done properly, they will be difficult to distinguish from real ones;
- choice of tip shapes - there are square, oval, teardrop-shaped, sharp and rounded.

Sour cream sauce for chips: recipe
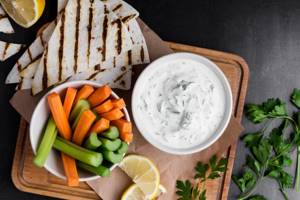
photo: Getty Images
Ingredients: sour cream, aromatic seasoning, hop-suneli seasoning.
How to cook : take a bowl in which we will mix the sauce, put sour cream in it, then add seasonings and stir. It is better to add spices gradually, mix and taste, so as not to overdo it with seasonings. For spicy lovers, you can add paprika to the sauce. Mix well and refrigerate for 15 minutes. This is just enough time to make homemade chips.
The same sauce can be made from thick yogurt.
How to make zucchini chips
These delicious, nutritious and crispy chips will curb your salty cravings without harming your figure! Can be stored in an airtight container for up to 2-3 days. Your family will definitely love them!
Ingredients:
- 1 medium zucchini;
- 1 tablespoon olive oil;
- salt and other seasonings to taste.

Cooking method
- Using a slicer or knife, thinly slice the zucchini. The thinner the slices, the better they will dry in the oven.
- Place the pieces evenly on paper towels, then sprinkle a light sprinkle of salt on top.
- Let the slices sit for about 10 minutes. This will help draw out excess liquid from the zucchini. This way they will cook faster and have a very appetizing crunch.
- After 10 minutes, preheat the oven to 110°C.
- Place the mugs evenly on the baking sheet. First, place baking paper on it.
- Brush the top of the zucchini with olive oil, then sprinkle with your favorite seasonings. Be careful not to use too much as the slices are already salted.
- Bake for about half an hour, 40 minutes. Until they reach the desired shade and firmness.
- Remove from oven and let cool. Bon appetit!
Fish salad with chips: recipe
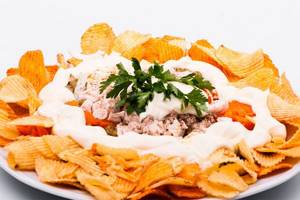
photo: Press service archives
Ingredients : chips - 100 g, carrots - 1 pc., mayonnaise, canned fish in oil - 1 jar, garlic - 2 cloves, salt.
How to cook: boil the carrots, peel them and grate them on a fine grater. Peel the garlic clove and squeeze through the garlic press, combine with the carrots. Remove the bones from the canned fish and mash with a fork. Add canned oil to fish.
Lay out the salad in layers. The first layer is fish, place it on a dish and pour mayonnaise. The second layer is carrots with garlic, sprinkled with mayonnaise. Place chips on top and pour mayonnaise. Decorate the edges of the salad with chips. Let the salad brew.
From beets
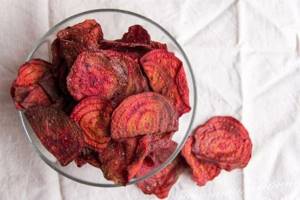
Beetroot chips are an original version of a crispy snack. If you wish, you can choose a sweet variety - such a snack can easily replace your usual sweets. You will need:
- 4-5 pcs. large beets;
- 0.5 liters of water;
- 250–300 g granulated sugar.
The essence of the recipe is the syrup. Peel the beets, cut into slices and soak in syrup made from water and sugar. In this form it should stand for about an hour, after which it can be baked.