The technology is quite simple
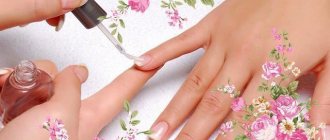
To soften the cuticle, special formulations of oils and various emulsions are used. The cuticle is moved with a natural orange stick without damaging either the skin or the nail plate. The surface of the nails must be sanded. After the procedure, the skin of the hands is treated with moisturizing cream.
Unedged manicure is of greatest interest to those with very thin, delicate skin, when the blood vessels are located close to the surface of the epidermis. Such skin, even with minimal damage from tweezers, is prone to heavy bleeding, which makes the classic version of manicure undesirable or difficult.
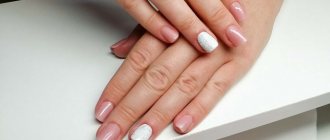
The technology for performing this type of manicure does not require any special skills or tools. That is why the popular European manicure at home is very easy to do. Numerous photos prove the excellent results of this simple procedure.
What is an unedged manicure?
When performing an unedged manicure technique, only special tools are used to remove cuticles and scissors or nippers are not used at all. This saves not only from discomfort, pain, bleeding, but also from the appearance of hangnails. The procedure is absolutely painless.
Unedged manicure is also called European manicure.
Advantages and disadvantages
- Unedged manicure has many fans. However, many do not consider this method acceptable for themselves. Advantages of the method:
- no risk of infection through superficial skin lesions;
- complete painlessness;
- no risk of injury;
- beneficial effects on the skin;
- effective for people with thin skin and nearby blood vessels;
- long-lasting effect with regular care;
- slowing down or stopping the growth of the cuticle.
Technique for unedged manicure at home
The first thing you need to do is stock up on the right tools. Compared to classic manicure, European manicure requires much less special equipment. This includes:
- Orange stick;
- Nail file;
- Cuticle remover;
- Buff;
- Nourishing cuticle oil;
- A hand bath and towel if you decide to use a hot or wet manicure technique.
Now let's proceed directly to the manicure itself.
Step 1. Start with hand disinfection. This is especially important if you decide to use a hot manicure; the presence of oil and dirt on the skin will reduce the effectiveness of the procedure.
Stage 2. Adjust the length of your nails using a nail file and give them the desired shape. After this, polish your nails with a buff to give them shine and make the nail plate smooth.
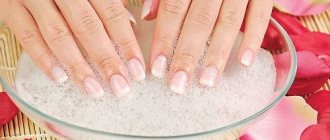
Step 3: Now dip your nails into the preheated bath. This is necessary so that the cuticle softens, and it is easier for the remover to remove it. Depending on the type of manicure, keep your hands in the bath for 10-20 minutes. If you decide to do a dry manicure, skip this step.
Step 4. Carefully remove all moisture from your hands and apply remover. Since each brand has a different time it takes to remove cuticles, check the packaging for it. After the specified period, remove any remaining product from the skin of your hands with a napkin. Use an orange stick to move the softened cuticle towards the side ridges, so you can remove it from the surface of the nail.
Stage 5. The main work has already been completed. Now rub the nourishing oil into the base of the nail. Also, don't forget to use a moisturizer on your hands.
As you can see, doing an unedged manicure yourself is quite simple. The main thing is to carefully follow the instructions for each step. This will make your nails well-groomed and healthy.
Cuticle treatment methods
An unedged manicure at home can be done in three different ways:
- dry;
- wet;
- hot.
To perform a dry manicure, you do not need to pre-soak the skin. A special emollient is applied to dry skin of the hands. This method is not suitable for brittle, injured nails that need additional hydration and a delicate approach. But dry unedged manicure lasts much longer.
The wet method involves soaking the skin in water for several minutes before treating the cuticle. The bath is often filled with water and oils or special lotions.
The hot method is recommended for dry, brittle nails and damaged cuticles. Hands should be steamed in hot cream or lotion, heated to at least fifty degrees.
Options for unedged manicure at home
Wet or damp manicure. Place your fingers in a bath of warm water for a few minutes. After this, remover is applied to dry hands, which must be held according to the time indicated on the package. Remains of the cuticle are removed using an orange stick.
Hot manicure. Used for working with rough leather. The technology is similar to a wet manicure, but your fingers need to be soaked in a bath of hot moisturizing lotion. If you don't have a special bath, you can use a deep bowl. The lotion should be creamy. However, you can use regular hand cream or olive oil instead. Leave your nails in the bath for 20 minutes.
Dry manicure. This method involves applying remover to dry hands that have not been steamed in water. This manicure is less time-consuming, although you will need more money.
Let's look at the benefits of this manicure together:
- This is the safest manicure
: there is no risk of contracting various diseases, since the cuticle is not cut. - Lack of redness and inflammation around the nail
, due to the lack of mechanical impact on the cuticle. - The effect of such a manicure lasts longer
than that of an edged manicure, and after time, the cuticle practically stops growing. - No need to bother with steaming baths
: unlike the classic edged manicure, this type of manicure is “dry”. - The procedure takes a minimum of time.
How to perform a European manicure yourself?
Remove old varnish. Then use a file to give your nails the desired shape. Apply remover along the cuticle line and wait 30-45 seconds. After this time, take a wooden stick and use the sharp end to push the cuticle to the inner edge of the nail plate. Dead skin should be peeled off, which can be removed from the nail with a cotton pad soaked in water. Repeat the same with all nails one by one. Then soak your fingers in warm soapy water for about 10-15 seconds to remove any remaining cuticle. Wipe your hands dry and buff the nail plate. Finally, apply moisturizing oil to your cuticles and nails.
Unedged manicure has many important advantages:
- It is less traumatic than edged.
- There is no risk of infection. This method may also be suitable for women whose skin regeneration is slow due to chronic diseases such as diabetes and may be accompanied by complications.
- The nail bed is not damaged or deformed.
But this technique also has its disadvantages:
- This method is not suitable for women who naturally have rather rough and dense skin - it is quite difficult for them to remove the cuticle without cutting.
- Cuticle remover causes allergies in some women with particularly sensitive skin. In this case, the cuticle needs to be softened in a warm bath and removed with a special pumice stone.
- Untrimmed manicure is not suitable for owners of false or extended nails.
Which manicure is better: edged or unedged?
A little theory
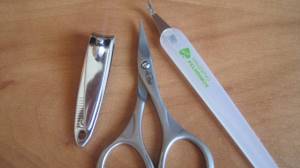
Trim manicure
Manicure can tell a lot about a girl, sometimes even more than her face or clothing style. That's why hands and nails receive as much attention as hair or makeup. Naturally, any manicure begins with shaping the nails and processing the cuticle, which is usually removed. If it is small and growing slowly, you can simply soften it and push it away with an orange stick, which is less damaging to the nail than other metal tools, especially if you do your own manicure. But in the case of a strongly growing cuticle and pterygium (a thin layer of cuticle that grows onto the nail plate), it will have to be removed completely. And here the question arises: which method to choose?
There are two: edged and unedged. In the first case, the softened cuticle is moved back and trimmed with special scissors, nippers, or removed with a cuticle fork. In the second, a special softening agent with acids is applied to the cuticle, which dissolves it, and then all that remains is to remove the skin with an orange stick or pusher. There is also a hardware manicure, but it can perhaps be classified as the first cut version of manicure. In addition, you still need to know how to use this device so as not to injure your nails and fingers.
My choice
Unedged manicure
So what should you choose? For a very long time I did trim manicure. But sometimes you got injured, especially if you were in a hurry. And then I tried an unedged manicure. I liked it very much! I take a bath for my nails for five to ten minutes, then dry my hands and apply a special product to the cuticle area. After five minutes, I wipe it off with a cotton pad and remove the cuticles with a pusher. You can, of course, use an orange stick, but the pusher copes better with the pterygium and is more convenient for processing the side ridges. However, at first I injured my nail several times, which later caused the plate to delaminate. Therefore, we still need to work on these tools.
At the end of the procedure I apply a special oil. I am 100% satisfied with the result. The cuticle is well-groomed, there are no hangnails, it grows slowly.
There are different cuticle removers. I'm currently using Belarusian from Bitekc.
What I want to conclude is that everyone who does not have the proper dexterity is better off doing an unedged manicure. It's easier and safer, and it seems to me that the results last longer. The main thing is to choose a good cuticle remover.
Learning to do edged manicure: master class
- First you need to prepare your hands and tools for the procedure. Inspect and disinfect the skin of your palms and nails with special products. As a result, you should have as clean and dry nail plates as possible. If there was varnish on them, it must be removed with nail polish remover.
- Use a manicure file to give your nails the desired shape. When filing the edges of your fingernails, start with your little finger and end with your thumb. It is better to do this with a glass file.
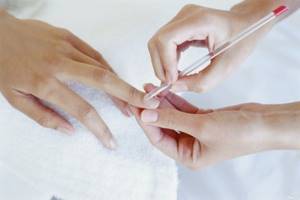
- Tilt your hand so that the inside of the nail under the free edge is filed. Each one needs to be filed in the direction of their growth from corner to center, moving from right to left. Never do this in a back-and-forth motion, otherwise you may damage the nail plate. In addition, you should not file wet or steamed nails, otherwise you risk seriously damaging them.
- If your nails require shortening, carefully trim them with nail scissors, and only then proceed to filing. It is not recommended to file the corners too much.
- Do not strongly round the entire side edge of the nail. When processing it, limit yourself to a few careful movements of the file. To get rid of micro-jags at the tip of the nail, use a fine-grained file, block or buff.
- Once you've shaped your nails, you'll want to soften the cuticles. To do this, dip your fingertips in a bath of warm water. You can add oils, sea salt, and herbs to the water. Instead of water, you can use a special solution.
- Next, clean your nails with a disinfected manicure brush. When brushing, make downward movements, starting from the 1st finger bone to the free edge of the nail. This cleansing removes all excess from the fingers and nails, including pieces of cuticles.
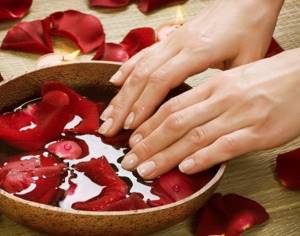
- After the softening bath, dry your fingertips. Dry your hand with a soft towel or paper napkins. While drying, gently move the cuticle towards the base of the nail. When you dry your hands, take a wooden, orange or special stick with cotton on the end and use it to apply cuticle remover to your nails.
- Push back the cuticle using a special spatula and gently lift it. Lift the cuticle that fits tightly to the nail plate in a circular motion. The pressure should be light so as not to damage the nail plate and other parts of the nails.
- Use a cuticle clipper to carefully trim any jagged edges or burrs. Don't try to cut too deep or you may cut your finger.
- When the manicure is ready, you can coat your nails with varnish.
