The magic of charm » Beauty
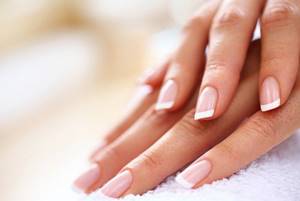
French manicure is the most versatile of all types of manicure and suits almost everyone : an office worker, a nightclub goer, and even a bride. And it turns out that doing a French manicure at home is quite simple. You just need desire, a little skill and, of course, a little patience to learn this.
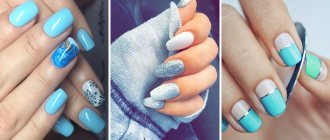
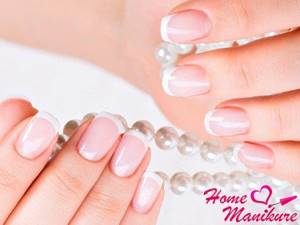
In another way, French manicure is called French , i.e. painting the free edge of the nail a different color. The classic color of the nail tip is white. That's what it's called - classic French. There are also other types: fan, millennium, vintage and many others. It depends on how you decorate the tip of the nail.
Terms and symbols
Before you start doing a French manicure at home, let's understand the terms that we will use for this. The border between white and flesh color on the nail is usually called the smile line. And the more your smile line smiles at you, the higher the corners of the white part of the nail should rise. On unvarnished nails, the smile line is clearly visible. This is the line up to which your nail is attached to the nail bed, and beyond that the free growth of the nail begins. If you draw a French line along a line that differs from the natural smile line, then first we cover the natural line with beige varnish. Thus, we lengthen the bed. But more often this is done on artificial nails.
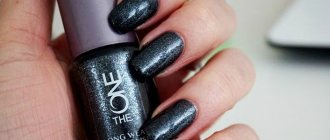
To create a manicure, you can use cosmetics from the Oriflame catalog - one of the most popular in Russia.
Remember that for a neat, beautiful jacket you need to follow two rules:
- The height of the white tips should be the same on all nails.
- The height of the tendrils (i.e., the white edges that go from the middle of the nail to the edges) should also be the same on all nails.
Additional recommendations
To extend the life of your manicure, you need to follow simple recommendations:
- Don't skimp on tools and materials. High-quality manicure accessories will cost more, but will last longer and provide good results.
- It is better to purchase gel polish, base and top coat of the same brand.
- Each layer of coating must be applied to the end of the nail, sealing it. Then chips and cracks will appear much later.
- You need to dry the coating exactly as long as indicated in the instructions. Deviation in time, up or down, negatively affects the quality of the manicure.
- On the first day after a manicure, it is recommended to refrain from visiting the sauna, swimming pool, or taking a bath.
- You should wear gloves when washing dishes and doing other housework. You will extend the life of your manicure and protect your hands from the harmful effects of household chemicals.
As you can see, you can get a French haircut without going to the salon. French manicure on nails with gel polish looks elegant and stylish at any age. The main thing is not to rush and choose quality materials. There is no need to stop at the classic pink version, it's time to experiment and play with colors.
Ways to perform a French manicure at home
There are two ways to perform a French manicure at home. One with adhesive strips, but this still poses more difficulties. And the second is done by hand. It is still more acceptable for beginners, although it requires careful patience and some skill, but if desired, it can be mastered quickly.
You will need beige and white varnish, as well as a clear coat. And a good brush. It is better to buy a brush at an art store or stationery store. Take a Kolinski brush #1. This is practically the thinnest brush for artists.
Using a stencil
If you don’t know how to correctly draw a smile line so that it turns out perfectly straight, use stencils for a French manicure. Stencils are strips of paper on a sticky base, 5-6 mm wide. They have different shapes, allowing you to create a smile line not only in the form of a classic semicircle, but also in the form of a wave, zigzag, triangle, heart or straight beveled line. Using stencils is very easy. They are glued onto a beige layer only after it has completely dried. Draw a smile line when the stencil fits tightly to the nail.
After applying the gel polish to the smile line, the stencil is carefully removed. An awkward movement can lead to smearing of the varnish and disruption of a perfectly straight line. After removing the strips, the white layer is dried in a UV lamp for 2 minutes.
You can make a stencil yourself from regular tape. You need to cut a piece 3 cm long. It is cut into strips 0.5 cm wide. The side line of the strips is given the desired shape (semicircle, wave or triangle). Before gluing the adhesive tape to the surface of the nail, you need to glue it to any other surface 1-2 times. This will help reduce its stickiness, and then maintain the integrity of the gel coating.
The procedure for performing a manicure step by step
So let's get started. First, we tidy up the nails, wipe them with nail polish remover, i.e. degrease so that the varnish lasts longer. Begin.
- Apply one thin layer of beige varnish and wait a minute. Apply the second layer.
- Then open the bottle of white polish and use a brush to place three dots on each nail. A point in the very center of our future smile and at the edges of the antennae. We make sure that all points are located equally.
- Now we use the same brush to draw our smile. Draw the line very slowly and with concentration, connecting the dots.
- Now we paint the ends. Use a brush to paint over the sharpest parts of the antennae, then use a varnish brush to carefully paint the tip on one side from the antennae to the middle and on the other side from the antennae to the middle.
- We wait a minute and paint our nails with colorless varnish.
Treatment of the nail plate
Before you paint your French manicure with gel polish, you need to prepare the nail plate. The final result directly depends on the quality of its processing. The free edge of the nail must be trimmed and filed, giving it the desired shape. Then the surface of the nail plate is processed. In order for the manicure to lie perfectly flat and look flawless, you need to remove the top keratin layer. The surface of the nail should become slightly rough and matte, this will provide better adhesion to the coating.
Then the cuticle is pushed back so that no voids form under the base layer. Remains of cuticle that have grown to the nail must be removed with a cuticle remover. The treated nail is wiped with a liquid to degrease the surface. Before creating nail art, you need to familiarize yourself with the rules for decorating a French manicure with gel polish step by step, which we will tell you about below.
Video
Perhaps this procedure will seem complicated and time-consuming to you the first time, but after doing this manicure 2-3 times, you will be able to perform it easily and quickly, like a real artist. And one more piece of advice. If, when drawing antennae, you stain the skin rollers near the nail with varnish, just take a cotton swab, dip it in acetone and carefully remove the varnish from the roller. Hooray! Your French manicure is ready! Here you can learn how to do a hot manicure.
Well, for those who find the French jacket too simple and boring, you can show your imagination and diversify it with various beautiful and mischievous trinkets. For example, draw a design in the form of a flower , leaf , etc. or use stickers , of which there are a great variety now on sale. It all depends only on your desire, imagination and your style.
You can share or save for yourself:
Discussion of the article:
- Elena
In general, French manicure is a classic. It is very delicate and beautiful and will go out of fashion for a long time. And overloaded with various sparkles, baubles, bows and other things, the nails will not last even two weeks...
We paint French gel polish: we use strips and stencils
Apply a thin layer of protective base under the gel. It is important to paint over the free edge so that the gel polish lasts longer. Dry each hand with a UV lamp for 30-40 seconds. Wipe off the sticky layer with a napkin. The next stage is the most creative, because French manicure with gel polish involves drawing holes. The stencil will allow you to make a perfectly straight smile line, which you can complement with drawings and rhinestones.
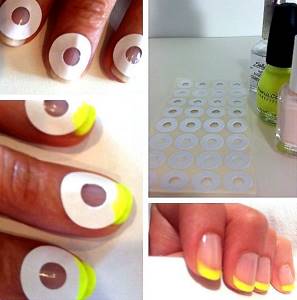
In the photo: using a round stencil.
French with a round stencil is done in no time: after degreaser, primer and base have been applied to the nails, decide on the color.
Try using gel polish to create not a white jacket, but a yellow one, and your nails will look very impressive. Place the stencils on each finger very evenly so that they cover the surface of the entire smile line. The smile should be painted over with gel polish and dried with a UV lamp. If necessary, paint over the smile again, remove the sticky layer with a napkin and sharply remove the stencils. Cover the entire nail with Top Coat. This way the free edge of the nail will remain painted for a long time.
Video on how to make a French jacket using stencils:
Strip VS stencil: what to choose
A perfectly straight smile is the rule that dictates a French manicure performed with gel polish.
Craftswomen in a beauty salon rarely resort to stencils or stripes, since they know how to carefully create a pattern of any complexity on all ten nails. If you make a French look at home using gel polishes, choose a stencil for yourself, which comes in several types.

Straight looks wonderful on square nails, round is great for creating a moon manicure. The sharp and wavy stencil will certainly attract the attention of young fashionistas.
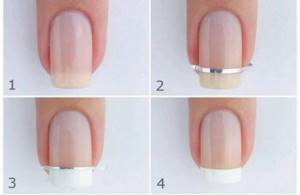
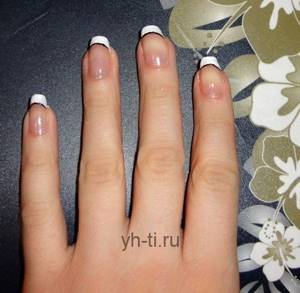
In the photo: strips for French manicure and the algorithm for using them in four steps.
If you prefer to see a traditional French look with gel polish on your nails, you can use strips, which will cost you a little less than a stencil. With their help, a French manicure with gel polish can be done much faster. There are no downsides to the strips, except for one thing - they are too thin, so the polish must be applied very carefully so that it does not get on the free layer of the nail plate. The photo shows how you can make French gel polish using strips.
You can also watch the video tutorial:
In addition to silver, stripes can be colored, so you can use them to create a great French jacket.
How to do a French manicure: step-by-step instructions
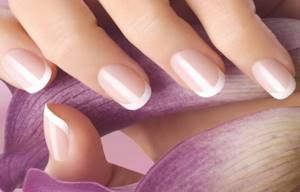
A classic French manicure involves covering the surface of the nail with a pink tint and a neatly drawn smile line at the tip. If you don't use a camouflage tone, then be prepared that after three or four days the nail will begin to grow back and the crescent moon will move.

Although this simple masterpiece was called French, its origins, oddly enough, have American roots. Nail design with a smile appeared in 1976 in Hollywood. And it’s not surprising, because actors change their images in one day, and manicure rarely harmonizes with the overall appearance. That's why we decided to create a universal design called French.
How to do a French manicure at home
French manicure perfectly combines simplicity and style.
This nail design is at the peak of popularity, regardless of the age category of women. It is chosen by athletes, businesswomen and ordinary saleswomen. French is not vulgar, so it is ideal for teenage girls. Thanks to its technology, hands look well-groomed and neat. There is no need to change it according to the type of clothing, hair color, makeup or accessories. Its base is universal, suitable for any style, which allows you to save money and time on updating your manicure. You can do a French manicure yourself using the recommendations. French is practiced on any nail length. How to do a French manicure at home, because there are many secrets regarding its design and application?
If you take into account all the recommendations, then your nail design will be at the highest level, similar to salon work.
Features of the French jacket
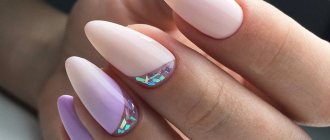
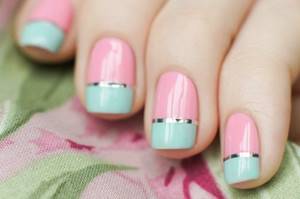
A classic jacket in the form of a nude base and a white “smile” is relevant in case of strict requirements for the dress code. In other situations, no one limits your imagination. The trend is to decorate nails, use different flower varnishes, and vary the shape of the “smile.”
The choice of shape depends on the characteristics of the plate and the cut of the nail. The width of the contrast strip varies from the thinnest, and does not always run parallel to the stock; there are also options with a diagonal line. Fantasy “smiles” deserve special attention, the execution of which depends on the season, occasion, and mood. There are many successful examples in photos in fashion magazines.
One of the popular options is an inverted French manicure, when a “smile” is drawn at the base of the nail bed. Celebrities and beauty bloggers prefer this extraordinary design, playing with shapes. They draw holes, an imitation of a regrown nail, a semicircular, triangular, diagonal contrast line.
One of the features of French manicure is the opportunity to learn how to combine the design with other manicure techniques as a base or accent.
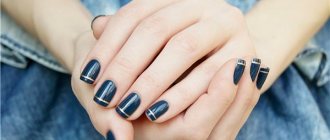
French with a pattern
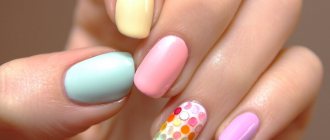
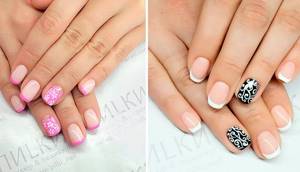
A modest French coat can be made more vibrant if, for example, you replace white varnish with red, blue, pink, yellow or even black. Or draw something on the bottom of the nail. Most often they draw floral patterns, glue rhinestones or apply sparkles
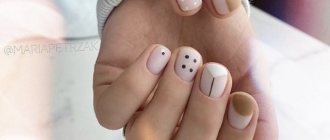
Making a stripe with dark varnish
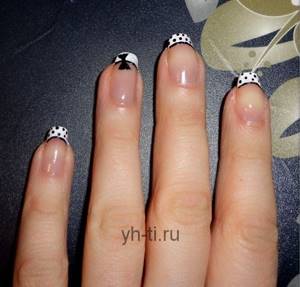
Draw dots and a bow
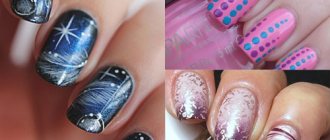
In general, there are a lot of options for French manicure with patterns. I browsed the Internet and found, in my opinion, the most interesting ones. I suggest you watch them too.
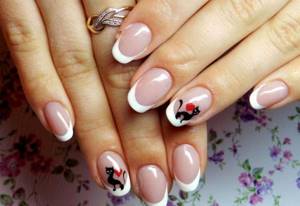
Manicure with cats
French gel polish
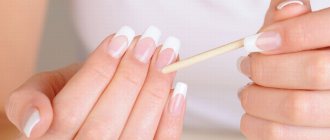
How to prepare your nails
The first step is to treat the nail plates with an antiseptic. After treatment, give the edge of the nail the desired shape using a nail file. Apply remover to cuticles and ridges on the sides to soften the skin. The next step is to soak the brush in a bath of warm water for 4 minutes, remove and dry.
Use a pusher spatula to push back the ridges and cuticle, trying not to press too hard to avoid wounds. Use tweezers to remove excess skin around the nail, and remove the pterygium with an orange stick soaked in water or with a pusher. All that remains is to apply the oil.