One of the most common questions asked by beginners who have just started practicing yoga is: “What is a yoga block used for?” Modern yogic practice is equipped with many accessories to help deepen the effect and enjoy the asanas. One of the most widely used assistive devices and supports is yoga blocks.
Blocks are useful for both beginners and advanced yogis. For a beginner, they serve as a support where more flexibility is required than a person has.
The yoga block allows you to perform asanas, expanding a person’s capabilities, and provides additional convenience when performing exercises.
For flexibility
Since they help maintain balance, the human body becomes more flexible. It is especially useful for people who have difficulty performing asanas that require body flexibility (crescent pose). With the help of this auxiliary accessory, it is much easier to practice some poses and inverted asanas, even if the person is not as flexible as required.
Providing support
The brick can support your head and neck while lying down, sitting or standing. It will also allow you to hold various poses better and longer. Useful if you need support for your neck or head when lying down during meditation (place under your head near the back of your head), which will help support the weight of your head without straining your neck and spine.
It can be used as a bench while sitting. You can use a block to provide the necessary support if you are overweight.
For balance
This accessory helps balance, which is especially useful during standing, squatting and sitting positions. It helps to correctly determine the center of gravity, balance the position and it will be easier for you to maintain balance (asanas on one leg).
For a long and comfortable position
Since the brick both helps to become more flexible and supports weight, the practitioner can hold the position for a longer time and feel comfortable in it. You will be able to stay in asanas that require flexibility and balance for much longer.
How you can use your block
The purpose of using the block is to provide greater comfort during training and improve body balance. They are more often used by beginners, but they are also used by more experienced practitioners, because more meditation methods are mastered and more complex asanas become available. For particularly advanced positions, the block acts as an arm extension. For people of any level of training, the blocks provide:
- stability;
- body support;
- help to stretch without deformation.
Depending on the position performed and to get the most out of the exercise and to ensure the safety of the practitioner, they can be placed under the arms, legs, buttocks.
The yoga brick is a great help in meditation and makes doing the Lotus position much easier. Sitting on a block will allow the hips to open more comfortably, and the knees will not rise up, the spine will lengthen.
A brick is also useful in Pigeon pose, when it is impossible to rotate the hip or knee due to compression of the bones in the joints.
Yoga brick is used in sitting poses, especially where there are bends and bends (Bandha Konasana). The pose will not only be more comfortable, but also more effective. The block will support your lower back and sacrum, and will also lift your pelvis off the floor.
The block will also help when performing a simple Hero pose, if due to strong tension in the hips, the practice of the asana causes difficulty.
Use in Hero Pose
- Kneel on a yoga mat.
- Place a block between your ankles.
- Sit on it so that your heels are on either side of your hips.
- Place your hands on your calves and pull them out from under your thighs, this will keep you closer to the ground.
When bending forward, it will help you get closer to the floor and you won't have to strain your back and hamstrings.
For those just starting out with yoga, blocks can really help in helping them progress through the exercise. Blocks are ideal for positions such as Ardha and Chandrasana, where one hand is on the ground.
The block is made in the shape of a parallelepiped, has six faces, which are used when performing certain asanas. The auxiliary yogic instrument is lightweight, easy to use, and safe.
What to pay attention to
Most yoga bricks come in standard sizes and have a uniform length of 21-23 cm, a width of 11-12 cm and a height of 6-7 cm and look like small and very light bricks. The simplicity of the design makes them an ideal tool for almost anything related to yoga. Less common are models with large dimensions. The main characteristics that you should pay attention to when choosing are:
- Quantitative and qualitative characteristics of linear parameters.
Since the block serves as a support and transfers part of the body weight to it, it must be stable, therefore made with great precision, have smooth walls and equal angles.
If you do not plan to move it too often, or moving it is not difficult for you, you should choose a heavier unit. It will be more stable, but if you plan to carry it with you often, you can choose one of the lightweight foam or cork models. In order for the blocks to fully perform the function you require, you need to be more careful in choosing their parameters.
Types of yoga blocks
Wooden
Mainly used individually and in yoga schools. Characterized by the highest strength and hardness. Wooden blocks provide excellent stability. Due to their relatively heavy weight, they are less comfortable than rigid foam blocks.
Foam bricks
Very light and comfortable. Characterized by high hardness and wear resistance. Convenient and easy to transport, ideal for use during outdoor training.
Bamboo
Durable, natural, but expensive.
Cork
Designed for those who value environmentally friendly and natural products. More expensive than bamboo ones. Characterized by good stability and strength. An important advantage is their low weight. Great for training outdoors and away from home. Thus, the Yoga Block Pro cork block is made from highly compressed cork and is characterized by high rigidity. Has a low specific gravity, ideal for carrying. Dimensions 30x20x5 make it indispensable for performing many asanas. Four such blocks help make an excellent support for Candle asana.
Yoga classes are effective and fruitful with and without yoga blocks. The block helps an experienced practitioner achieve the ideal stretch. This sports element can help relieve muscle strain while performing asanas. Well-known practitioner B.K.S. Iyengar used yoga blocks very often and was confident in their effectiveness. It is reasonable for beginner yogis and experienced pros to listen to the opinion of such a sought-after specialist. Before purchasing a sports accessory, you need to decide on the material and size of the block.
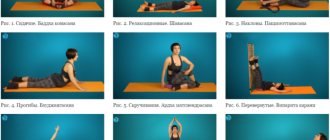
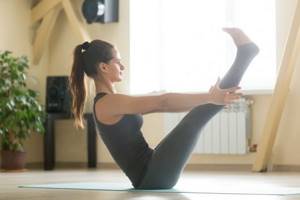
Boat pose
Paripurna Navasana (“paripurna” – complete, complete, “nava” – ship, boat).
How to perform
- Sit on the floor, stretch your legs in front of you. Palms on the floor on both sides of the pelvis, fingers facing forward. The back is straight, perpendicular to the floor.
- As you exhale, simultaneously lean back and lift your legs off the floor. Keep your legs extended and your knees pulled up. Balance on your buttocks, do not lower your back to the floor, and not a single vertebra should touch the mat. The angle between the legs and the floor should be 60-65°. The feet are above the level of the head. The back is straight. The legs are tense and fully straightened.
- Lift your hands off the floor and stretch them out in front of you parallel to the floor, palms facing each other, shoulders and palms on the same line. Look straight ahead.
- Stay in the pose for 30 seconds. Breathe at a normal rhythm. Gradually increase the time spent in the asana to 1 minute. B.K.S. Iyengar notes that you can feel the effect of Paripurna Navasana only if you hold it for at least 20 seconds.
- Place your feet on the floor and relax.
Effect
The pose eliminates fat from the waist, stimulates kidney function, and helps with stomach disorders.
How to choose the size of a yoga block
Yoga blocks UNISS
Yoga blocks vary in size depending on the manufacturer. Blocks in the range of 8x15x23 cm and 10x15x23 cm are considered standard. There are giant accessories, these are blocks 22.6x15.3x10 cm. It is wise to choose blocks in accordance with the personal parameters and physiological characteristics of a person. For those who are light weight and have small hands, small blocks are suitable; for athletes of a large weight category, large size accessories will naturally be in demand.
Yoga block material
Yoga blocks, yoga bricks, yoga stand, yoga props
Yoga blocks are made from foam, polystyrene foam, cork, wood, and bamboo. Each has its positive and negative sides. You should choose based on personal preference.
Yoga blocks are used for flexibility, additional support, balance, and position retention. The yoga brick is useful in a variety of poses and is essential for bending and bending. They are used for home workouts and group training.
Support blocks
Types of blocks:
Class with yoga blocks.
. Wood is a particularly durable and massive material. Such blocks will last longer and lose their positive properties. They have rounded edges and greater stability. But heavy wooden bricks are not particularly convenient for many due to their heavy weight. One block weighs from 0.5 to 1 kg. Although it is the weight that makes the wooden block stable and convenient as a support. Recently, hollow wooden blocks have appeared; they are lighter, although they have the same characteristics as wooden blocks.
. These blocks are very light and durable. Such bricks are especially popular among yogis. But cork quickly absorbs moisture and sweat, so over time these elements lose their aesthetic appearance.
. Cheap, light, easy to care for.
Most yoga studios use foam blocks for their classes. Such accessories are excellent for restorative asanas, but not very durable for balances. It is in the studios that you can try out these blocks and evaluate their quality. Professionals recommend purchasing several yoga blocks to practice sets of exercises. Some yogis overcome the situation by using stacks of books as support.
Everyone must choose their own yoga block
. If you do not consider it necessary to purchase blocks, that is your right. Experienced yogis say that having a high-quality mat is quite enough for fruitful practice.
A yoga brick is a yoga aid. To help you exercise more effectively, we have developed special video exercises for you in collaboration with Domyos Club sports trainers. They will allow you to develop flexibility through a progressive yoga program.
For best results, the total workout duration should be between 45 and 60 minutes, depending on your fitness level. The time spent doing exercises is measured by the number of inhalations and exhalations. The main goal of the exercises is to stretch all muscles and develop flexibility.
Safety Tips:
When performing a set of exercises, make sure that there are no foreign objects (towels, water bottles) on the mat. Do the exercises barefoot to avoid slipping during exercise.
Complexity:
level 1
Performing the exercise:
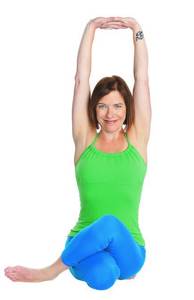
place a brick on a yoga mat and sit on it. Spread your legs to the sides and straighten. The distance between your legs depends on your level of flexibility. Lean forward, keeping your back straight, and try to reach your toes without bending your knees.
Repeat the exercise with the brick in front of you. When bending over, lean on the brick with your stomach.
Breath:
Repetitions:
Forward lean
Complexity:
level 2
Performing the exercise:
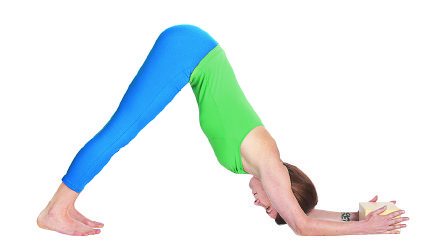
Starting position: standing on the mat, legs spread wide apart. Place a yoga brick in front of you vertically. Slowly bend down, reach your head towards the yoga brick and grab your ankles with your hands. Then slowly rise up and return to the starting position. If you feel ready for a more challenging exercise, try doing the same thing by lowering the height of the yoga brick.
Breath:
While performing the exercise, breathe smoothly and evenly. Do not forget that in yoga you need to inhale and exhale exclusively through the nose.
Repetitions:
2-3 sets of 3-5 inhalations and exhalations, depending on the level of training.
Neck care
Gentle but effective neck traction
After 40 years, a person’s neck becomes more vulnerable. In addition, working at a computer or watching social news feeds from a smartphone is the first thing that hits you in the neck. Quite simple yoga asanas aimed at lateral stretching of the neck muscles can relieve pain in the cervical region and help you relax. Having tilted your head to the side, you need to add a little effort with the hand to which the tilt is made to the shoulder. The palm can be placed on the back of the head or temple. If you stay in the asana for 2-3 minutes on each side, in addition to the obvious benefits for the muscles, you will also get a feeling of rest, relaxation, and peace.
Sitting position
Complexity:
level 2
Performing the exercise:
Starting position: Place one yoga brick on top of another and, on your knees, sit on the bricks with your buttocks and clasp your palms together. Hold this position for 3-5 breaths, then remove one brick. Hold this position for 3-5 breaths, then remove the second brick.
Breath:
While performing the exercise, breathe smoothly and evenly. Do not forget that in yoga you need to inhale and exhale exclusively through the nose.
Repetitions:
2-3 sets of 3-5 inhalations and exhalations, depending on the level of training.
Fish pose
Complexity:
level 3
Performing the exercise:
Starting position: sitting on the mat, legs bent. Place the brick on its edge, level with your upper back. Slowly lower your back towards the stand until it stops. Slowly tilt your head back and hold this position for 3-5 inhalations and exhalations. Then return to the starting position, gradually straightening your back.
Breath:
While performing the exercise, breathe smoothly and evenly. Do not forget that in yoga you need to inhale and exhale exclusively through the nose.
Repetitions:
2-3 sets of 3-5 inhalations and exhalations, depending on the level of training.
Pressure stabilization
This asana lowers blood pressure
Yoga can help and stabilize blood pressure. With age, this problem can become more and more common. Doctors state that lying on your back on a flat floor with your legs raised (lifting your legs can be as you feel better, or a lighter option - with your heels resting on the wall), held for several minutes, will help lower blood pressure.
The brick must be placed under the base of the skull
A special foam brick for fitness (yoga brick) will also help stabilize blood pressure. It is easy to purchase for a nominal price, for example, on AliExpress. The upper wide edge of the brick lies exactly on the protrusions of the base of the skull. The lower wide rib is on the shoulder blades. You can lie in this position for an unlimited amount of time.
If you experience pain from pressing the brick, you need to wait until it goes away. After which you can change the position of the body with a micro-rotation by 2-3 millimeters and continue to apply pressure. This is an effective way to stabilize blood pressure (increase or lower it to normal).
Inverted Triangle
Complexity:
level 3
Performing the exercise:
Starting position: Standing on your mat, place your left leg straight in front of you and place a yoga brick vertically next to your left leg. Place your right foot far back so that your feet are far apart from each other. Extend your arms to the sides and reach for the brick with your right hand, expanding your chest. Hold this position for 3-5 breaths, then return to the starting position. After completing the exercise, repeat it, changing the position of your legs and yoga bricks.
Breath:
While performing the exercise, breathe smoothly and evenly. Do not forget that in yoga you need to inhale and exhale exclusively through the nose.
Repetitions:
2-3 sets of 3-5 inhalations and exhalations, depending on the level of training.
Pigeon pose
Secure one end of the strap to your left foot. From Downward-Facing Dog, step your right foot forward, bend both knees, and place your right shin in front of you. Stretch your left leg back. Make sure the pelvis is closed. Bend your left leg at the knee and point your foot upward. Place your right hand on the mat. With your left hand, grab the belt and lift it up, tightening the belt. Do not bend in the lower back, work by opening the chest. Having fixed the position for the required amount of time, exit the asana and repeat the same in the other direction.
Lateral balance
Complexity:
level 3
Performing the exercise:
Starting position: Facing the mat, place one yoga brick on each edge of the mat. Slowly lower yourself toward the floor, straightening your back, and place your hands on the yoga bricks. Then perform a small jump, straightening your legs back and placing them on your toes in a push-up position. After this, place your feet on the mat and lift your buttocks, trying to reach your hips with your head, taking the head down dog pose. Hold this position for 3-5 breaths, then return to the starting position, slowly straightening your back (straighten your neck and lift your head last).
Breath:
While performing the exercise, breathe smoothly and evenly. Do not forget that in yoga you need to inhale and exhale exclusively through the nose.
Repetitions:
2-3 sets of 3-5 inhalations and exhalations, depending on the level of training.
Some people like cardio to keep fit, some like strength training, but I like stretching yoga - leisurely and calm, but not at all easy. I ordered a yoga mat a long time ago, also from Aliexpress, it’s still intact and safe, I couldn’t be happier, I use it every day. . The thought occurred to me that for my classes I also need auxiliary materials (props): “bricks” (support blocks) and a tape for stretching the legs. I received all this from Aliexpress, including the rug, I’m happy with the quality of everything. The blocks arrived very quickly, a real record, in almost two weeks. Packed in film, not wrinkled in transit, even and smooth.
I bought it for 360 rubles
two pieces (sold individually for RUR 180)
You can choose the color, from the 4 presented I chose blue
, I received them.
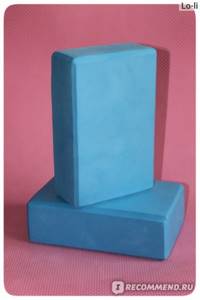
▅ Material
: The same one my mat is made from -
EVA
(ethylene vinyl acetate) - a foam polymer. Very light, warm, smooth, but not slippery, pleasant to the skin, although not natural. The blocks do not smell, do not stain, and do not cause allergies.
There are also wooden and cork blocks, they are more environmentally friendly, hard, and expensive. For support on your arms and legs, they are good because they are more stable, but it is a bit harsh to place under your back and neck; for these purposes, polymer ones are the best option. Ideally, of course, it would be desirable to have both for different asanas.
▅ Hardness
:
moderately
hard, slightly creased when pressed hard, like dense foam without granules.
I have read opinions that some users consider the material to be too soft, they say, it flexes under the weight, but I think this will be noticeable if a man weighing 100
kg is working out and pressing hard.
I can barely stand on them with all my weight. True, the form is immediately restored
.
For example photo: pressed very hard
By my weight 57
the hardness is the most optimal, the heel
does not hurt
during splits, neither does the hands, and the joints are grateful. I think I would prefer these polymer ones to wooden blocks (I also tried them) as they are more comfortable.
In addition, the blocks are weightless
, weigh less than 100 g. As I already noted, they are completely smooth, with rounded edges, but the hand
does not slip
, even when doing push-ups from the floor.
▅ Dimensions:
225*145*76 mm.
Optimal for my average hand. There is no need for more or less.
▅ Why use blocks?
Yoga blocks are one of the most popular devices. When performing standing positions and seated crunches, they are used if you cannot reach
hands to the floor.
An important feature is the ability to turn over
bricks on different sides (on the end, on the narrow or on the wide side).
Yoga blocks aren't just for those with injuries
or flexibility issues.The lightweight modules provide stability for both beginner poses (triangle) and more advanced movements (forearm stand), which is why most yoga practitioners find them very useful. Blocks help increase stretches and allow you to hold the pose longer
which improves
flexibility
.
First of all, blocks will probably be necessary for beginners; I think they are not superfluous. This is additional support and posture correction. The “bricks” are placed on different sides, 3 variations in total, using them in different asanas. Blocks help optimize the distance to supporting arms or legs if it is difficult to reach yourself, support your back and neck, help maintain balance, relieve tension and, most importantly, perform exercises correctly. It’s better to bend less deeply, but correctly, this is important/
▅ Application options (the simplest):
In the lotus position, you can also lean on blocks to lighten the weight and keep your back straight:
I also adapted the blocks for power push-ups
from the floor, there is nothing better to pump up your arms, make them stronger: I put blocks on the edge, they do not fall, do not sway under the weight of the body. If you don’t have push-up supports at home, these bricks can replace them for a while, but the palm grip will still be wider.
I recommend the blocks for anyone doing yoga and stretching.
Here are all my essential gadgets for yoga classes.
Yoga blocks are small, lightweight support modules that help stabilize a difficult pose or, if you lack flexibility, get into the correct body position. Many instructors come to the conclusion that using this tool improves the quality of asanas. How to choose a yoga block and what types are they?
Good travel companion
Before you start,
BREATHE.
Take any comfortable sitting position and hold the pose for a few minutes. Imagine that you are directing each breath into the space behind your rib bone, expanding the area of your heart. Exhale slowly, continuing to feel freedom in the chest area.
REST.
Lie down in Shavasana (Dead Man's Pose). Turn your arms with your palms facing outward and widen your shoulder blades, allowing the heads of your humerus bones to slowly sink toward the floor. Stay in the pose for 5-10 minutes.
You will need:
To perform the asanas, you need a brick, an open-backed chair, three or four blankets and an additional mat. If props are missing, replace bricks with books and blankets with blankets. As a chair, you can use a support in the form of a window sill, tabletop or balcony railing.
When traveling, when we sit huddled in an airplane seat for a long time or carry a backpack with luggage for days on end, back pain and a feeling of stiffness in the shoulders inevitably come. American yoga teacher Richard Rosen offers a set of asanas that will help relieve tension in the back and shoulders. “This selection of asanas will not only guide you throughout your journey, but will also prepare you for the safe practice of inverted poses,” says Rosen. “When performing asanas, do not forget to rotate your shoulders from the inside out, intensify the work in your elbows, retracting them and straightening them if they bend inward.”
If you can expand the front of your chest, your shoulders will be freed, your armpits will open, and your upper back muscles will be stretched. This means that you will be less tired while wearing a backpack or moving on a regular bus from one city to another.
The complex is aimed at stretching the upper chest, turning the shoulders outward and improving mobility in stiff joints. As you practice these poses, you will feel the chest expand and the flow of breath deepen. At the end of the complex, do not forget to perform Sarvangasana (Shoulder Stand). The inverted pose will help you relieve tired legs.
1. Opening the chest with support
Lie on your back so that the brick rests on the area directly under your shoulder blades, and your head is on the blanket folded in four. Bend your knees and place your feet on the floor. Stretch your arms up and gently swing them, thereby expanding the area of your shoulder blades. Grab your elbows and extend your arms behind your head, opening your armpits. Straighten your legs without lifting the bottom of your ribs. Stay in the pose for 2-3 minutes.
2. Dolphin Pose
Get on your knees, lower your forearms to the floor. Take a brick and press it with your palms so that your thumbs point up. Lift your knees off the floor, but do not straighten your legs completely. Align your shoulders with your elbows and press the inside of your wrists firmly into the floor. Lift and open your chest. Guide the sternum bone towards the hips. Push your hips back and straighten your knees. To turn your shoulders outward, point the inner surface of your arms up and turn them in a circle towards the outer one. Stay in the pose for 1 minute, then lower your knees to the floor.
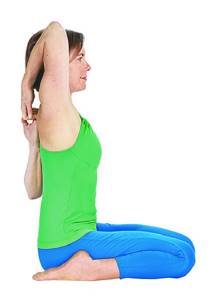
3. Legs in Virasana (Hero Pose), arms in Gomukhasana (Cow Head Pose)
Sit in Virasana with your feet on either side of your pelvis. Place your knees next to each other. If your sit bones don't reach the floor, place a brick across the mat under your pelvis. Extend your left arm to the side with your palm facing back and feel the freedom in your shoulder in this position. Move your hand back. Slide your forearm up along your back. Stretch your right hand up and back, interlocking the fingers of both hands if possible. Otherwise, use a belt. Hold the pose for one minute, then perform it on the other side.
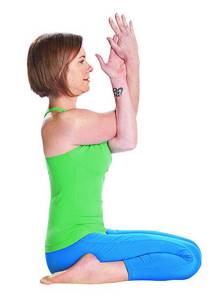
4. Legs in Virasana (Hero pose), arms in Garudasana (Eagle pose)
While sitting in Virasana, extend your arms in front of you, palms down. Move your shoulder blades away from each other. Place your right elbow in the crook of your left and bend your elbows. Interlace your hands and press your palms together. Raise your elbows slightly. Hold the pose for 1 minute, then perform it in the other direction.
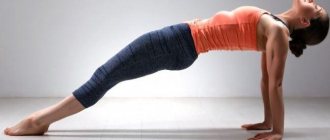
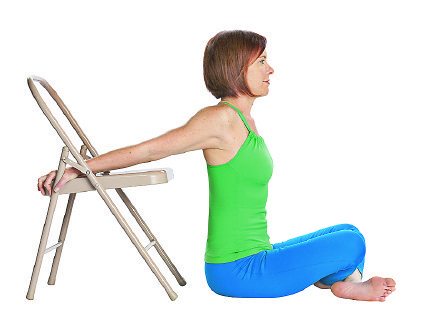
5. Purvottanasana (upward facing Plank pose), variation
Sit at the front edge of the chair. Wrap your arms around the seat behind your back so that your thumbs point to the sides. Straighten your elbows. Lift your butt off the chair and walk your feet forward, aligning your torso and hips in line. Don't throw your head back. Expand your shoulder blades and feel your chest opening. Stay in the pose for 1 minute.

6. Work with the shoulders, grabbing the chair with your palms from behind
Sit on a chair and wrap your palms around the seat from behind, as you did in the previous pose. Slide your buttocks forward and slowly lower yourself to the floor, crossing your shins. If the shoulder stretch is too intense, sit on a brick. Raise the front of your body and turn your shoulders outward. Stay in this position for 1 minute. To come out of the pose, lean forward, slowly releasing the chair.
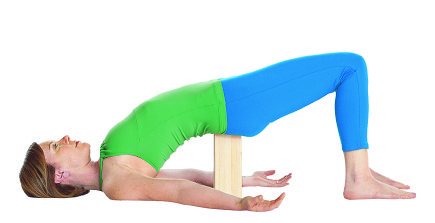
7. Salamba Setu Bandha Sarvangasana (Bridge Building Pose with Support)
Lie on your back and bend your knees. Extend your arms to the sides at a distance of 30-45 cm from the body, palms up. Lift your lower torso off the floor and place your sacrum and tailbone on a brick. First, place the sacrum on the wide edge of the brick. Gradually, the lower back will stop compressing, and the brick can be placed on a narrow edge. Stay in the pose for 2-3 minutes.
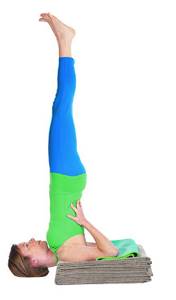
8. Salamba Sarvangasana (Shoulderstand with support)
Stack three blankets and place a rolled rug on top. Lie down with your head on the floor and your shoulders and elbows on a folded mat. Raise your legs up and place them behind your head. Come into Halasana (Plow Pose). Turn your shoulders outward. Wrap your arms around your back as close to your shoulder joints as possible. Point your body and feet up. Press the tops of your shoulders and the outer edges of your elbows toward the floor. Stay in the pose for 2-3 minutes. Lower your legs into Halasana and then onto the floor. Over time, increase the time you spend in the pose.
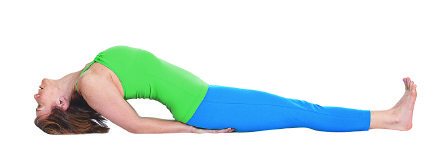
9. Matsiasana (Fish pose)
This pose has the opposite effect to Sarvangasana. Lie on your back and bend your knees. Slide your palms under your buttocks. Press your forearms into the floor, lift your head and chest off the mat, and rest the top of your head on the floor or folded blanket. To get deeper into the pose, extend your legs one at a time. This pose perfectly releases the shoulders, neck and chest. Stay there for 30 seconds to 1 minute. Lift your head and chest and lower yourself gently to the floor.
Source/Author: Richard Rosen
Yoga Block Shapes
Many people mistakenly assume that yoga blocks are only necessary for beginners. However, some modules and their combinations can not only serve as support, but also complicate asanas, increasing the amplitude of body movement.
Universal yoga block
A solid block that resembles a brick is the most commonly used and versatile module. It can be used when the arms cannot reach the floor or support is needed for a strengthening pose.
The presence of this block is desirable at any stage of the lesson.
Brick with hole
This block is shaped like a universal one, but in the middle of it there is a hole in the shape of an infinity sign. Thanks to this, it is lighter than the first one and allows you to relieve tension from the wrists when performing asanas. However, along with the weight, the number of working surfaces is also reduced: a flat palm position is only possible with a universal block.
"Egg" (oval)
Oval blocks are designed, rather, to complicate positions: the absence of angles causes them to oscillate when the center of gravity shifts, which provokes the yogi to find the perfect balance and remain motionless. They rest on the ovals with their palms, hips, lower back or buttocks. Usually at least a couple of “egg” blocks are used.
Platform
The platform, reminiscent of a roof slope, serves to relieve stress on the wrists and calves in dog or wheel pose. Supporting the inclined platform with your palms or feet makes it possible to relieve excess tension and prevent cramps. This module is indispensable not only for yoga classes, but also for those who prefer Pilates.
Arch
A solid arch on two supports is the best choice for tight back muscles. To stretch its upper part, you need to lie down on a block and rest your head on the floor. To warm up the lower one, you need to lean back on the arch while sitting on the floor. The small thickness of the block allows you to turn your shoulders and stretch all the core muscles well.
Those who do not experience back problems will also find the arched block useful: after a hard day at work, it is pleasant to relax in the “back bridge” position, breathing deeply and feeling how fatigue leaves the muscles.
What is the function of a belt in yoga practice?
It helps to properly rebuild the body in asanas. “Without a belt, at the initial stages of practice it is difficult to build the correct angles,” explains Alexandra Lebedeva , hatha yoga instructor, manager of the Taste & Color .
“The belt also helps to “lengthen” our limbs in deep bends and extensions.” For more experienced practitioners, the belt will be useful in mastering hand balances and inverted asanas. “It allows you to strengthen the “structure” and correctly distribute the load: if you fix your forearms with a belt at the correct distance in the downward-facing dog pose, handstand, then the asana will be more comfortable and stable,” comments Alexandra Lebedeva. “For some, this measure gives confidence: when you feel that your hands are not moving apart, the asana no longer seems dangerous.”
Plus, using a belt in such positions helps to better open the chest and “revitalize” the shoulder girdle. “We all have pretty tough shoulders. Asanas with a belt on the forearms help strengthen and stretch these muscles,” adds our expert.
We asked Alexandra to show us which asanas should be performed using a belt even for experienced practitioners.
[new-page]