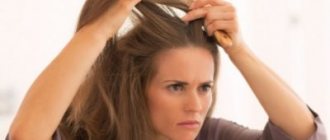
Is it possible to highlight your hair at home?
Highlighting strands is not as complicated a procedure as many imagine. Thanks to a variety of highlighting methods, you can choose the appropriate coloring method. Using a comb or rubber bands, highlighting your locks is easy. But for other techniques you will need an assistant or an additional mirror with which you can look at the back of the head.
Important! The first time, everything may not go as smoothly as expected, but with time, experience will come and highlighting done on your own will look perfect.
The difficulty of an independent procedure lies in the inconvenience of coloring the strands on the back of the head, even with the help of a mirror. Pulling and applying the product to selected strands is a rather labor-intensive process. Your hands get tired quickly from this position. But when experience comes, it will not bring any inconvenience. Moreover, home highlighting is much cheaper than a salon procedure.
Proportions of paint and oxidizer
Different manufacturers indicate different percentages of pigment and oxidizing agents. In packages for self-use you will find a separate tube with paint and oxide; most often they are combined in a 1:1 ratio.
If we are talking about a professional product, then the components are sold separately; they need to be diluted as written in the instructions for coloring or on the bottle of oxidizer. Depending on what shades you want to get, the amount of oxidizing agent may vary, but the manufacturer must warn you about this.
Carefully study all the information on the packages to get the desired result.
How to breed
The procedure for connecting components also has some nuances. First of all, choose only non-metallic equipment; the mixing container should be ceramic, glass or plastic, and the spatula should be made of plastic or silicone.
Immediately pour the oxidizing agent into the container, and only then add the dye. The reaction occurs almost instantly, so you need to stir the composition quickly. There should be no lumps or irregularities in it.
After joining, the paint is carefully applied immediately to the roots, and then along the entire length. Stir the mixture from time to time, this will help avoid incorrect development of the shade.
Common Mistakes
Many girls do not get the results from coloring that they expected, judging by the photos on the Internet. This happens due to improper use of the oxidizing agent. It must be added exactly as much as indicated in the instructions. Otherwise, you will get a completely unexpected shade.
Let's consider what the consequences may be if the composition is not diluted as it should be.
- Too much oxidizing agent. Hydrogen peroxide dehydrates hair, makes it brittle and leads to hair loss. If you use a large amount of developer, you risk damaging your hair, and it will take a lot of time to restore it.
- Too little oxidant. If you use the developer in insufficient quantities, the pigment simply will not penetrate the hairs. You will get uneven coloring, a very dull color, or no result at all.
- Using paint and oxidizer from different manufacturers. The most important rule when choosing a developer is that it must be the same brand as the pigment. If you buy an oxidizer from another company, it is quite possible that the percentage of perhydrol in it will be less or more than needed to develop a particular tone. In this case, the proportion of components will have to be calculated independently. But the use of oxidizing agents with different percentages of peroxide from the same manufacturer is allowed; such combinations help to achieve new interesting shades.
- Incorrect holding time of the composition. Even if your hair color is too dark, you should not leave the dye on for longer than indicated on the package. This can only damage the strands. The higher the percentage of peroxide in the oxidizing agent, the less time is required for its interaction with the hair. It is also impossible to wash off the composition ahead of time, as the pigment may appear unevenly.
Methods of execution and photos
There are many techniques for highlighting, such as American, Venetian, Californian, ombre and others. This will give you the opportunity to choose the appropriate type of hair coloring to transform your appearance and hairstyle.
You need to pay attention to the color palette of shades for different hair colors. It is advisable that the first highlighting be done by a professional who will help determine which technique is suitable for the hairstyle and hair color. You also need to choose a method for highlighting strands, taking into account the length of your hair and your appearance.
Regardless of the technique for dyeing strands, your hair needs to be looked after both before and after the procedure.
These techniques are the most popular.
Veil
It is considered a rather painstaking and complex process for painting yourself. The technique consists of applying the product to the top layer of hair on selected strands, up to 3 mm wide. The curls are lightened along the entire length using foil and paint.
Californian
It involves coloring strands along the length with a smooth stretch, where the ends are the lightest. This is necessary to create sun-bleached hair and a natural look. It is done without foil and a special cap; the paint is simply distributed over the hair, 2-5 cm away from the roots.
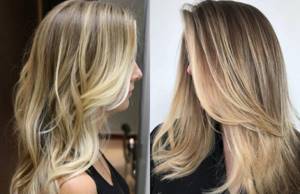
We invite you to watch a video on how to do California highlighting at home:
Ombre
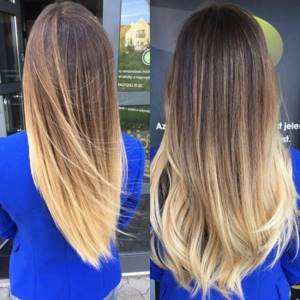
It is a popular type of highlighting, when the ends of the curls are lightened, and the root part remains natural or darkened with paint. For light hair, you can do the procedure in reverse - dark ends, light roots.
American
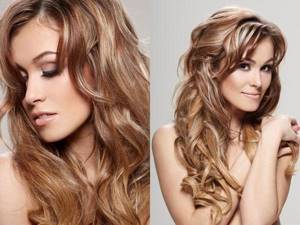
Most suitable for dark-haired ladies and consists of copper, red and red colors.
Brazilian
Designed for light brown hair and made only from a palette of natural shades. The tips should be light and the roots should be dark.
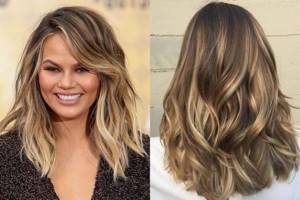
French technique or majimesh
Needed to lighten selected strands with natural shades. This is the most gentle method for blonde and light hair, when you can lighten it by 2-4 tones.
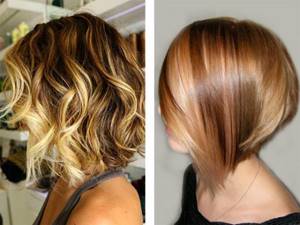
Booking
Alternates light and dark strands to create a natural color. Hair length should not be less than 10 cm.
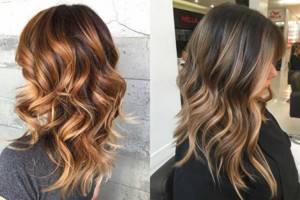
Features of the California highlighting technique
The Californian type of partial hair coloring is very popular among modern fashionistas.
California highlighting is a gentle procedure, for which a special thick paste based on beeswax is used.
This paste allows you to bleach your hair without damaging its structure. In this case, neither foil nor a cap are used.
The paste for California bleaching is quite thick and does not spread when applied to the strands.
The main feature of the procedure is that bleaching is carried out in the open air, whereas when using foil, the lightening reaction occurs under the foil and acts more aggressively on the hair.
Video:
During California highlighting, the hair dries naturally and the lightening agents completely evaporate.
California highlighting is performed on both long and short curls. In this case, the strands are made of different thicknesses.
And considering that with this procedure you can get up to 5 different shades with a smooth transition from roots to ends, coloring is used with equal success on both dark and light hair, including black and light brown.
Advantages of the method:
- using several light colors at once;
- growing roots against the background of Californian highlighting go unnoticed;
- there is no need for toning correction;
- hair gets extra volume;
- gray hair is perfectly camouflaged;
- The procedure is recommended even for allergy sufferers;
- the deep structure of the curls is preserved;
- There are no restrictions on hair type.
The results of this procedure can be seen on the locks of most Hollywood stars.
California coloring is considered a complex procedure, but this does not mean that this method cannot be done at home.
Performing California highlighting yourself
To perform the California procedure, you will need a highlighting kit, which includes a bowl for the color mixture, gloves and a brush. You will also need a comb and an old towel.
California highlighting is performed by gradually dyeing the strands with a special composition.
Important to read: Attractive highlighting of light brown hair
Before preparing the coloring mixture, you should decide on the choice of the required shades, which, as a rule, should be at least 5.
It is important that the shades are harmoniously combined with each other, only then can you count on a successful result of the procedure.
Photo:
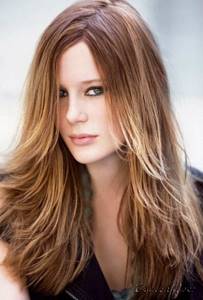
Preparing a mixture for coloring involves combining shades with a thickener.
After 40 minutes, wash your hair with shampoo and then apply conditioner.
We suggest you watch the process of California highlighting in the video in our article.
How to properly prepare strands for the process?
In order for the paint to lay evenly on the curls without damaging them, you need to remember the basic recommendations:
- There is no need to wash your hair for several days before the procedure. It is better to do highlighting on dirty strands, since the fat layer formed during this time will protect the hair from the negative effects of dye, from drying out and becoming brittle.
- It is not recommended to use styling products before highlighting your curls.
- It is advisable to start nourishing, moisturizing and strengthening your hair using special masks 2-3 weeks before dyeing.
Useful tips
- The prepared coloring mixture is used only once.
- You will need to dye your hair very quickly so that in the end the strands are the same tone.
- It is mandatory to use gloves.
- It is best to apply a rich cream to the forehead and neck area.
- Do not leave the coloring composition on your hair for too long. The determining factor is the length and thickness of the dyed strands.
- The frequency of the procedure is no more than once every 3 months.
- After highlighting, you should take care to protect the color and hair with the help of special cosmetics.
- If the hair was dyed with henna, then the final tone can be completely unpredictable.
- You cannot apply the lightening mixture a second time to previously bleached curls, as this will “burn” them.
- The procedure is best carried out on the 2nd or 3rd day after washing your hair, as this will protect it from the negative effects of chemical components.
What are the best products to use to color your hair?
To dye individual strands at home, you need to prepare a lightening agent, as well as a number of tools that will be needed for the procedure:
- foil or a hat with holes and a hook;
- gloves;
- glass or plastic container for diluting the drug;
- application brush;
- hairpins or clips;
- a comb with a sharp and thin tip to highlight curls;
- a towel to cover your shoulders from getting the product on your clothes.
When choosing a paint, you need to look at its composition and the percentage of oxide that is selected to match the hair color.
Attention! It is better to buy a special highlighting kit, which will include everything you need.
What you need to highlight your hair
Tools used for the hair highlighting procedure:
- comb-tail, which is designed to separate strands;
- effect stanler - a special brush designed for coloring strands;
- comb with hook;
- brush necessary for coloring hair.
To dye your hair you will need the following equipment :
- foil - any kind, but not very thick;
- bowl for hair coloring - if you don’t have a professional bowl, use a glass one;
- short peignoir made of polyethylene;
- a measuring cup made of glass or plastic, preferably with a cross-section of 10 ml;
- gloves and hair clips (“ducks” and “crabs”).
Step-by-step instructions: how is highlighting done step by step and how long should you keep it on?
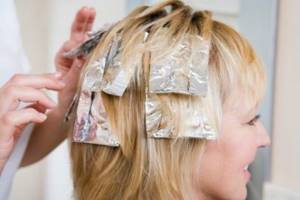
For many techniques and types of highlighting, one procedure is used:
- Prepare the coloring agent in a special container. It must be remembered that to lighten fine hair, 1.5% oxide is taken, for light curls - 3%, and for dark curls - 6 or 9%.
- Comb your hair, divide it into several zones and pin it with clips. Starting from the back of the head, from a large bunch of hair, you need to separate the strands. To do this, using the sharp end of a comb, small curls for highlighting are formed in a checkerboard pattern. If a cap is used, the strands for dyeing are pulled through the holes with a crochet hook.
- You need to start highlighting your hair from the back of the hair, bangs and the crown are done last. The coloring composition is applied to the foil, if used, and to the strands from the tips to the roots using a brush, stepping back a few centimeters from the roots.
- Leave the composition for 15-45 minutes depending on the structure and color of the hair.
- Rinse with warm water and dry as usual.
To better remove paint from the skin, apply a thick cream to the neck, temples, behind the ears and forehead.
Features of carrying out the procedure with your own hands for long curls
To dye selected strands on long hair, you need to use foil. The cap is not used in such cases, since it will be difficult or even impossible to remove later. In general, the technique for coloring long curls directly depends on the desired end result.
What mistakes should you avoid, how long should you sit?
You must strictly follow the instructions when preparing the coloring composition and applying it to the strands. The strands should not be too wide or, on the contrary, too small. Apply the product evenly, making an inconspicuous indent from the roots. Also, you should not leave the dye on for more than the specified time, otherwise your hair may be seriously damaged.
If highlighting is still unsuccessful, it can be corrected by tinting and adjusting areas of the roots or strands where the product is unevenly distributed, you can also repeat the full procedure, but after how long, it is better to check with a specialist. To remove the yellow tint, you need to use special tonics.
A salon procedure, such as lamination, will return your hair to a healthy appearance, add shine and radiance, and also smooth out all the unevenness in unsuccessful coloring.
Advantages and disadvantages of the method
The zebra technique is an ideal solution when you want to emphasize the shape of your haircut. The coloring looks especially stylish with haircuts:
- asymmetrical bob;
- bean;
- The result looks great on straight hair smoothed with an iron.
Retro haircuts in the style of the 80s will not look very good with a zebra, there is a danger of getting a visual effect of a watermelon due to the round shape of the styling.
A similar technique will be suitable for women who want to embody images in the style of a wild jungle. You can create an original style of a predatory woman with a zebra hairstyle, using leather bags, tiger and leopard prints, and cat-eye makeup in your image.
Zebra coloring is primarily a way to express your own individuality, and not an attempt to conform to standards.
The zebra technique suits only certain individuals. First of all, a girl should be confident in the aesthetics of her facial features; this hairstyle will suit girls with full lips and big eyes, because you can wear bright makeup with it.
Attention. If the face has pronounced flaws, for example, a long nose or very lips, then it is better to choose a different coloring option
The face shape can be any. Large stripes mask triangular and rectangular face shapes, especially with diagonal bangs.
Disadvantages of technology:
- she doesn't look natural;
- There are no smooth transitions of tones.
Therefore, if you are for your hair to look natural above all, then this type of highlighting will not suit you.
How long will it last?
Since highlighting erases the hair pigment, it will last for a long time. This depends on many factors: on the shampoo and its composition, on the characteristics of the curls and how quickly they grow, as well as on exposure to sunlight on them. Therefore, experts recommend carrying out the procedure once every two to three months so as not to harm the hair. When answering the question of how often you can highlight, it is better to tint the regrown part of the strands, and not the entire length.
Every girl and woman can have her hair highlighted outside a salon if she studies the recommendations of professionals and strictly follows the instructions. The technique and coloring composition must be selected taking into account the color and length of the hair. After selective dyeing, the strands also need proper care: it is better to use sulfate-free products and regularly make nourishing and restorative masks.
How to care for root highlights
Overgrown highlights require constant care, which consists of following several important rules.
Rule 1. Wash your hair with shampoo for highlighted hair.
Rule 2. After each wash, use balms, conditioners or masks. It is advisable that they be the same brand as the shampoo. Please note that you can only care for highlighted hair using store-bought cosmetics. Home remedies, especially oil-based ones, will give your hair an unattractive yellow tone.
Some of the best brands include:
- L'Oreal Professionnel Serie Expert Lumino Contrast is a shampoo for highlighted hair that restores damaged structure and normalizes lipid balance. Does not weigh down the strands, does not dry out the ends, adds shine to the hair, and maintains elasticity;
- L'Oreal Professionnel Lumino Contrast is a leave-in gel fluid containing silicones. The product envelops every hair and makes the hair smooth, soft and shiny;
- John Frieda Frizz-Ease Rehydrate Intensive Deep Conditioner is a conditioner for dry hair that has strong nourishing and moisturizing properties, and also promotes easy and painless combing;
- Illumi Lights Schwarzkopf Professional is a moisturizing shampoo that is in great demand among famous hairdressers. Provides very good care to the strands, makes them silky;
- Lifetex Color protection Wella Professional is a budget shampoo that nourishes the roots of strands and preserves color.
Rule 3. From time to time, use tinted cosmetics that neutralize the yellow tint. Silver or purple tonics, balms or shampoos are ideal for these purposes.
Rule 4. Choose a high-quality comb that will not damage your hair while combing. Opt for wooden combs with rare teeth, brushes with natural bristles, or fashionable combs Macadamia No Tangle Brush and Tangle Teezer, which in an instant will untangle tangles, smooth out the scales of strands and make your hair smooth and very beautiful.
Rule 5. To ensure that the highlighting result pleases you for a long time, protect your hair from chlorinated water and direct sunlight. They not only dry out the strands, but also contribute to the rapid appearance of an unsightly yellow tint.
Rule 6. Regularly apply fluids, serums or sprays to the ends - they prevent their delamination.
Rule 7. Don’t forget about the root zone - pamper it with strengthening masks once a week.
Rule 8. To restore the structure and strengthen your hair, take a course of vitamins.
Rule 9. Do not comb wet hair - this will cause it to stretch and begin to break.
Rule 10. Do not carry out the procedure too often - you need to grow at least 5 cm. As a rule, the interval between dyeing is from 3 to 6 months, but, of course, it all depends on the speed of hair growth.
Types of highlighting
In the classic version, highlighting is the lightening of thin strands evenly distributed throughout the head by several tones. Despite the fact that this method is now considered a gentle type of dyeing, until recently it significantly damaged bleached hair. For bleaching, a powerful powder was used, which literally etched out the pigment, depriving the hair of its natural shine and elasticity.
Today, more delicate paints are used, and for some types of highlighting, lightening just a couple of tones is quite enough:
- Californian - surface lightening, the purpose of which is to create the effect of natural fading of hair in the sun;
- American - giving the hair brighter reddish or reddish shades (in order to achieve purity of color, you need to first lighten the strands by 2-3 tones);
- shatush - delicate bleaching of chaotically located strands on dark hair;
- balayage - creating a smooth vertical transition from dark to lighter color with reinforcement at the ends;
- Ombre is a horizontal contrasting transition from dark to light or vice versa; lightening is usually performed only in the lower third of the length.
There are also contrasting types of highlighting: zebra and feathers, which may require bleaching by 4 or more tones. But now discreet painting with blurred boundaries of color transitions is in fashion.
More about supra
This is a modern and professional tool designed to:
- both for complete coloring and for coloring individual strands;
- to give more volume to hair;
- for bleaching before dyeing - used to give a brighter and more saturated color.
Its operating principle is based on a strong oxidation reaction. The alkali, which is part of the powder, affects the pigment granules, which leads to their subsequent destruction.
Lightening powder consists of very small granules. These are various additives, hydrogen peroxide, persulfates and alkaline buffers.
This product may also contain bisabolol, which has an antiseptic and anti-inflammatory effect, and various additives that control color intensity.
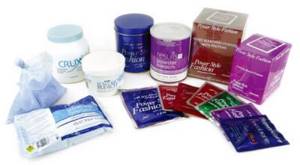
To enhance the clarification effect and accelerate the reaction, a catalyst is used. This is a special oxidizing agent that is mixed with powder. Without it, only a slight color change can be achieved. The higher the percentage of catalyst, the faster the reaction will occur and the more the color will change.
Powder should not be used to lighten dry and damaged hair, as this can damage it even more. Powder can give a very interesting highlight effect, which will add a certain charm to your hairstyle. The powder can also be used to remove old shade. However, it is not recommended to lighten with powder at home.
