What is airbrush?
The design of nails, in which the main tool is a special manicure airbrush, is called airbrushing. A special device sprays paint with adjustable intensity, and drawings can be applied either directly or using a stencil.
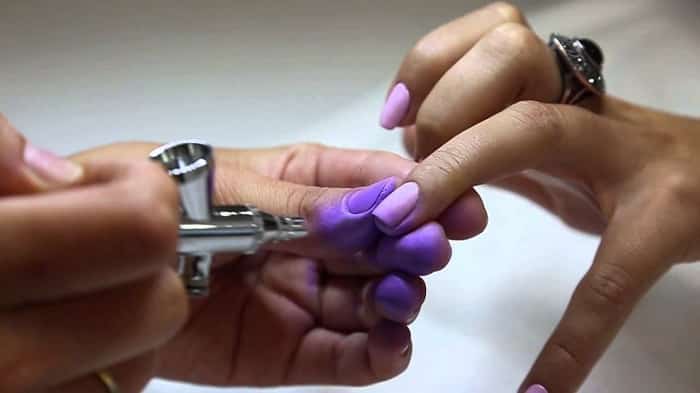
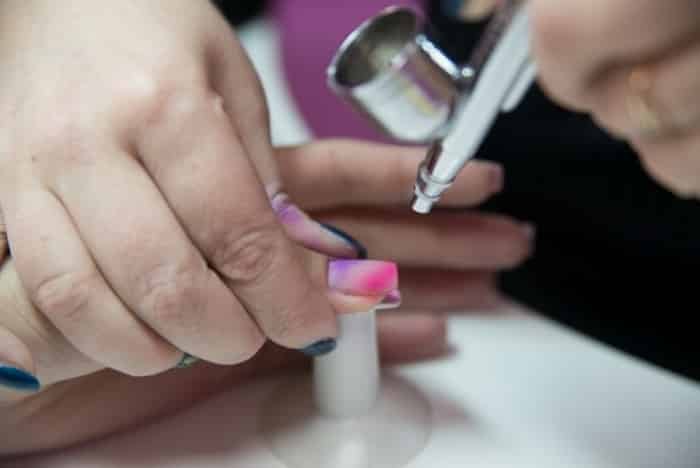
Using a manicure airbrush
A high-quality unit allows the nail art master to choose the thickness of the lines, so the drawings turn out realistic and voluminous, especially if the airbrush is in the hands of a real professional.
Types of airbrush
The pricing policy of special devices for spraying paints directly depends on the capabilities of the selected tool. Among the types of devices there are simpler or double options. The difference in quality and cost is colossal.
- Simple airbrushes apply paint under uniform pressure, but there is no way to regulate it. Also, the amount of pigment applied is difficult to control, which causes some inconvenience during work. Excessive consumption of coloring liquid is also possible. Typically used when working with stencils.
Simple airbrush - The double type of airbrushes is more practical. In addition to full control of the paint supply force, the unit allows you to apply lines of any thickness to the nail. It can also be used to create maximum image detail.
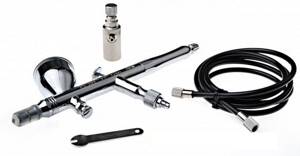
Double airbrush
Both one and the other cannot be used without additional tools and special materials.
You can choose such accessories from a huge range of products and a variety of prices.
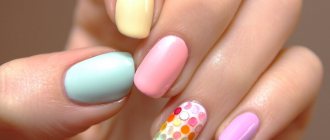
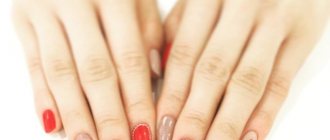
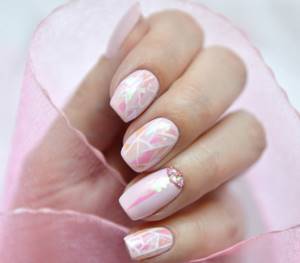
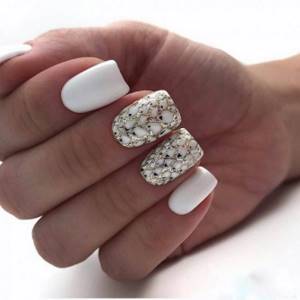
#5 Acrylic decor on the ring finger
Acrylic powder, as one of the varieties of volumetric decor, looks best on the ring finger. As for the pattern itself, it can be flowers, generously sprinkled with acrylic, lace and openwork patterns in white or black, wide stripes with acrylic and a gradient.
Acrylic sand fits perfectly into summer nail art and perfectly imitates real sand. Design with acrylic is very practical:
- the material tends to strengthen the design
- acrylic is quite fine in texture, so it won’t interfere
- acrylic has many shades: from classic white to mix combinations for summer nail art
Materials and tools
Using an airbrush for nails is impossible without some additional accessories. The necessary materials and tools are not only paints and stencils, but also solvents and gun cleaning fluids.
Among the wide range of materials and tools, there are often not only fakes, but also simply low-quality products. You should approach your choice responsibly, because the quality of the result depends on it.
Paints and varnishes for artistic painting
Naturally, it is not possible to paint with just air, so a paint kit is simply necessary. They are often purchased as a set of a basic palette. These colors are good for the main background. Shades are often created by mixing several colors, but you can choose from tint palettes if you wish.
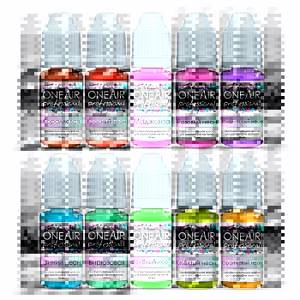
Airbrush paint set
Paints are mainly produced on a water basis. This makes them well diluted and washed out of the airbrush. But there are also special varnishes that contain special compounds for better adhesion.
High-quality paint will not clump, flow like water, or, on the contrary, be excessively thick. If the pigment has such characteristics, it cannot be used to avoid damage to the airbrush device.
Stencils
They are simply necessary for creating various effects on nails if there is no time for manual design or lack of drawing skills. Although stencils are often used by craftsmen who deliberately want to give the nail some special design option. Among the stencils you can find disposable paper stickers (or from film) and reusable ones.
Commonly used stencil options:
- “leopard” spots and other animalistic patterns;
- geometric shapes (often used as a basis for subsequent design);
- for French, moon manicure;
- contours of animals, plants, objects, monograms;
- inscriptions, letters, symbols;
- specific drawings (religious themes, subculture, etc.)
In almost all cases of using stencils, the effect of contrast is used. This can manifest itself in shades (light-dark), color scheme.
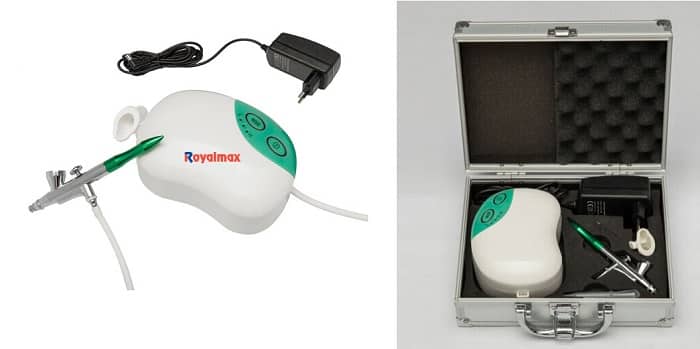
Ready-made sets
The airbrush apparatus itself is a pistol-like object on which there is a reservoir for liquid pigment, a spray nozzle, and switches. In order for it to start “blowing” paint under pressure, you will have to purchase a special compressor separately. The operation of the airbrush directly depends on its power. Some manufacturers provide an airbrush and a compressor at the same time, so you can find devices that are produced in sets. The “gun” is connected to the compressor using a hose through which air flows.
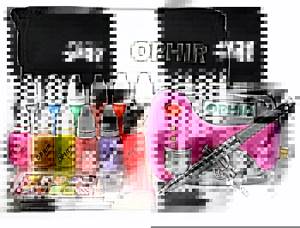
Standard airbrush kit
In addition to the complete equipment for the device, the all-inclusive set may include:
- paints or varnishes;
- stencils;
- solvents and cleaning fluids;
- set of nozzles, needles, etc.
Depending on the configuration of the kit and the quality of the device itself, the cost of the kit can easily fluctuate several dozen times.
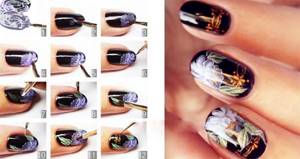
Step-by-step creation of airbrush drawings
Like any other coating, airbrush paint can be applied to natural nails, extended nails, or coated with gel polish. If the design is applied directly to a natural nail, then its surface is prepared in the same way as for coating with gel polish: a hardware or other manicure is done, and the nail is polished. There is no need to prepare artificial coatings in advance; the main thing is to remove the dispersion layer.
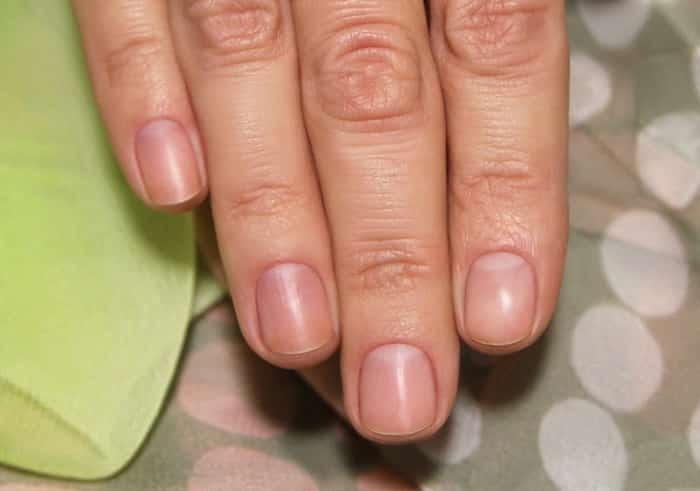
Nail ready for airbrush painting
In order to easily remove the remaining paint from the skin around the nail after artistic painting, it is worth applying hand oil in advance to those areas where you need to protect the skin from paint. A rich cream will also work. It is important not to touch the nail plate.
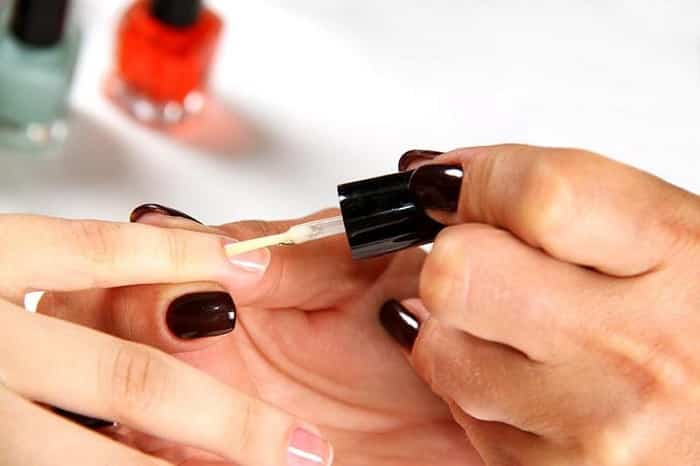
Preparing the skin around the nail for airbrushing
Don’t be afraid of this miracle airbrush machine, but practice more. If you have completed a training course in airbrush techniques, then working with the device will not be difficult. If the theory is mastered independently, numerous training sessions cannot be avoided. It is better to do this on training tips.
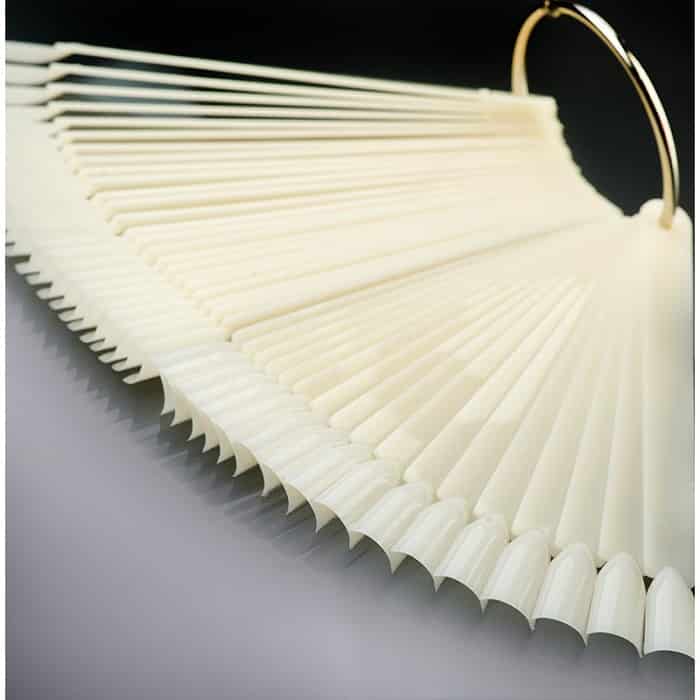
Set of tips for training sessions with an airbrush
But in any case, the process of decorating nails with an airbrush is the same:
- Apply the background by spraying the paint at the optimal distance above the nail. The design will be original if you use several shades as a background (although it all depends on the intended nail design);
Painting a nail to create a background - Allow the paint layer to dry under the lamp;
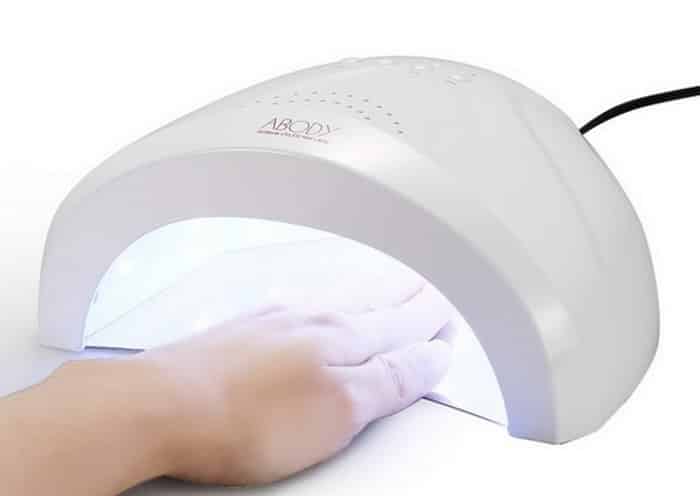
Lamp drying
Place the stencil firmly on the surface of the nail. If it is not used, then the main drawing is applied step by step.
Using a stencil
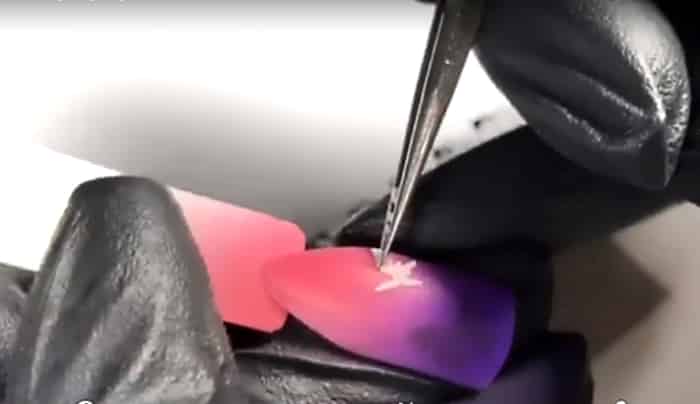
When using a large number of colors, it is worth using each one on all intended nails in turn, and only then changing the paint in the airbrush for subsequent painting. If necessary, especially small details can be applied with a thin brush;
Creating a drawing
- After each stage of applying the image to the nail, it is better to dry the new layer in a lamp;
- After the necessary drawing and detailing, you can begin to complement the design: decorate your nails with rhinestones or other decorations (using sparkles, for example);

Marigold decoration - After completing the design, the nail is covered with a finishing layer - top and dried.
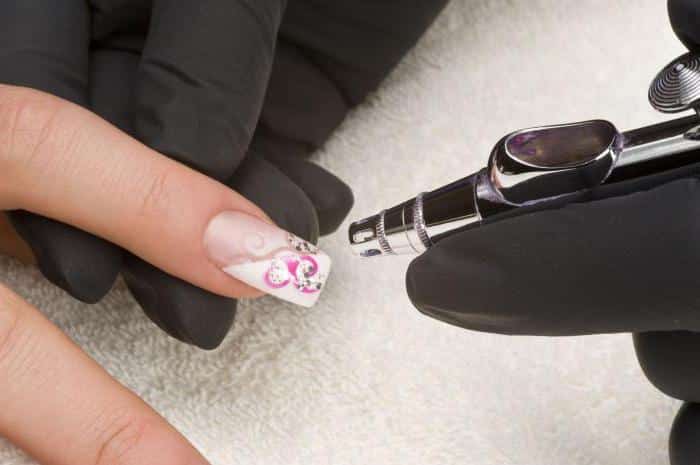
With a sufficient level of skill, both simple patterns and more sophisticated complex compositions or thematic designs can be created on nails.
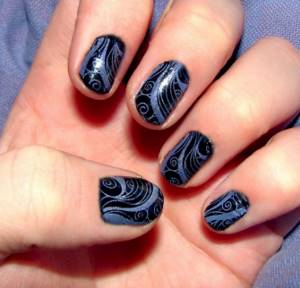
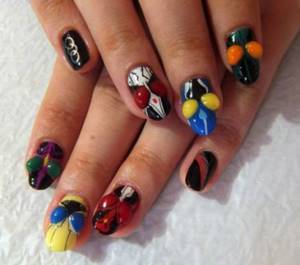
Simple airbrush patterns:
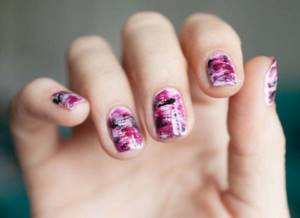
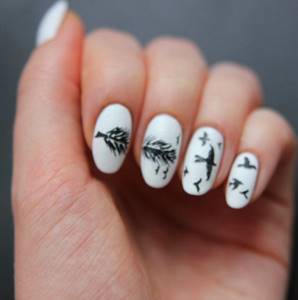
Photo examples of complex compositions for painting:
https://youtu.be/https://www.youtube.com/watch?v=EBru2zPPrdE
Powder drawings
Nowadays, painting nails with special powder is rapidly gaining popularity. There are varieties of powder that have different shades and textures. A fine structure is characteristic of velvet sand; flock is considered more fleecy. However, all types of this material are capable of creating truly wonderful patterns on your nails, giving them the effect of a chic velvet.
With the help of powder, the most interesting ideas are created, distinguished by their beauty, incredible luxury, but, at the same time, restraint. Working with powder requires good specific skills, but the result will be amazing.
Abstract designs that resemble lace are very fashionable. Floral and foliage compositions are also very fashionable now.
To effectively highlight the smile line in a jacket, use glitter powder. It can also be used to create a winter manicure. Using powder, New Year's motifs, designs of tinsel and snowflakes look beautiful.
Drawing tools and materials
The most important and basic thing that you will initially have to acquire are various chemical elements, as well as additional compounds and solutions: fixative and solvent for nail polish remover and other liquids.
It is recommended to buy varnishes that do not have caustic and pungent odors, and it is necessary to check the expiration date of the product.
Next, you need to have acrylic paints in your arsenal. This type of paint has no harmful or side effects on nails, and they have a very wide range of colors. Their main advantage is that acrylic paints adhere very well to the nail and dry very quickly, while they are not very expensive.
You also need to purchase an important tool when working with nails, this is a set of brushes made from natural hair, it is advisable to have two different sets.
As decorative decorative elements, you can use various items that must be available: a variety of rhinestones, stones, beads and other items. You can’t do without glue, which is used when gluing various decorative elements on nails.
All beginners need to thoroughly study the theoretical materials on painting and designing nails, and only after that can they get down to business.
The simplest nail design with a pattern is made with a special brush with the finest tip.
They are designed to work with special acrylic-based paints, with which it is desirable to apply small arbitrary outlines; these lines can be supplemented with various dots.
This work will have a very chic and unique look, but the work will not be very difficult.
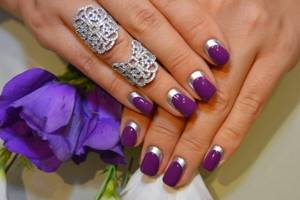
#4 Manicure with rhinestone inlay on the ring finger
An abundance of rhinestones and other shiny decor is a distinctive feature of ceremonial nail art. However, this design can also be found in girls’ everyday looks. As a base for your manicure, choose a classic, clean shade, such as black, white, burgundy. They go well with rhinestones on a colorless backing or colored stones.
A white manicure looks especially attractive when combined with pixie crystal inlay on the ring finger. A black matte French manicure with rhinestones looks chic and noble, while a burgundy manicure with inlay looks strict and laconic.
The procedure for applying designs on nails
Before you start decorating your nails using acrylic paints, you must:
- At the initial stage, it is necessary to prepare your nails for work, that is, you need to degrease them.
- Next, you need to apply a special nail plate, onto the surface of which a transparent base is applied.
- After this, you need to apply a special nail polish and wait until it dries well.
So, let's move on to the most important and serious stage, this is the artistic design of nails, in other words, nail painting.
For those who are going to perform such an operation for the first time, and even on their own, it is recommended to practice a little with a pattern on any surface. This is necessary so that your hand can get used to the brush a little.
After a short period of time, the hand will adapt well to the brush, and only after that you can apply a variety of patterns, as well as beautiful designs on the nails and smooth lines.
Next, you need to apply a special top coat to the finished drawing, which will make your nails brighter and shinier. As a result of this, it is possible to determine the inner world of the owner of such nails.
It is worth noting that the easiest way to decorate your nails after painting with paint is to perform high-quality decoration with decorative items, such as beautiful sparkles.
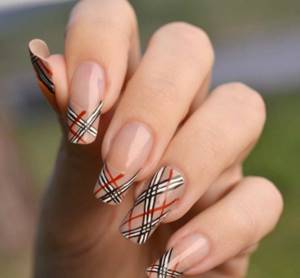
French manicure with a pattern
The manicure design in this image is a classic nail design style.
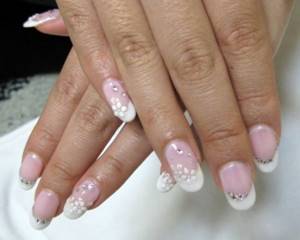
In this case, the drawing has a bright and rich shade, which may contain a small line or small uncomplicated lines of a dark color.
Colored nails with designs
If you add golden or gilded colors to a light and bright manicure, this will give the manicure more freshness and lightness.
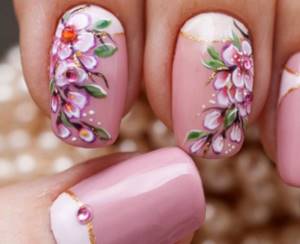
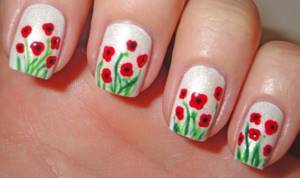
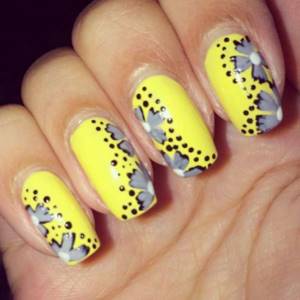
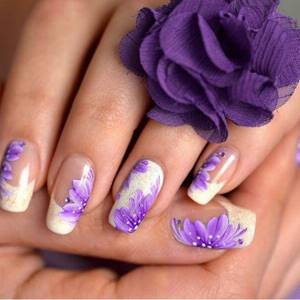
Nail designs - floral motifs
This is one of the complex manicure design options.
The fact is that painting in this style requires a very thin brush, which in itself is very difficult.
In addition, the execution process will take quite a long time, and it will also require a lot of patience and perseverance.
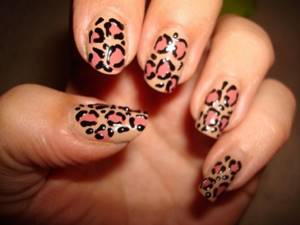
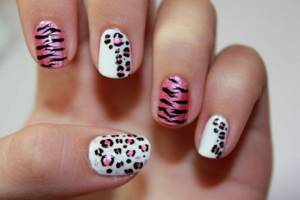
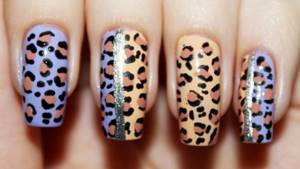
Leopard print on nails
This is one of the most popular and sought-after manicure styles. The reasons for this phenomenon are quite simple to explain. The fact is that applying the drawing yourself will not be difficult.
In order to create a unique and stylish nail design, you will need to have all the special equipment and tools, as well as high-quality materials.
The condition of the nails and skin of the hands is of no small importance, since fingers that do not look well-groomed can cause negative feelings.
Non-standard designs on nails - hieroglyphs
Today, there is a certain interest in oriental themes. The oriental theme and manicure did not go unnoticed.
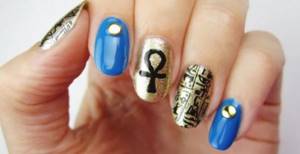
Drawn hieroglyphs on nails look very impressive and unique.
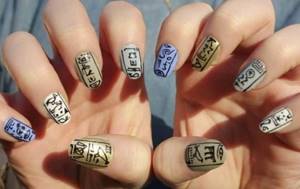
As a rule, the main color of this style is red, and black should be used as an additional color. This color scheme is typical for Japanese-themed designs.
How to decorate nail designs with rhinestones and stones
Quite an interesting design in this way. Nowadays, a very popular design for manicure is the presence of decorative items on the nails, such as rhinestones or stones.
At the same time, it is recommended to select decorative elements according to the size of the nails. Pebbles or rhinestones are applied to the surface with tweezers in the required places.

To attract romance and love
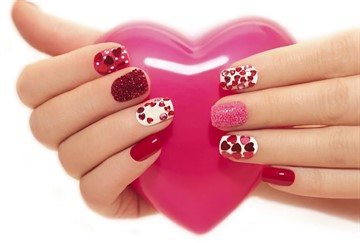
“Love” manicure is one of the possible Feng Shui manicure options, which can involve the left hand. To create a manicure, take some red, pink or purple and apply it to the middle finger of your left hand.
On your right hand, do the same procedure, focusing on the middle finger. Masters of Eastern practice say that there are several types of Feng Shui manicure to attract romance and feelings into your life.
One theory says that the ring finger on the left hand should be accentuated with beautiful decoration. To attract love, apply manicure only to your left hand. In this case, you can hope to meet true love. Such a manicure on the right hand will give the opposite effect.
How to care for your nails and hands
The condition of your hands and nails is of no small importance, since their untidy appearance will negatively affect your appearance.
Therefore, to prevent this from happening, you will have to follow the following rules:
- After you have gotten rid of the old polish, it is not advisable to immediately apply a new layer, but you need to give your nails a short break for a certain amount of time.
- It is not recommended to expose your nails to any chemical preparations, and in case of urgent need, you should put rubber gloves on your hands.
- Periodically dip your nails in a special solution that makes the skin of your hands and fingers more beautiful.
- periodically wipe your nails with lemon or its juice, this will provide them with a bright and rich shine longer.
- It is recommended to carefully consider a healthy and proper diet. Include dairy products, various nuts and even marmalade in your daily menu.
Thus, you can create beautiful designs on your nails with varnish yourself, without resorting to the services of specialists, if you follow all the necessary recommendations in this article.
There are also many different samples of nail designs based on photos. Therefore, you can safely get to work, and the result will surprise not only you, but also your loved ones.
Nail art with a cross: step-by-step instructions
Please note that, as a rule, shimmering rhinestone decor is particularly bright. For this reason, experts advise decorating only one finger with rhinestones so that the effect is not too bright and does not blind the eyes of others. But in this article, the author of this master class will show how you can make the most of nail art when the stones are located on each nail. In this case, a rhinestone cross, full of style, beauty, sparkle and grace, will be located on the index finger of each hand.
- So, first of all, you need to apply a clear base on your nails. After it dries, the nail plates are covered with decorative varnish. Specifically, in our case, we use a dark blue tint.
- After the colored layer has hardened, you can safely start laying out a composition of various colors on your nails. Now let’s turn to one of the examples of creating such a drawing in order to consider this point in more detail and understand it. It is worth noting that you can replace the glue with regular transparent varnish, with which you will need to draw a cross pattern on the nail. Thus, you will have a ready “platform” on which the rhinestones will subsequently be laid out. Now you need to take the tool that you decided to use to “pick up” the stones (toothpick, dots or something else). Your task is as follows: You need to carefully lay out all the rhinestones in the shape of a cross. First, a vertical row is ironed (from the cuticle to the tip), and then a horizontal row. If you did this job correctly, then on your nails there will be a decoration in the form of a stylish cross made of shimmering decor.
- And now you can move on to the final stage, that is, applying the top coat. Since your manicure is decorated with rhinestones, you should not refuse this. Then your manicure will last as long as possible.
So that you stop being tormented by doubts that this version of nail art is very easy to create, we would like to invite you to watch one useful video lesson in which the author of this master class will show how you can quickly and easily lay out any design or pattern made of rhinestones on your nails .
Nail art at home
To create patterns you will need brushes of various thicknesses, toothpicks or tailor needles, dots, sponge, orange stick, etc.
To create designs on your nails you will need acrylic paints. To begin with, you can use 2 - 3 colors. The choice of colors is very extensive. You can buy bright neon colors or, on the contrary, soft, calm shades. You can also use gel polish for nail design. It can be used on both natural and artificial nails. Gel polish is highly durable and has a wide range of color options. The resulting coating is dried in an LED lamp.
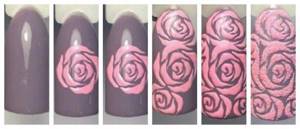
Step-by-step photo of creating a design on nails with roses
In order to make beautiful designs on your nails, you can refer to step-by-step photos on the Internet. You can also buy various stencils and stamps that will help you create a bright and catchy design, as well as various decorative elements: rhinestones, appliqués, fabric decorations, dried flowers, stickers, threads, cobwebs.
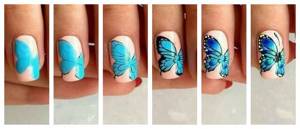
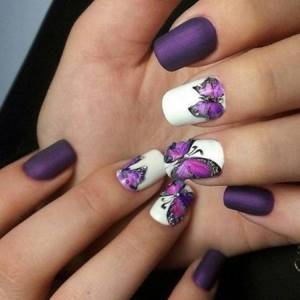
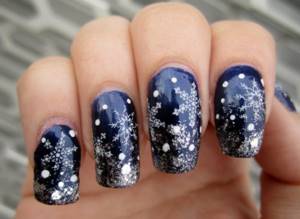
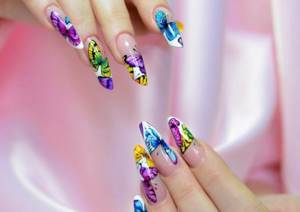
Step-by-step photo of creating a butterfly nail design
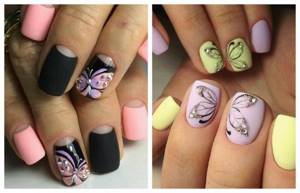
Summer nail designs with butterflies, photo
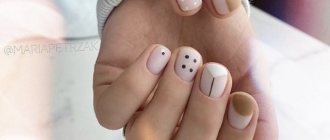
Drawing for beginners should not consist of complex elements. Most often these are drops, geometric shapes, curls, polka dots, stripes, mesh.
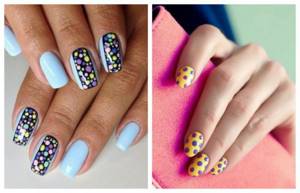
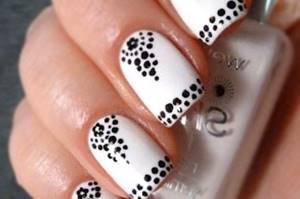
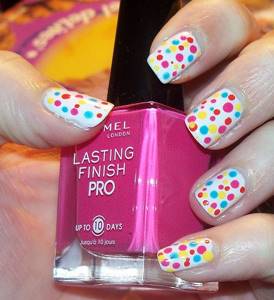
Stylish dot patterns on nails, photo
Nail designs in the form of a mesh or cobweb, photo
Step-by-step painting lesson for beginners
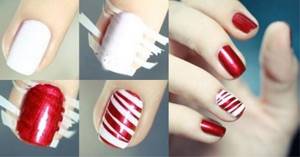
The simplest, yet quite stylish way to decorate your nails is to apply straight or wavy lines. The main rule: choose harmonious shades of varnish and draw clear, neat stripes.
For example, you can use wine-colored varnish. Silver, white, gold and black colors go well with it.
Instructions:
- Pre-prepared nails are covered with red varnish;
- Stepping back a little from the left edge of the nail, a black horizontal line is drawn. After which, another vertical line is drawn from the line.
- A white line is drawn just below the horizontal black line.
- A white and silver line is drawn next to the black vertical line.
Thus, you get an interesting and uncomplicated pattern that can diversify your usual manicure.
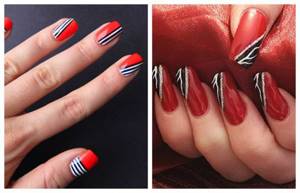
Options for simple designs on nails in the form of lines and waves, photo

Options for simple designs on nails in the form of lines and waves, photo
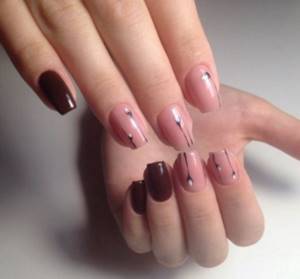
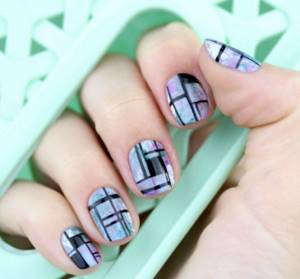
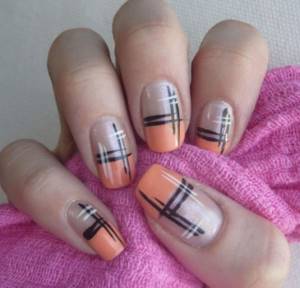
#2 Geometry on the ring finger
Geometry is still in trend, so you can confidently create this design on your nails. Geometric shapes and lines look quite complex visually, so it is enough to decorate only one finger with them, in our case the ring finger.
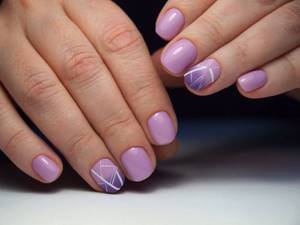
The geometric pattern should be in harmony with the entire design. For example, if you use a plain turquoise coating for a manicure, then this color should also be present in the geometry. Black is considered the accent shade of all nail art. It serves to separate individual areas of the design and highlight the main shapes. If you want to get a subtle and less bright design, then replace the black gel polish with white.
A manicure with geometry looks great on almond-shaped and square nails. On almond-shaped nails, use a design with chaotically located lines of different thicknesses, diamonds with a gradient. Complex nail art with triangles, rhombuses, glitter decor and black edging look great on square nails.
Tools
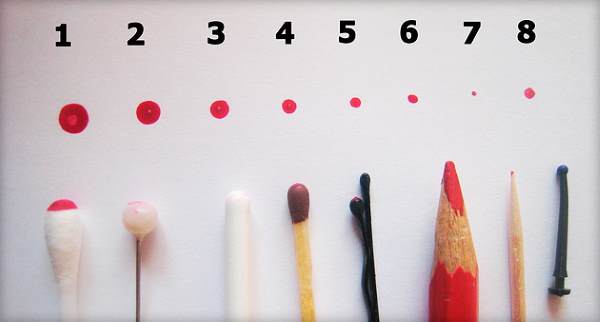
- To draw dots in the design, you can use a variety of tools - a toothpick, dots, sewing needle, bobby pin or ballpoint pen. With the help of simple circles you can create a stylish polka dot print, an interesting ornament and cute flowers.
- Simple stationery tape will be a lifesaver when you need to create stylish geometric patterns or designs with clear color boundaries.
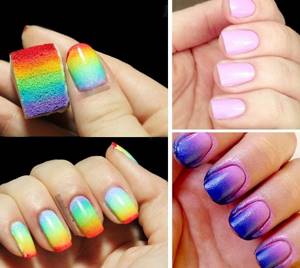
- Some trendy designs with patterns look especially beautiful on a gradient background. Creating this impressive effect is as easy as shelling pears - you just need to apply the varnishes to the sponge and imprint them on your nails. The same tool is useful in shading the pigment.
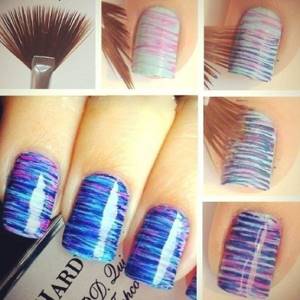
- If you're serious about it, invest in a set of manicure brushes. The dotted version can be used to draw small details, the liner will ideally draw thin lines, the flat brush is indispensable for making three-dimensional drawings, the fan brush will create a beautiful background, and the “petal” type is ideal for Chinese painting.
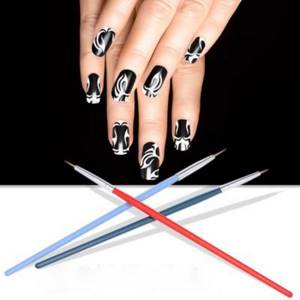
Liner brush for perfect lines
- If you wish, you can add acrylic paints for nail design to your collection of tools. They boast excellent durability, affordable prices and rich colors. Varnishes are inferior in quality to acrylic paints, so they are suitable only for elementary compositions.
- Various decors will help make the finished drawing more impressive: rhinestones, beads, bouillons, foil, decorative sand, glitter, mica, velvet and stickers.

Unusual design using foil
- A corrective pencil is a real superman, saving your manicure from minor errors and unevenness. Its tip is soaked in nail polish remover, so it gently adjusts the design.
Creating a manicure
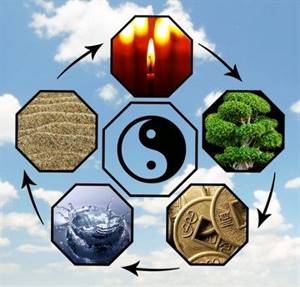
One of the main roles in Feng Shui manicure is played by the correct selection of colors, decorations and images.
You will need high-quality manicure brushes and toothpicks to create fine lines and detailed drawing of small elements. To paint your nails according to Feng Shui, you should get to know this eastern practice better and try to understand its subtleties. The color palette of nail polish is chosen in accordance with the element to which a person belongs.
In the eastern practice of Feng Shui, there are five elements:
- Fire;
- Water;
- Earth;
- Tree;
- Metal.
To determine which element you belong to, you need to pay attention to the last digit of your year of birth. 0 and 1 – Metal element, 2 and 3 – Water element, 4 and 5 – Wood element, 6 and 7 – Fire element, 8 and 9 – Earth element.
There is one important nuance: if you were born between January 1 and February 20, then you need to subtract one from the number, because Chinese New Year is celebrated in the last days of February.
Features of gel polish manicure
Easy drawings with gel polish require strict technology.
- The first step is to treat the nail plates with a buff – a rectangular file.
- This is followed by treatment with a degreaser.
- And only after the preparatory procedures is the base applied, which is then dried in a special lamp.
- Then comes the drawing’s turn - it also needs to be dried in a lamp.
- Then you should cover the result with topcoat and dry the nails again.
- The top sticky layer is finally removed with a special product.
A few more ideas for dessert
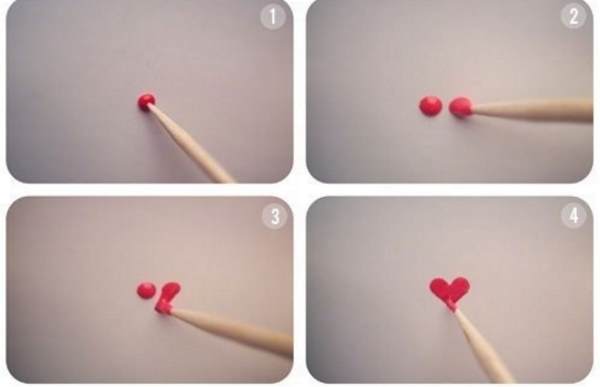
- Cover your nails with base polish. It is important that the base creates a contrast with the pattern.
- Pour a small amount of pink or red nail polish onto a previously prepared piece of paper.
- Use a toothpick to grab a little varnish and place parallel dots.
- From each point you need to draw thin strips down, which turn the workpiece into a heart.
Our photo selection proves that light designs on nails are easy to create at home, without having any special artistic talents. Move from theory to practice and create an exclusive and original design!
Drawings with rhinestones
To give your manicure a special charm and grace, nail industry experts advise decorating your nails with rhinestones.
If you want to bring this idea to life, you need to consider the size of the rhinestones. Large stones will fall off faster and will not look very attractive.
Now there are a huge number of varieties of crystals, which tend to shimmer with charming reflections. They are very good at performing French and moon manicure. The smile line highlighted with crystals looks simply charming. These stones are also often used to decorate floral arrangements, snowflakes and various applications.
![]()
When decorating a painting with rhinestones, you need to remember a sense of proportion. A large number of stones on the nails makes the manicure too provocative.